Introduction
While this guide uses specific builds as examples, it's not supposed to be a step-by-step guide on how to build anything. It's more a guide to the fundamental elements of building and a tutorial on how to spruce up basic builds. It's not really something you're supposed to follow along with step-by-step. The images and builds used are mainly a demonstration of specific techniques, and the order is sort of a skill progression. Additionally, I focus mainly on fantasy-leaning builds, so the examples used are in that style. However, I think that the techniques demonstrated are fairly fundamental, so you should be able to build in other styles using them as well.
This button allows you to toggle shaders on all the images in this guide. The shaders used are Rethinking Voxels. The images with and without shaders were all taken at the exact same angles, so there isn't any difference in the content of the two versions.
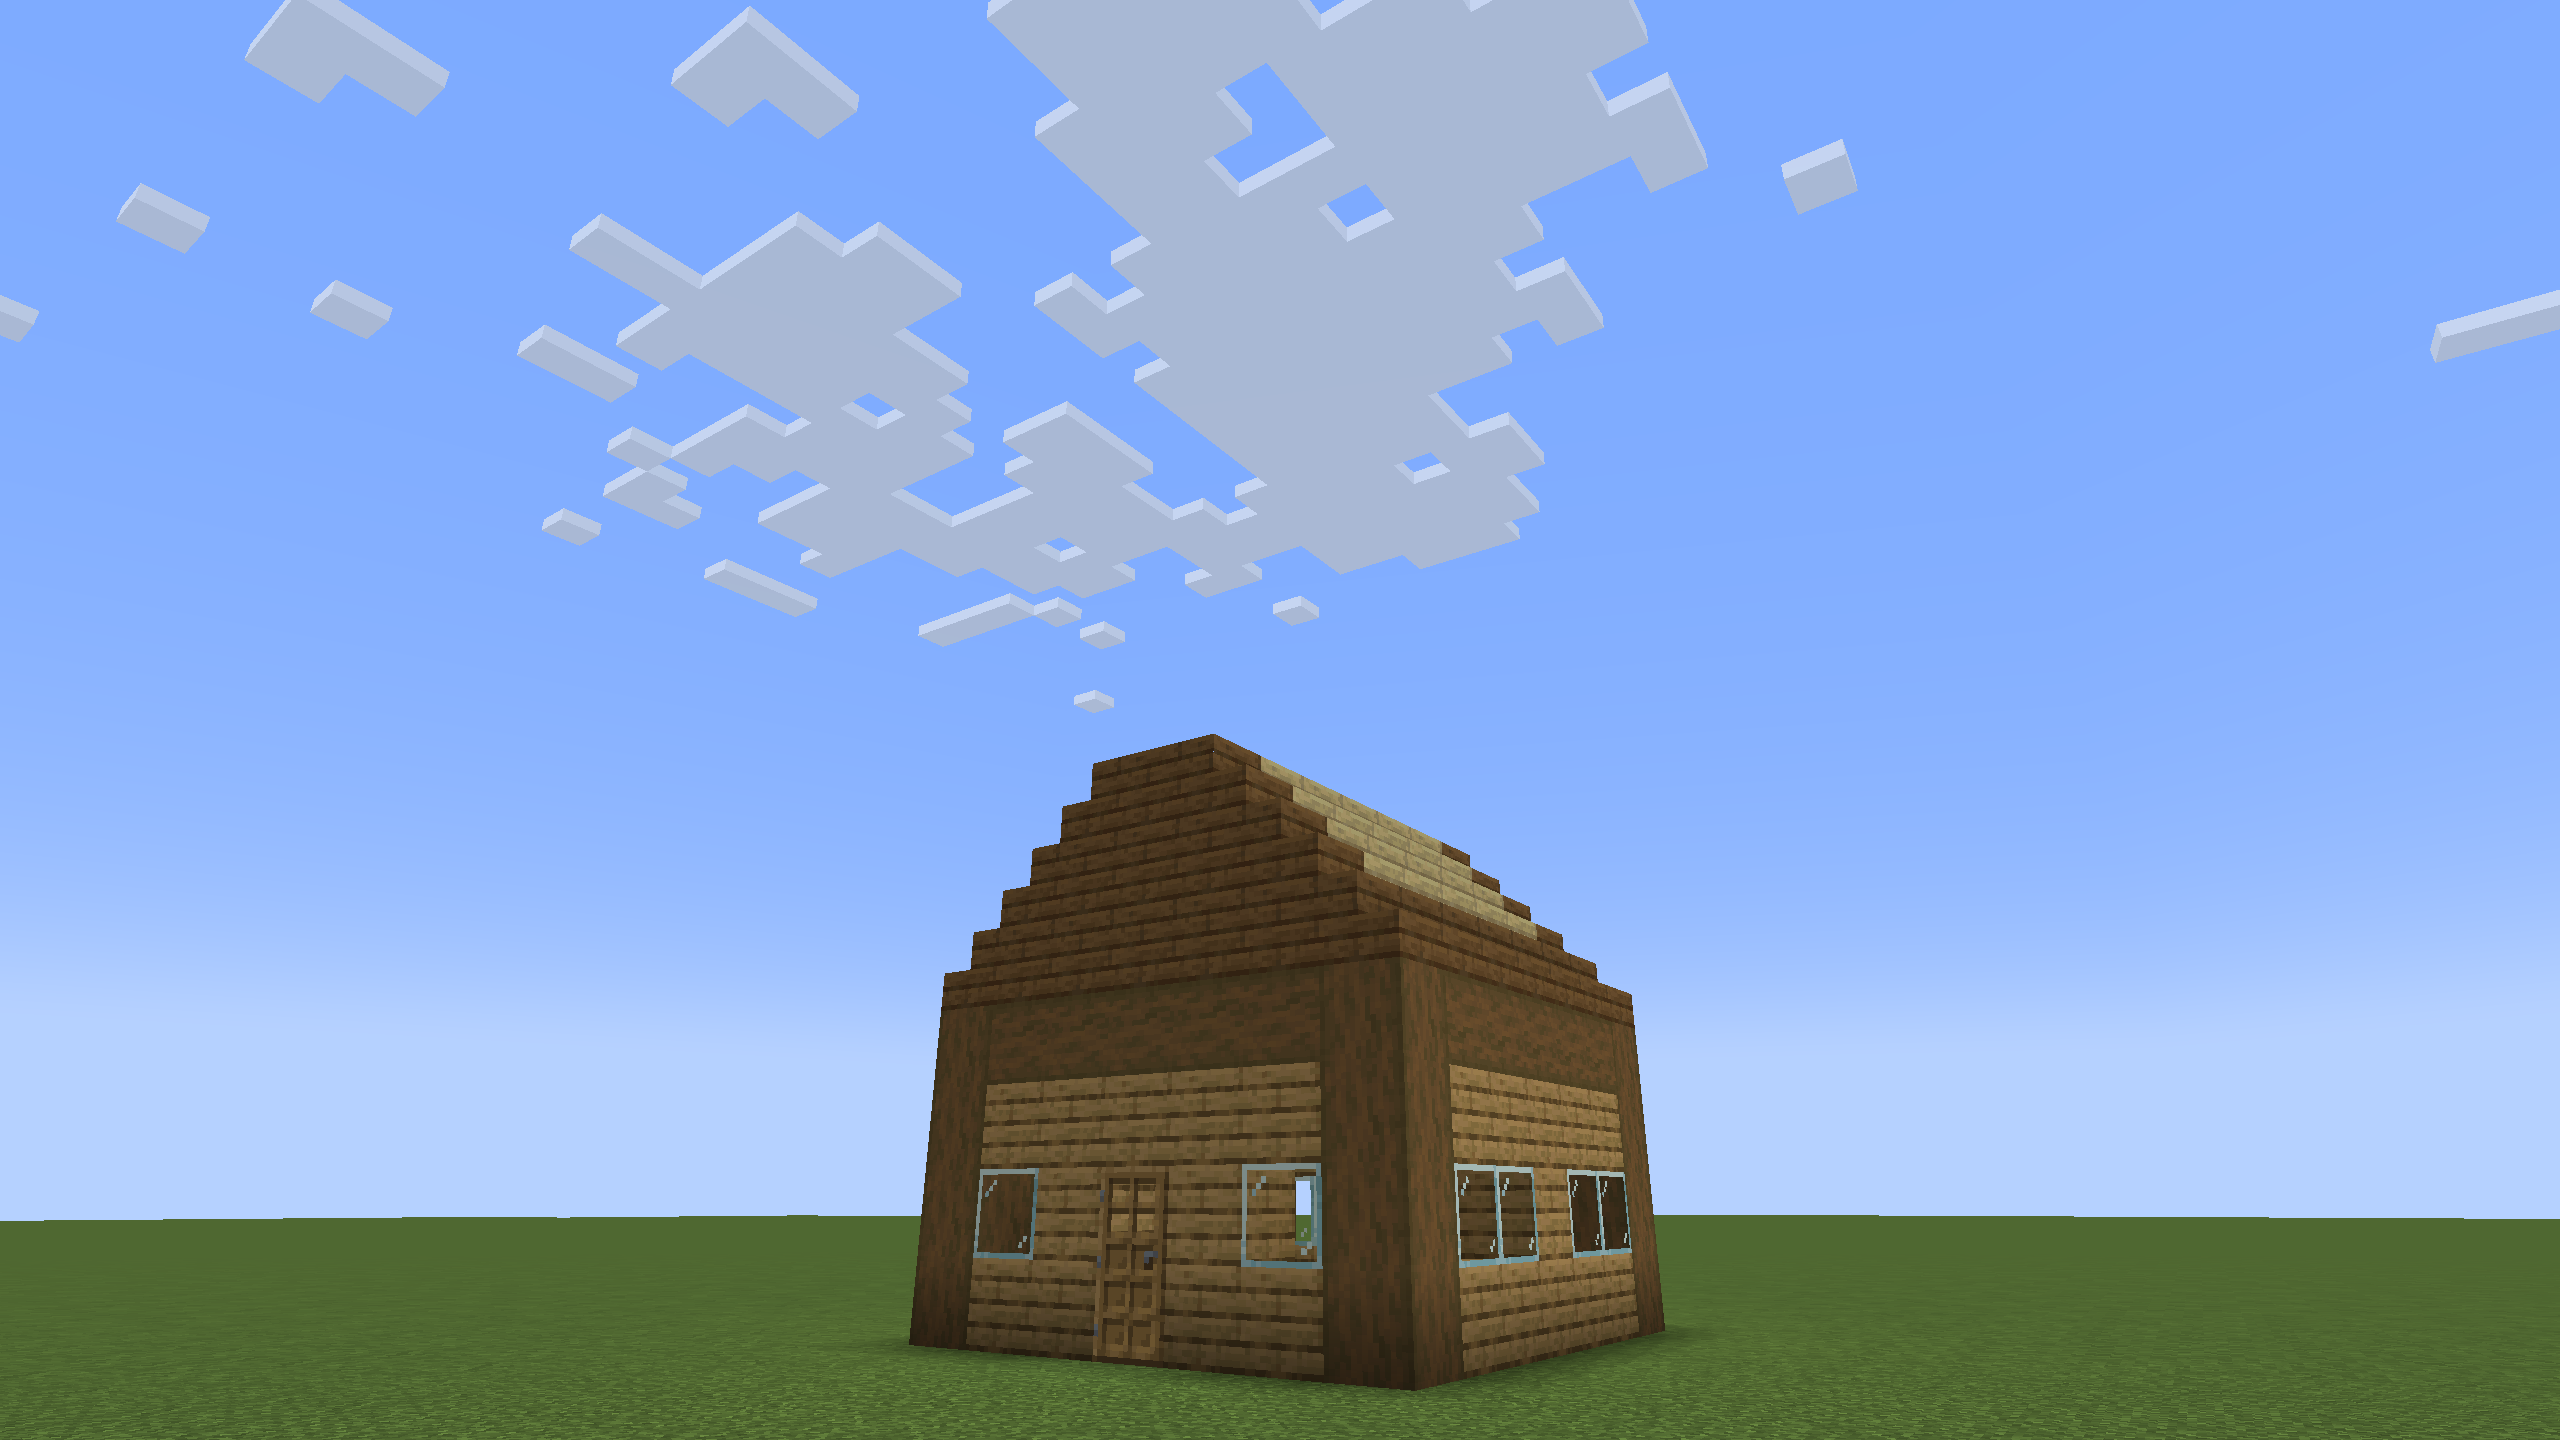
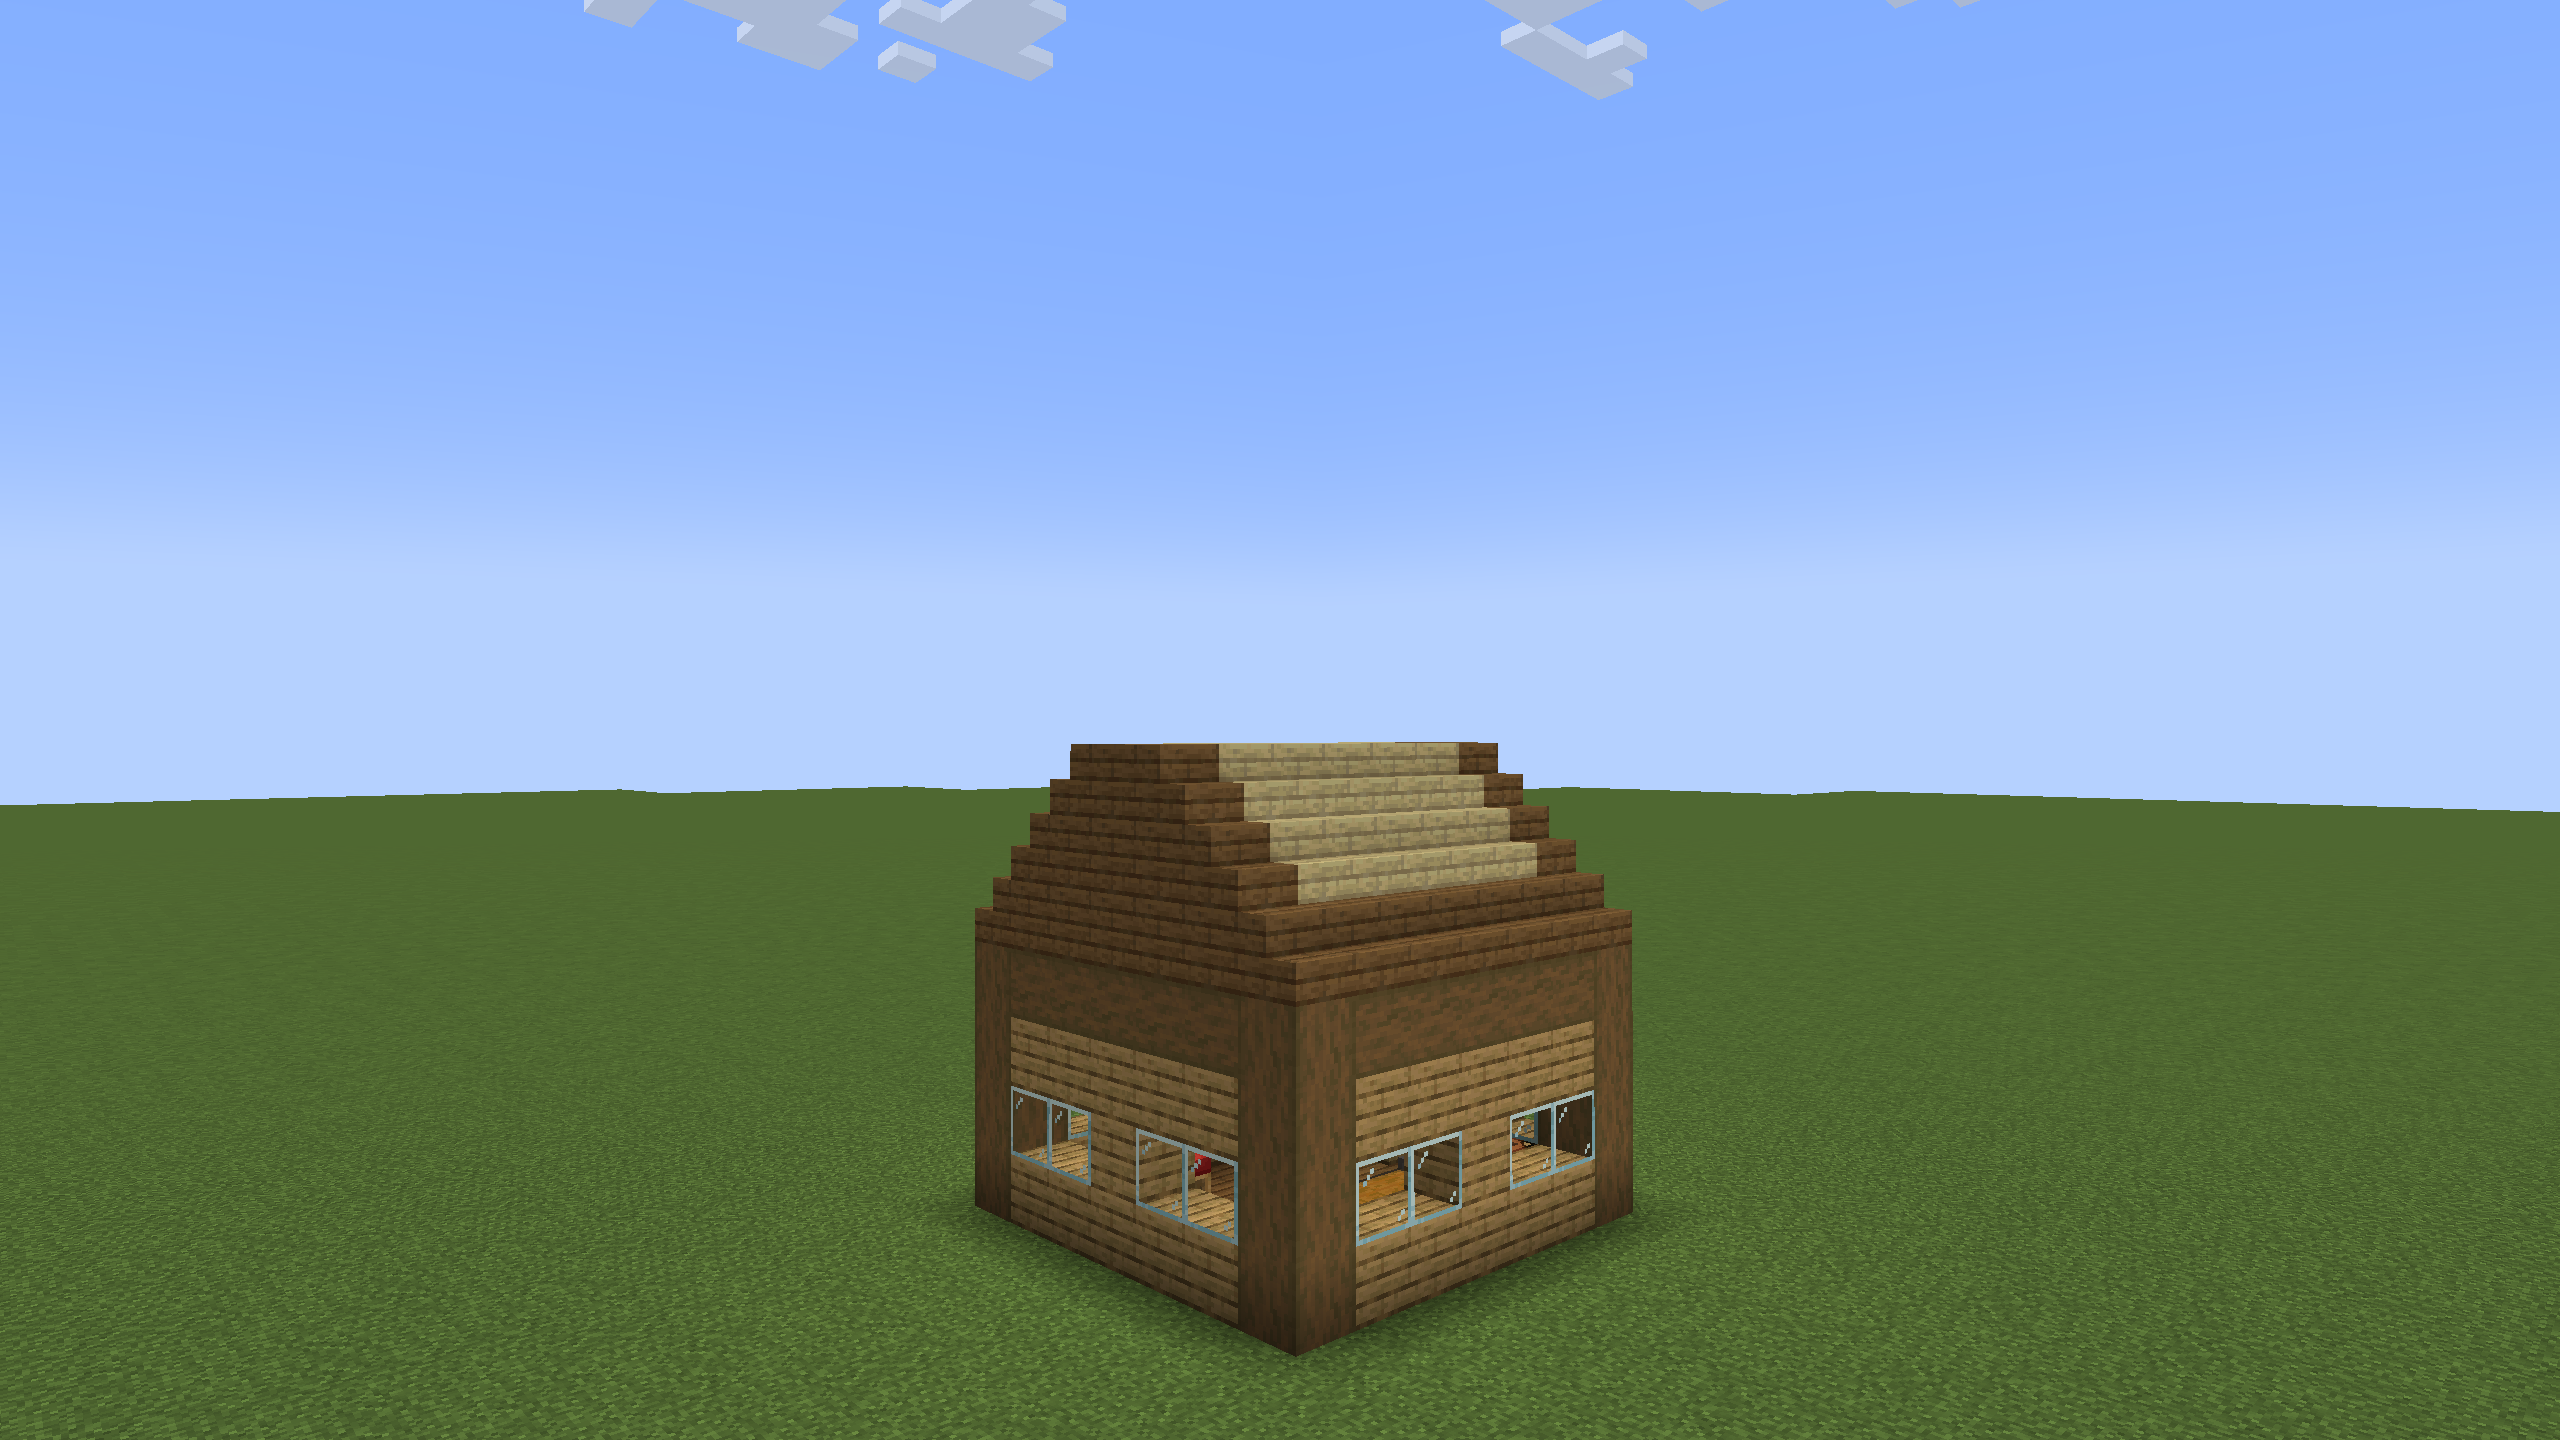
A Basic Build
We'll be starting with this extremely simple wooden house. It's functional, but it's not particularly pretty.
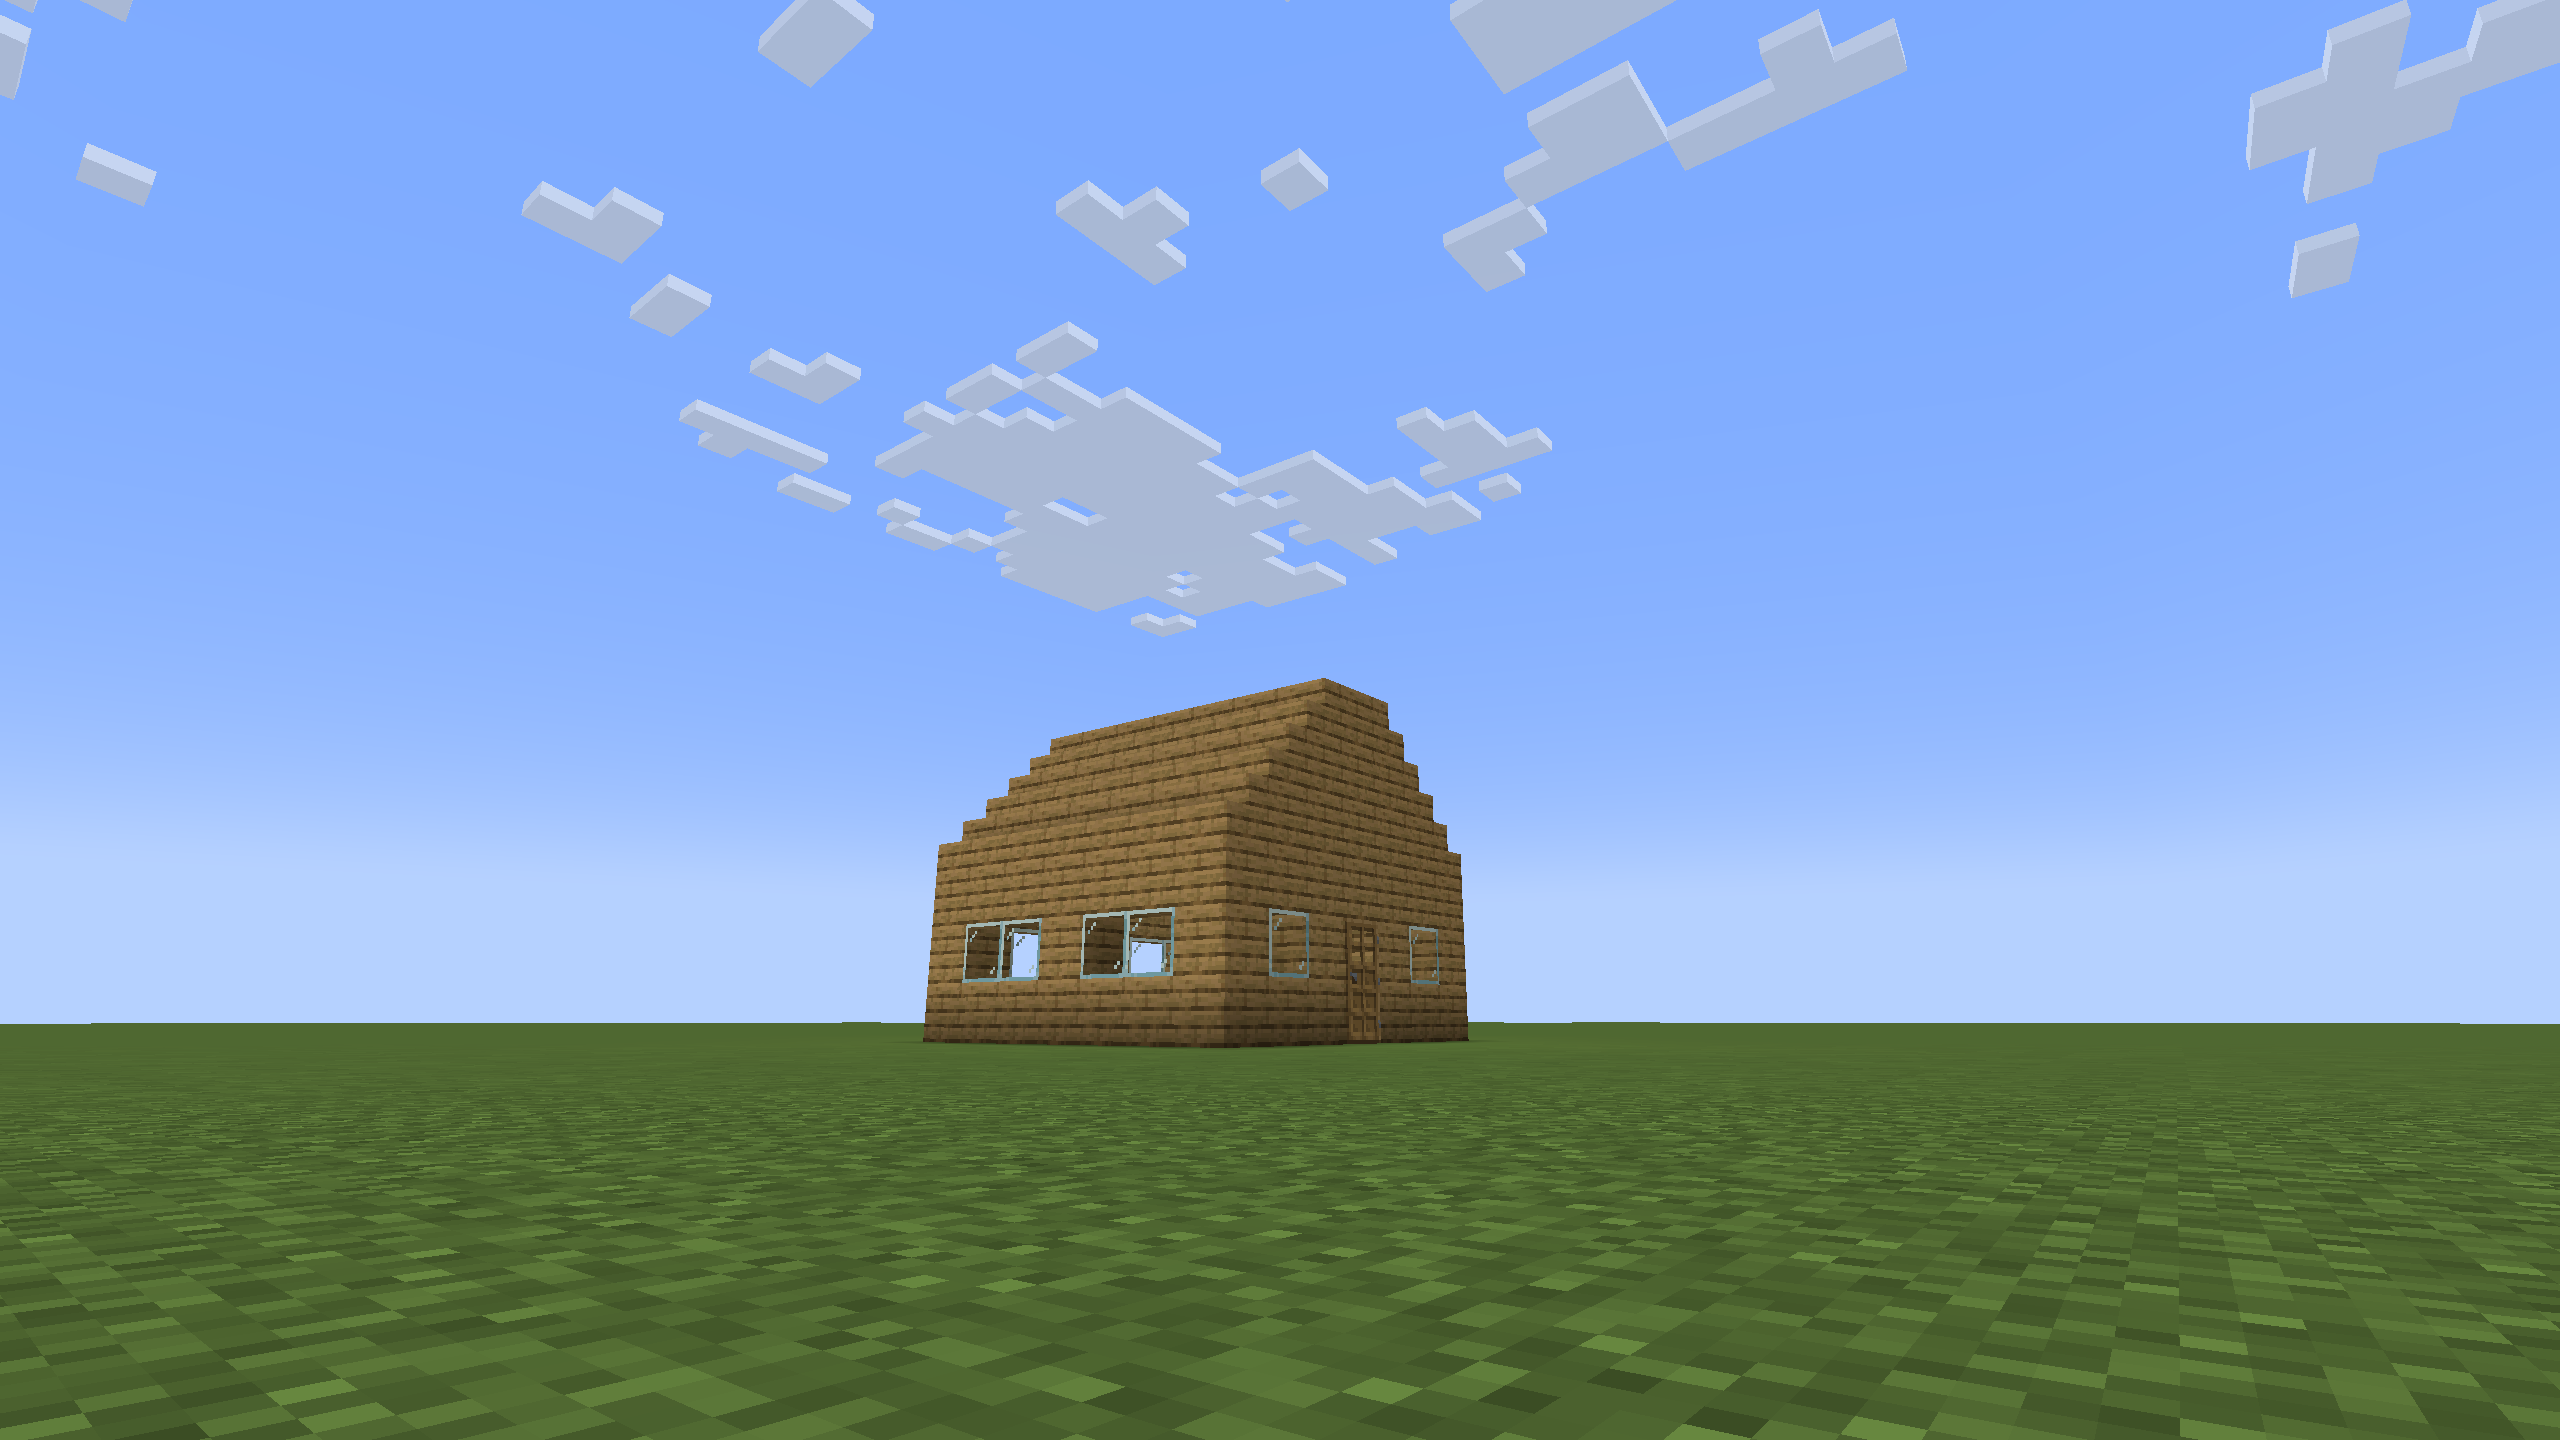
What would make this build better? A lot of things!
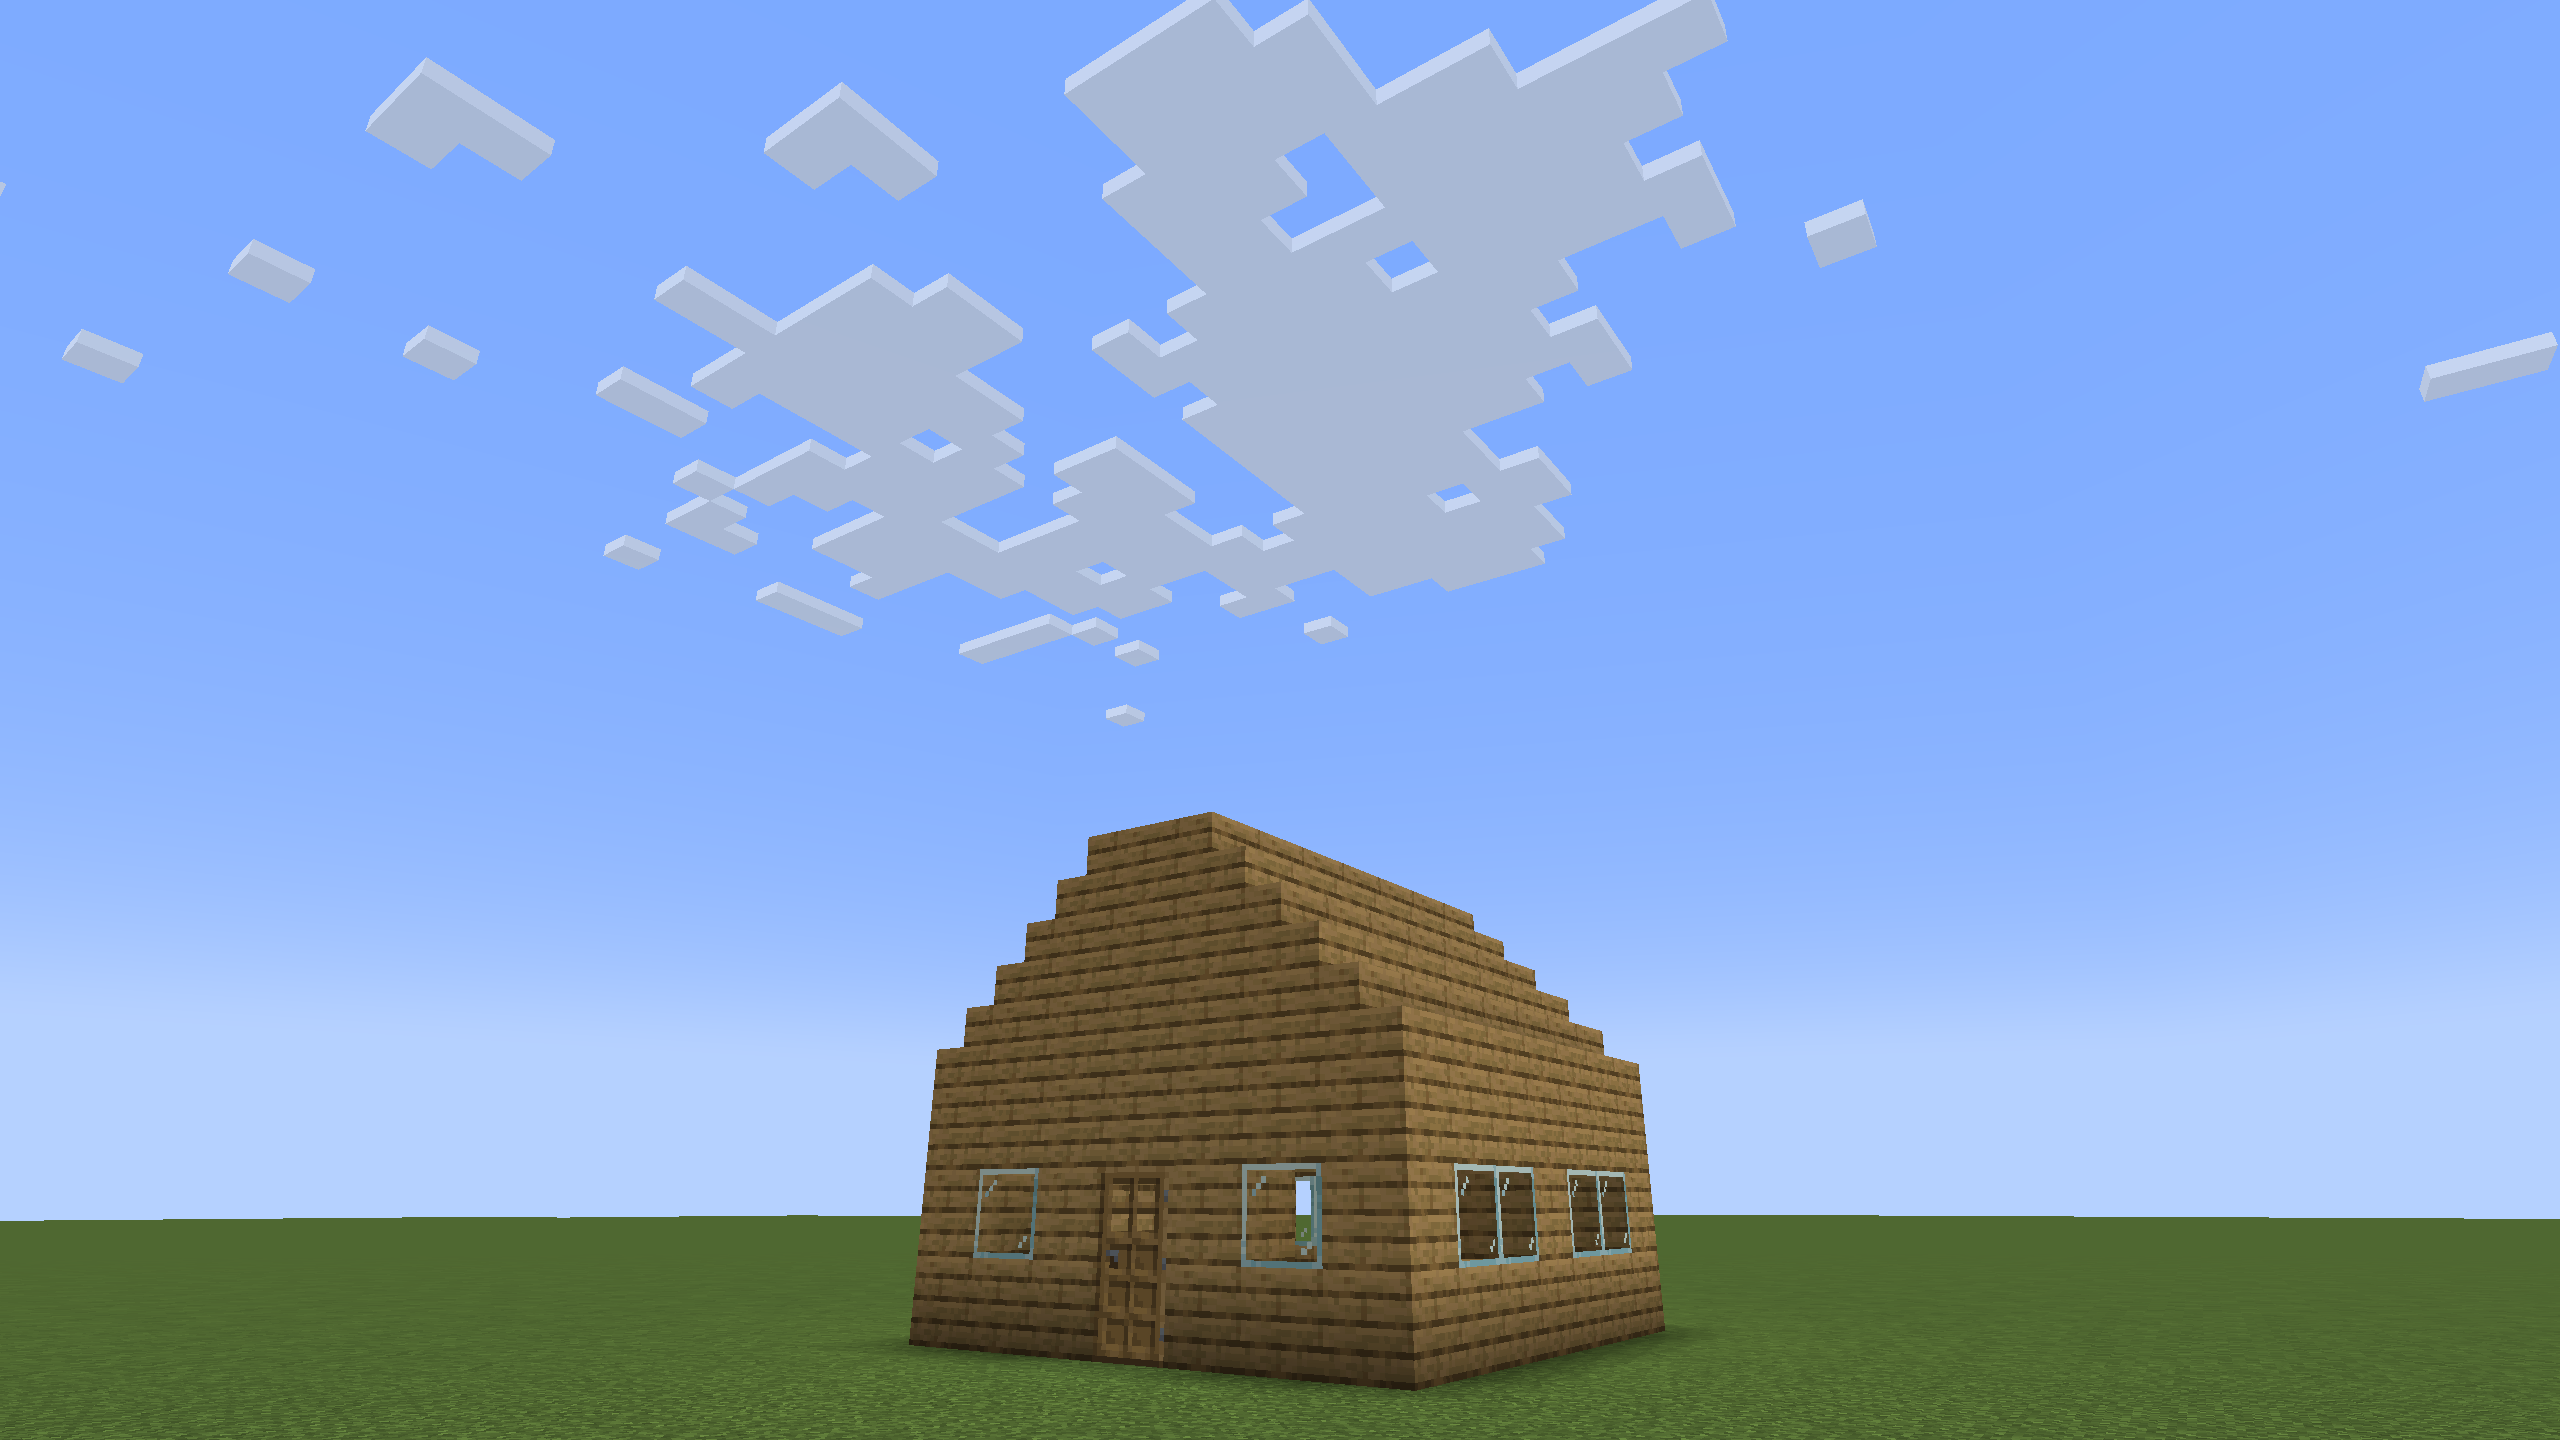
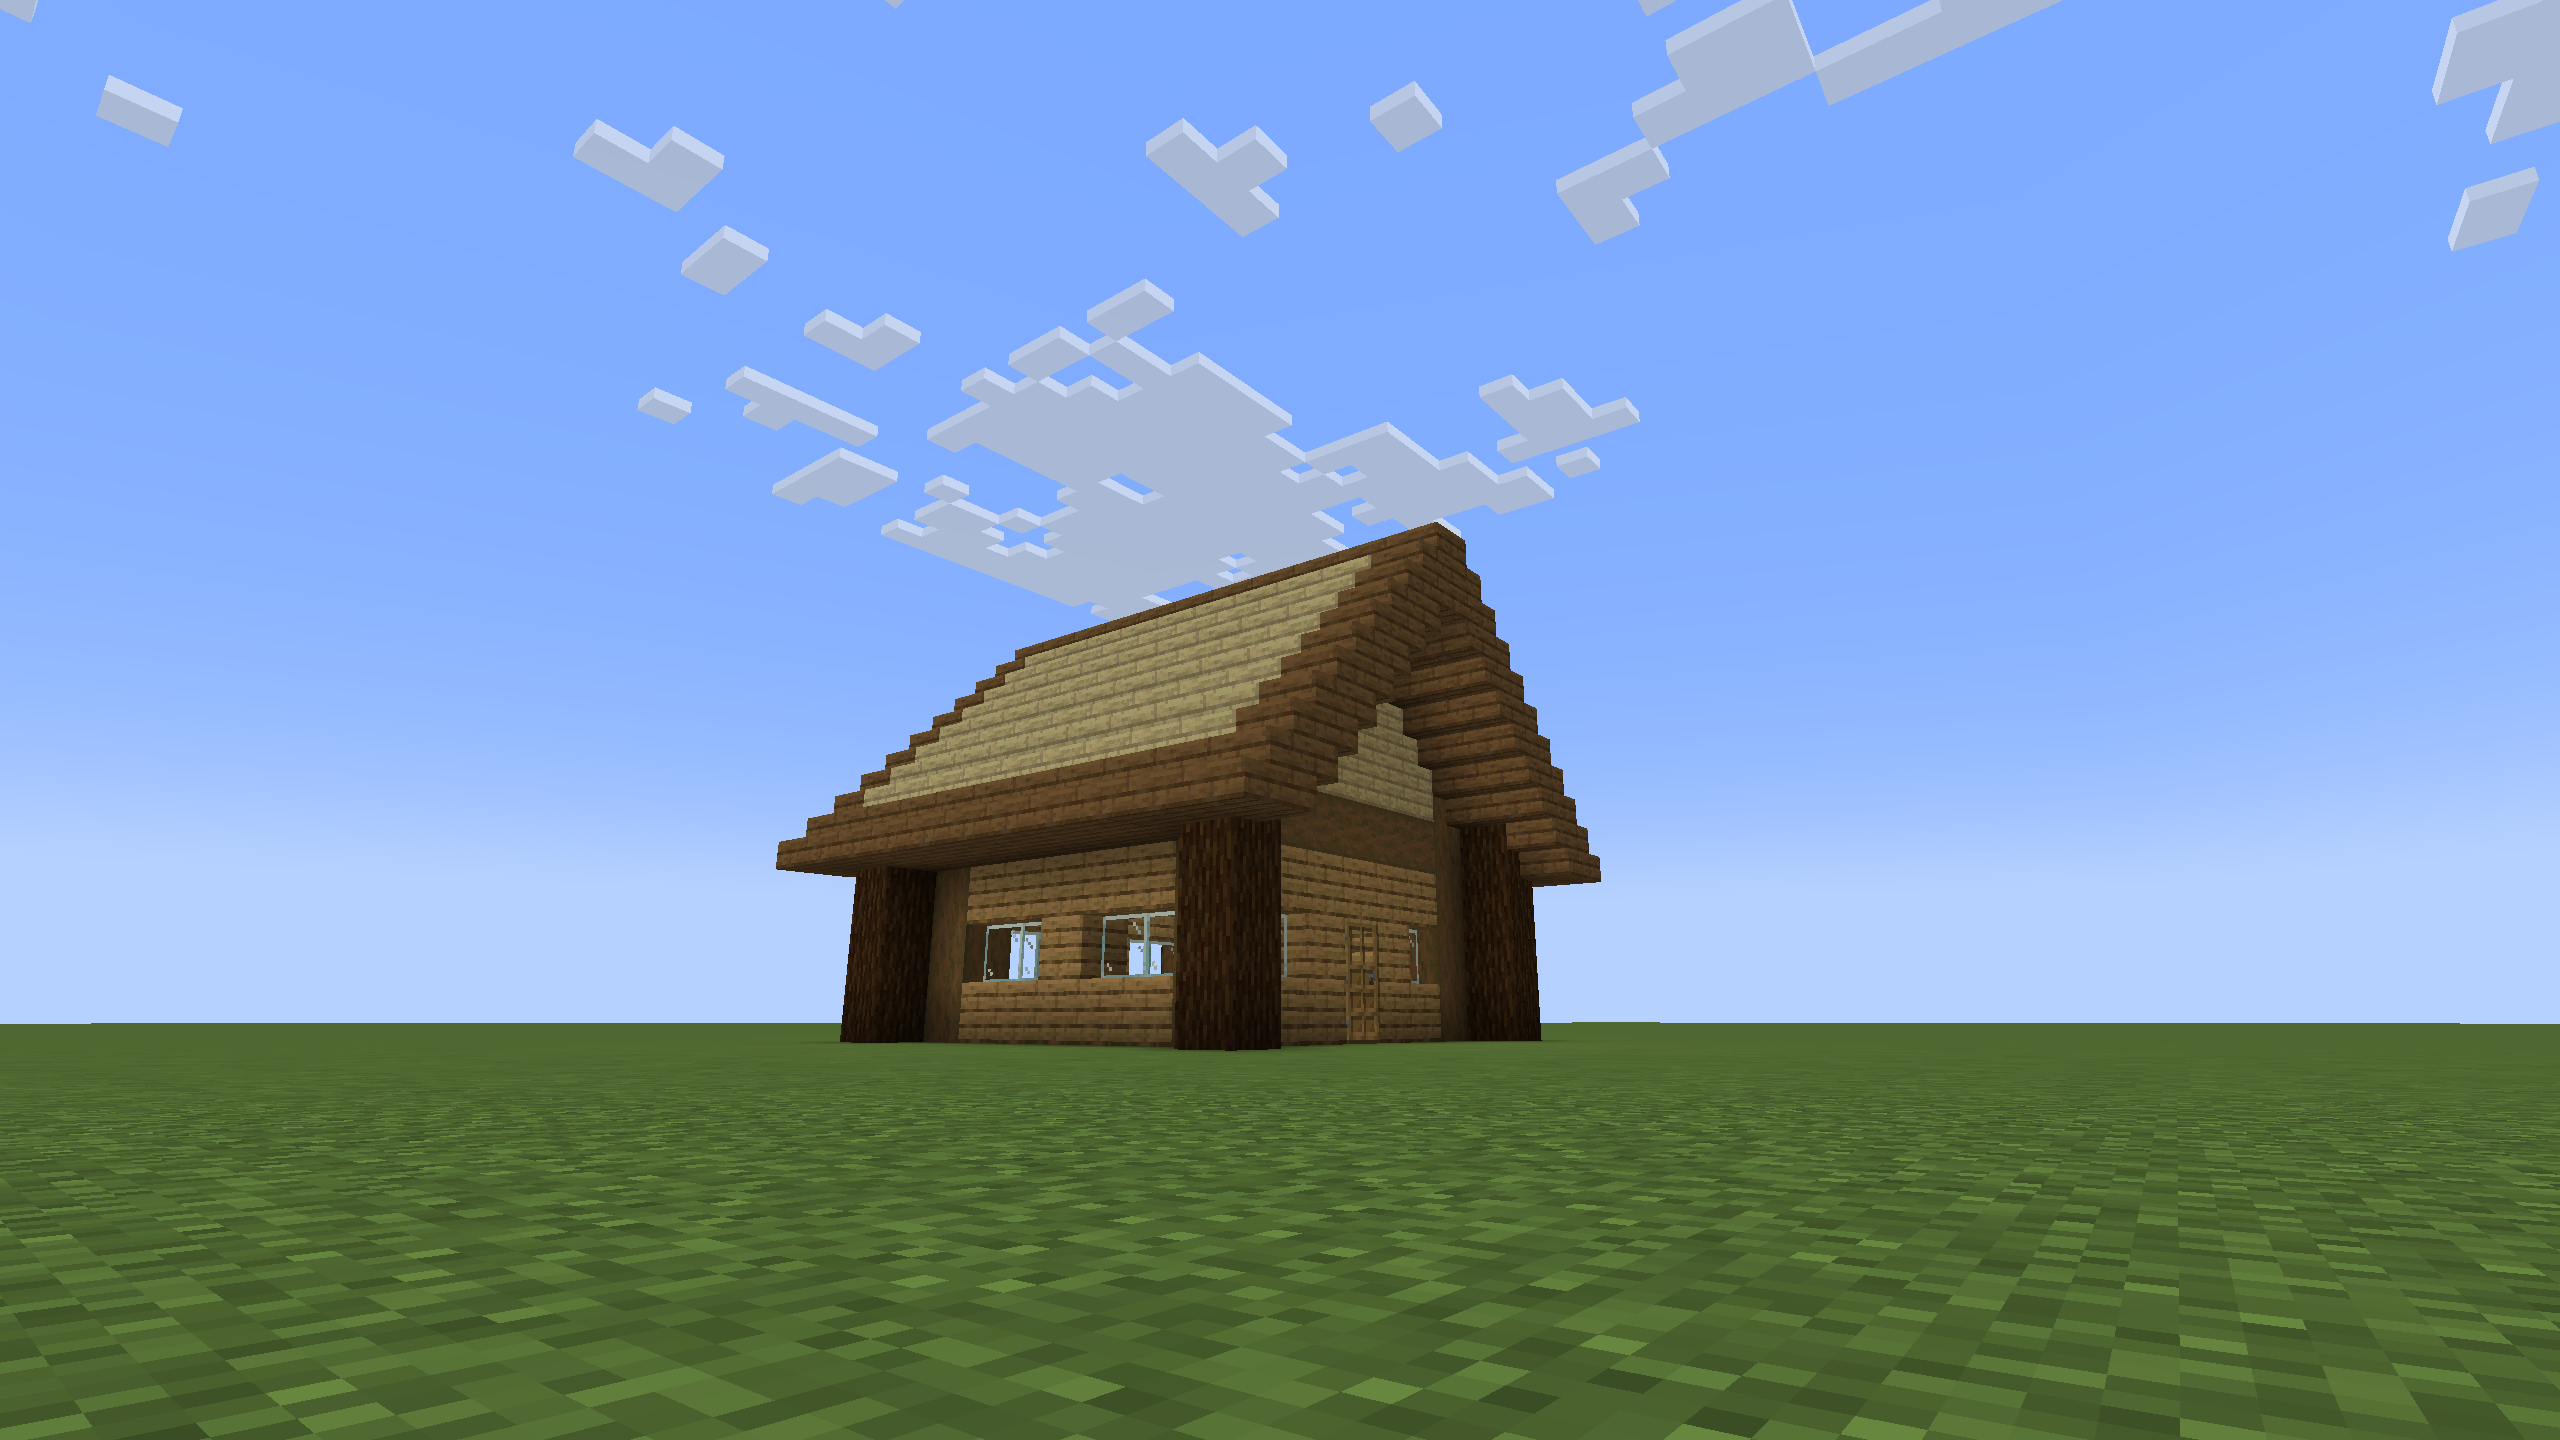
A Better Block Palette
Let's break up the monotonous oak wood planks by sprucing it up (pun intended) with some spruce and birch wood! Bordering the edges of a wooden house with logs and the roof with a different color is a pretty simple way to improve a build. The spruce and birch wood also provide some much-needed contrast between light and dark. Adding a splash of color to a palette can be good in some builds, but in this build I mainly used details to add that splash of color. A mostly neutral color palette and a palette with primarily colors have totally different vibes. The fully wooden palette of this build gives it a sort of warm, homely fantasy/medieval feel, while adding stone might make it feel colder, which isn't always what you want in a build.
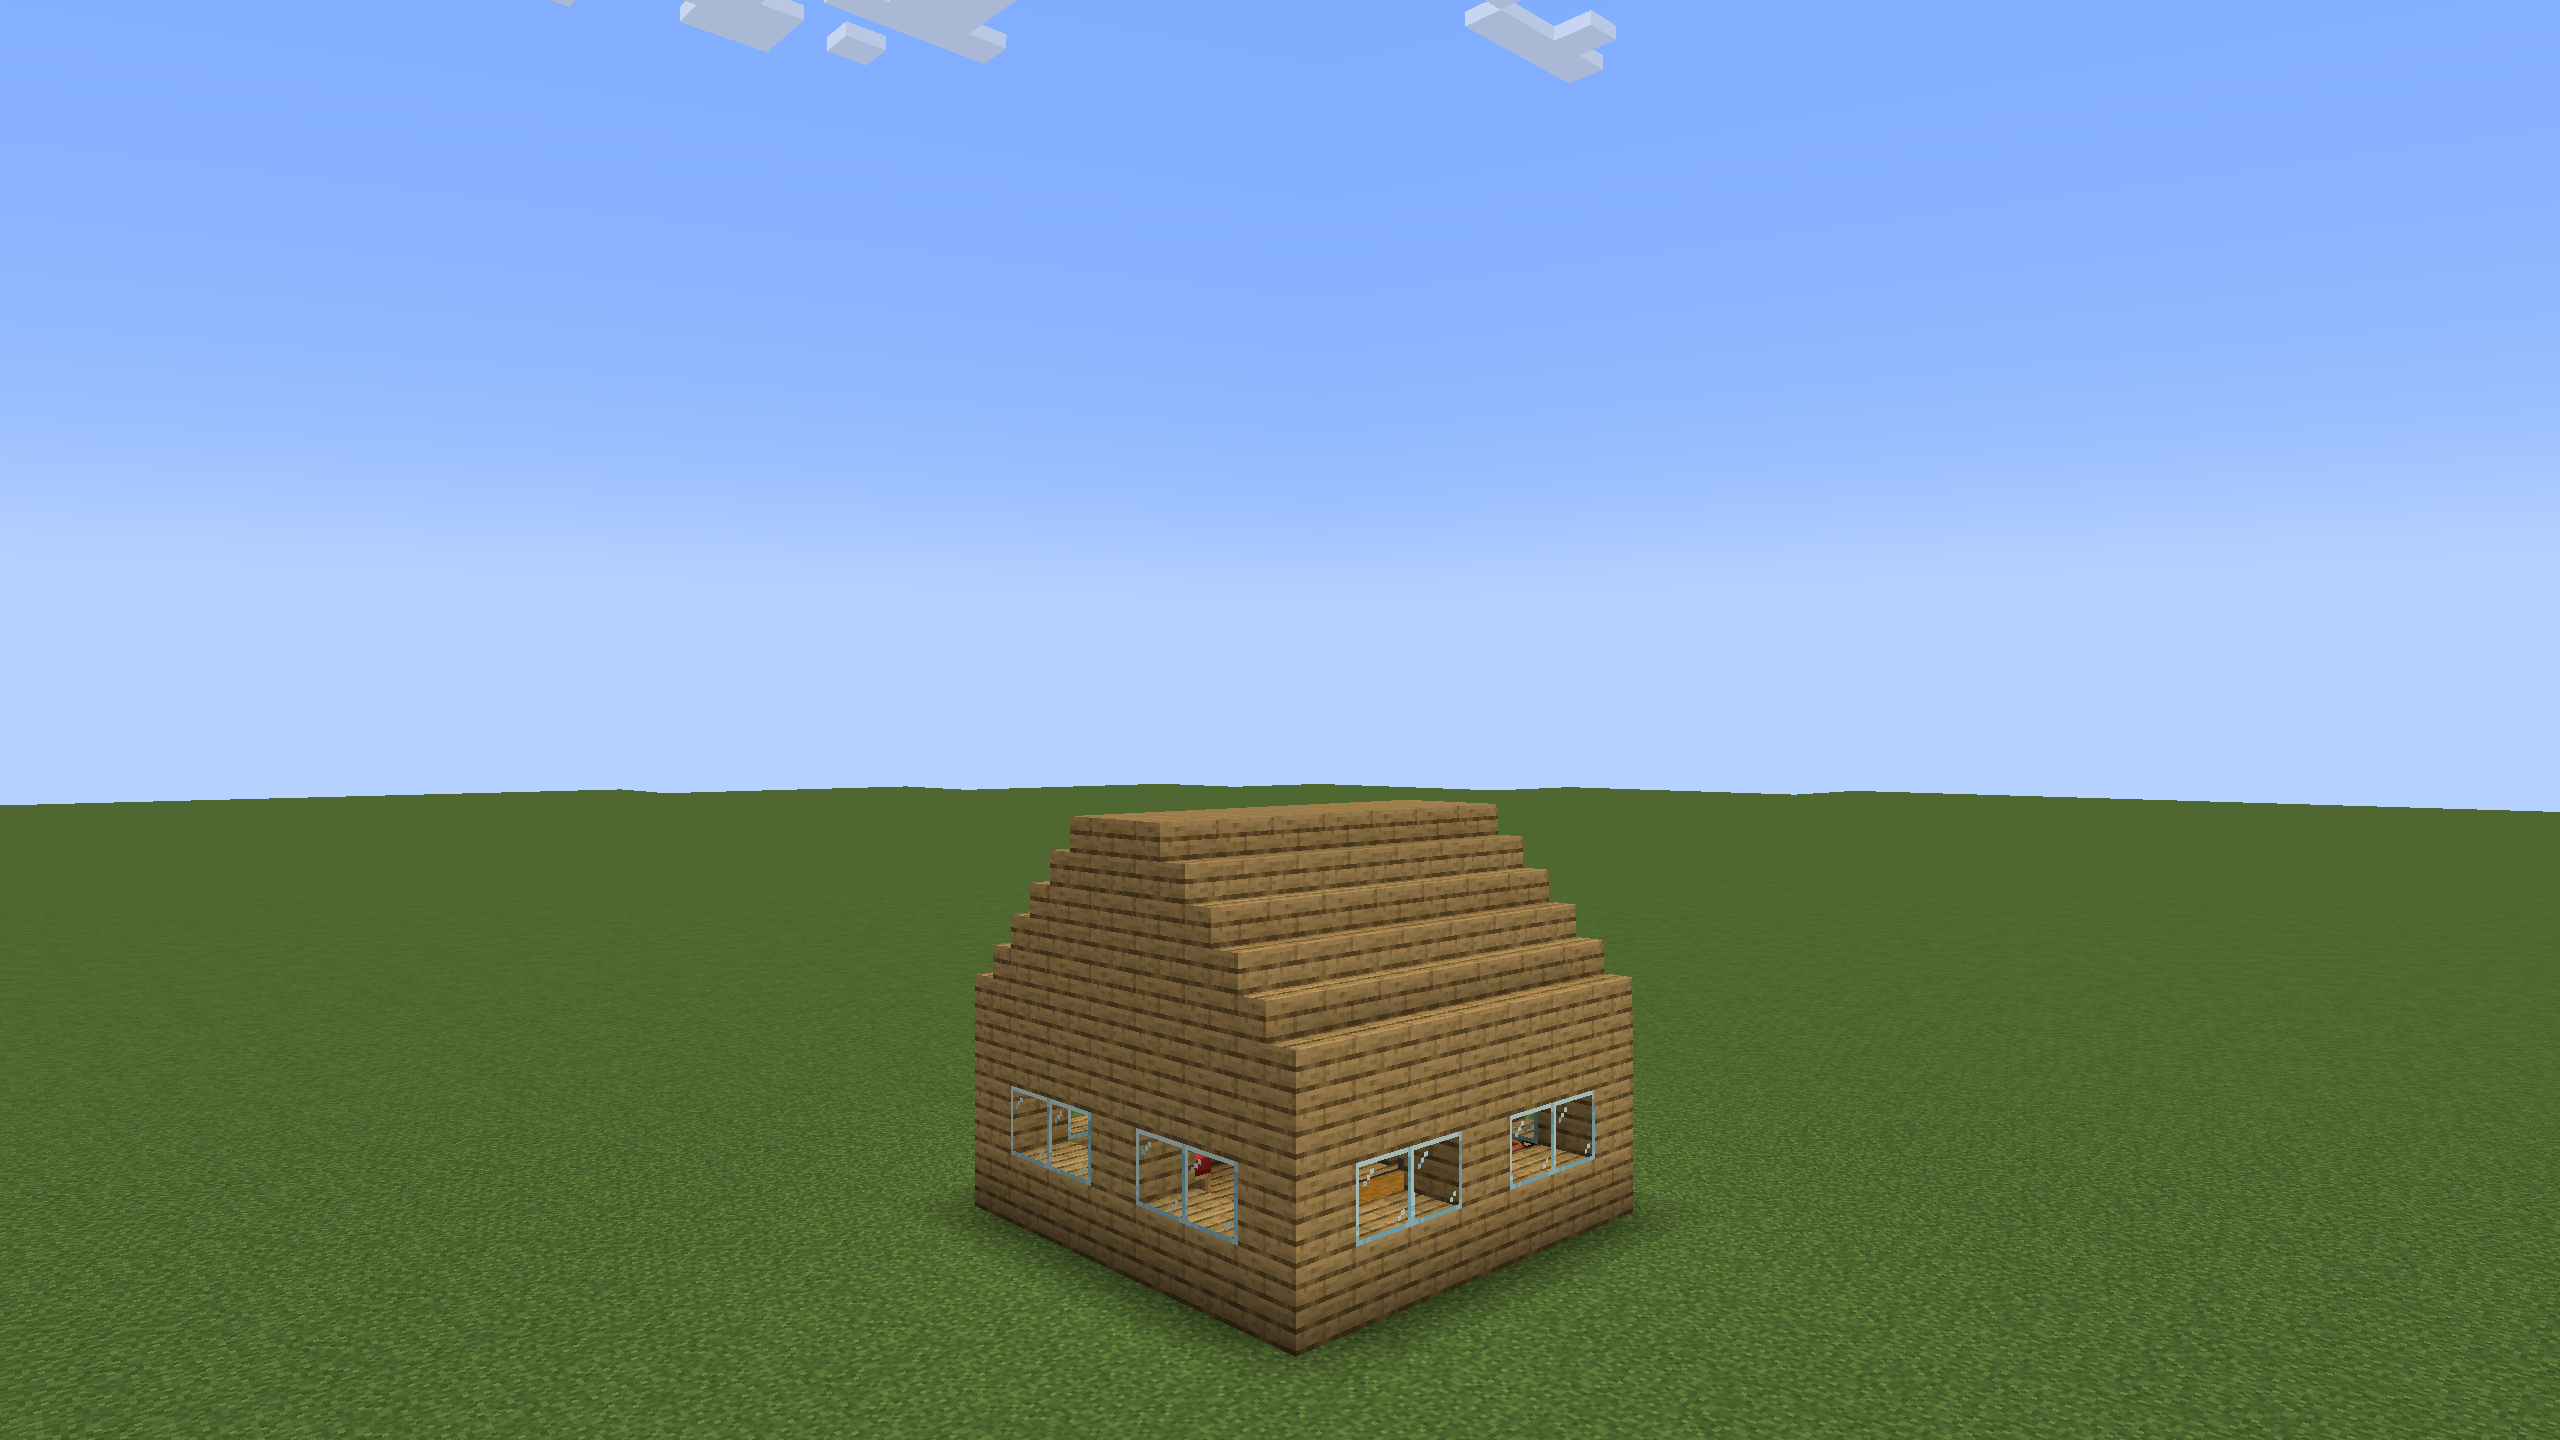
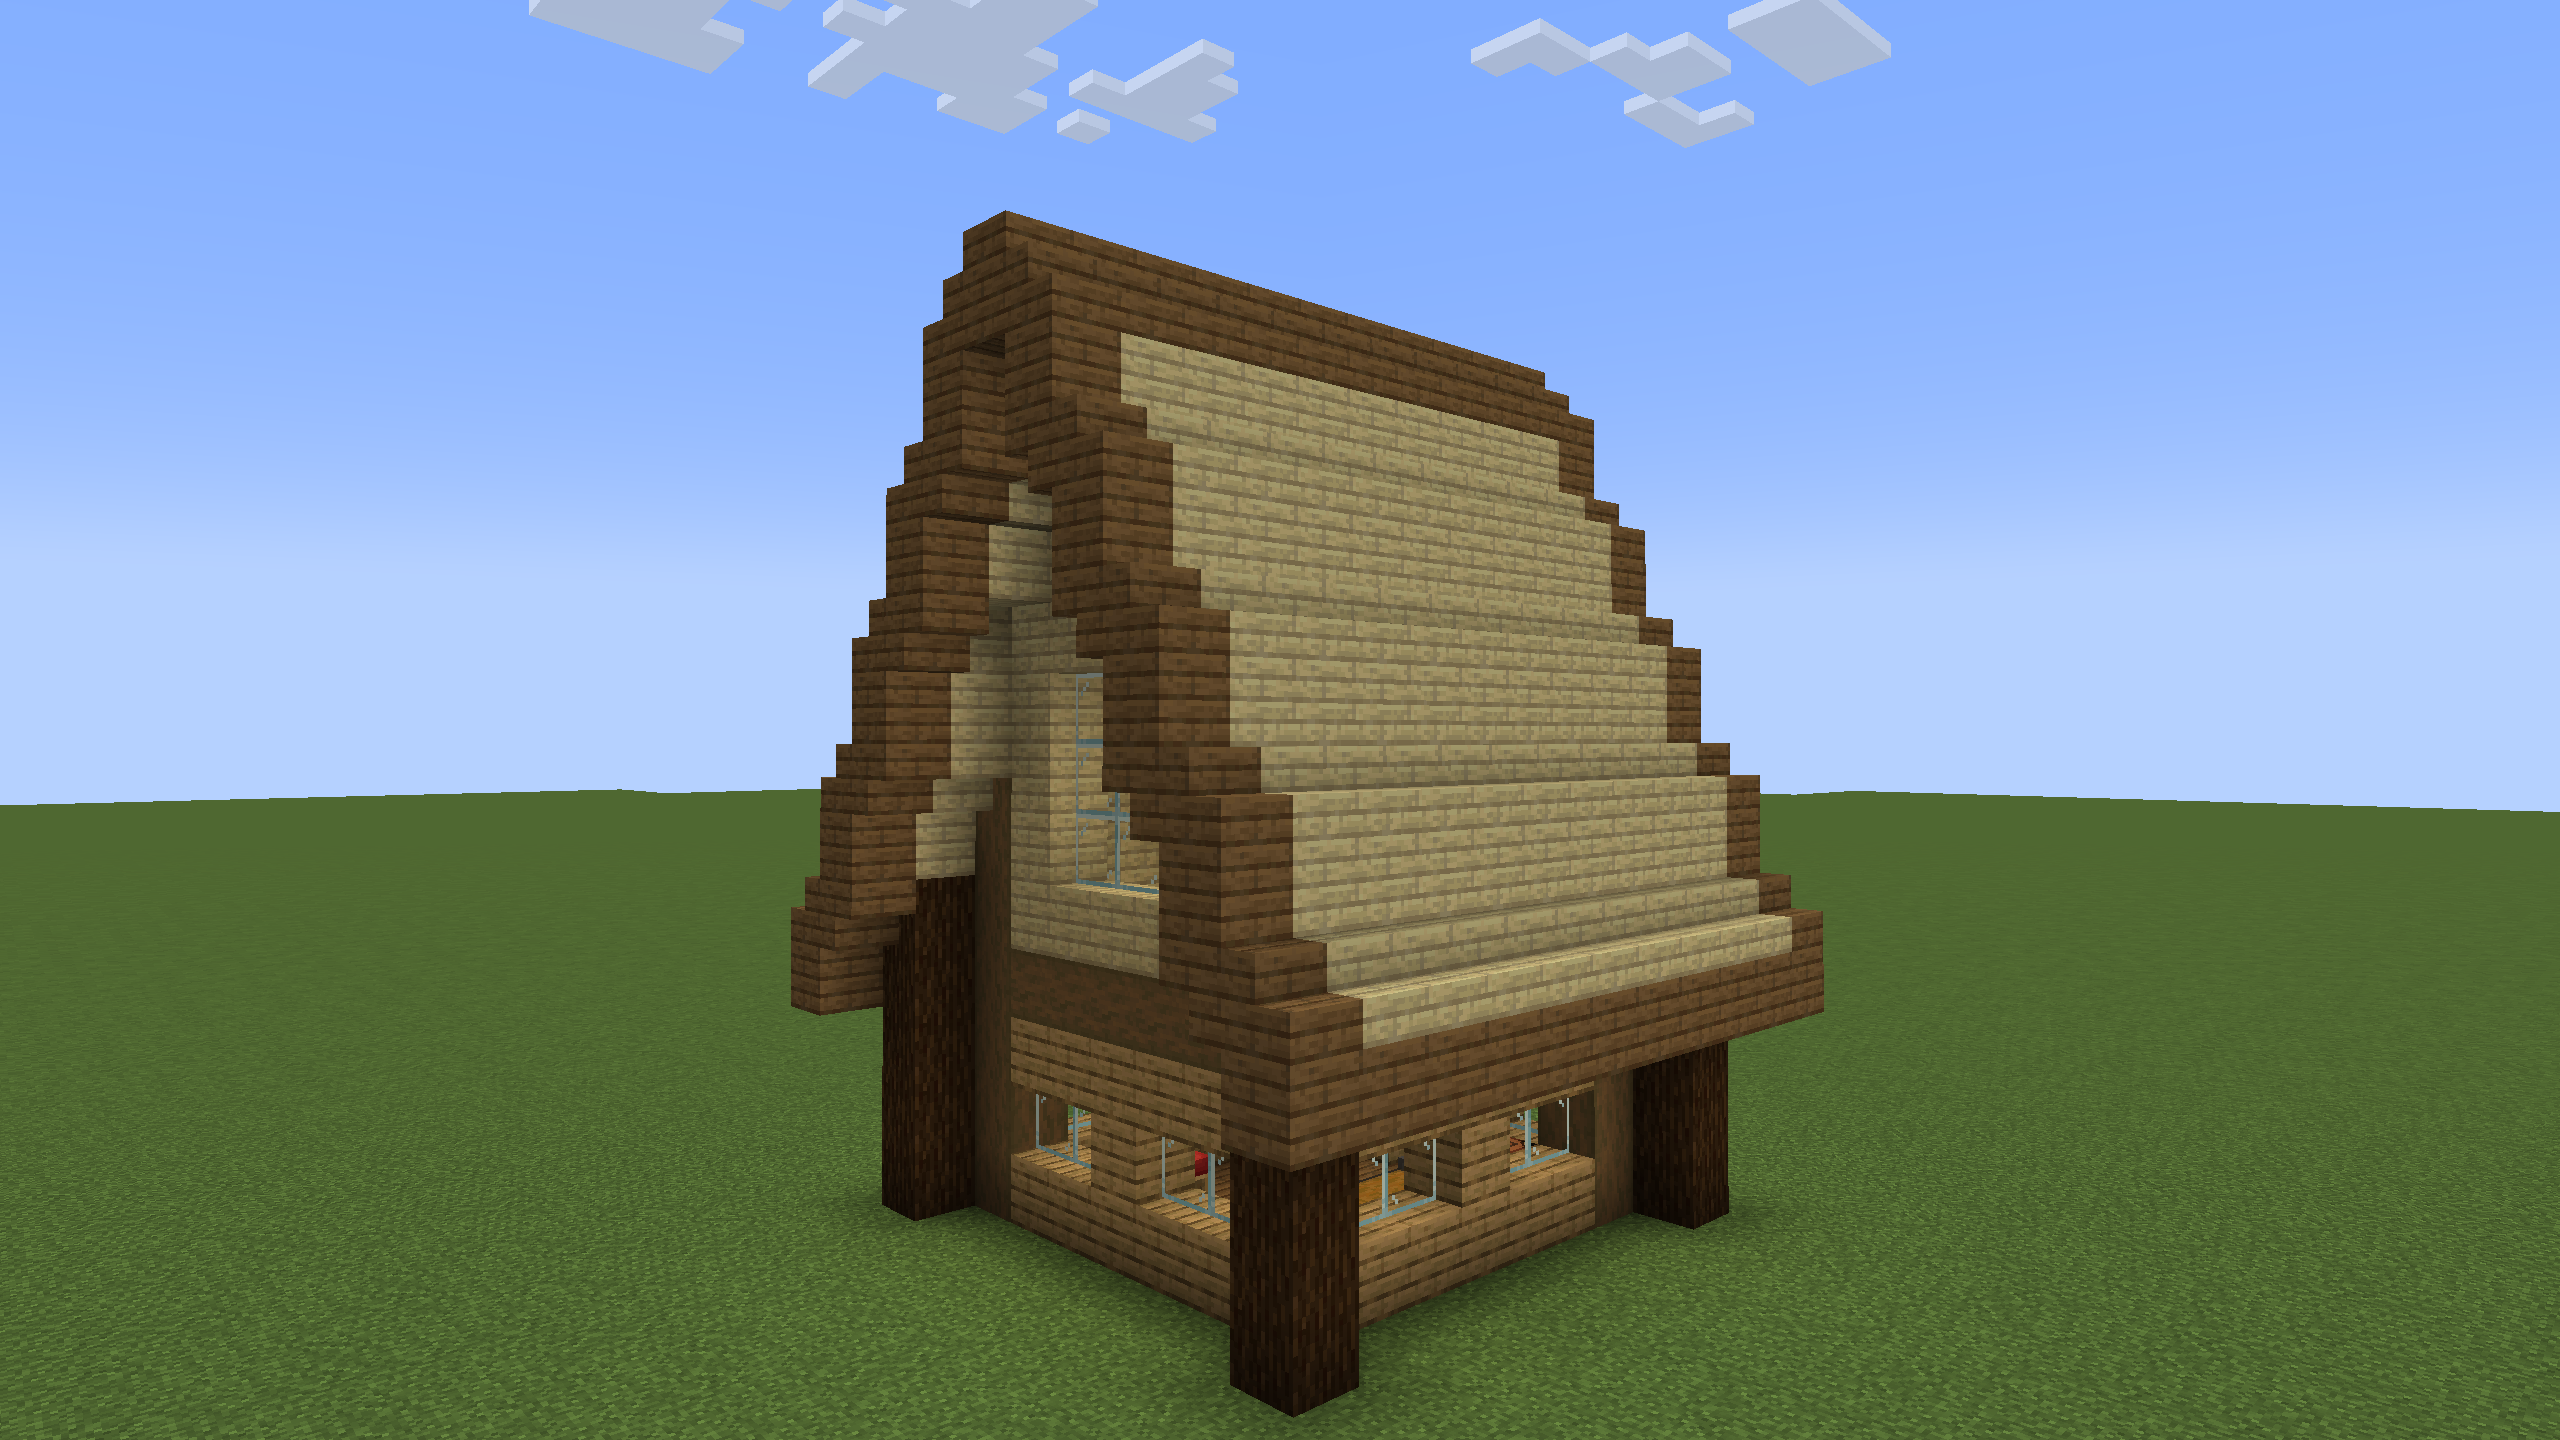
Depth, Depth, Depth
It's definitely still missing something, right? It's missing depth. Depth is, in my opinion, the most important building fundamental. If you take anything away from this guide, it should be the importance of depth. Adding some depth can instantly transform a build!
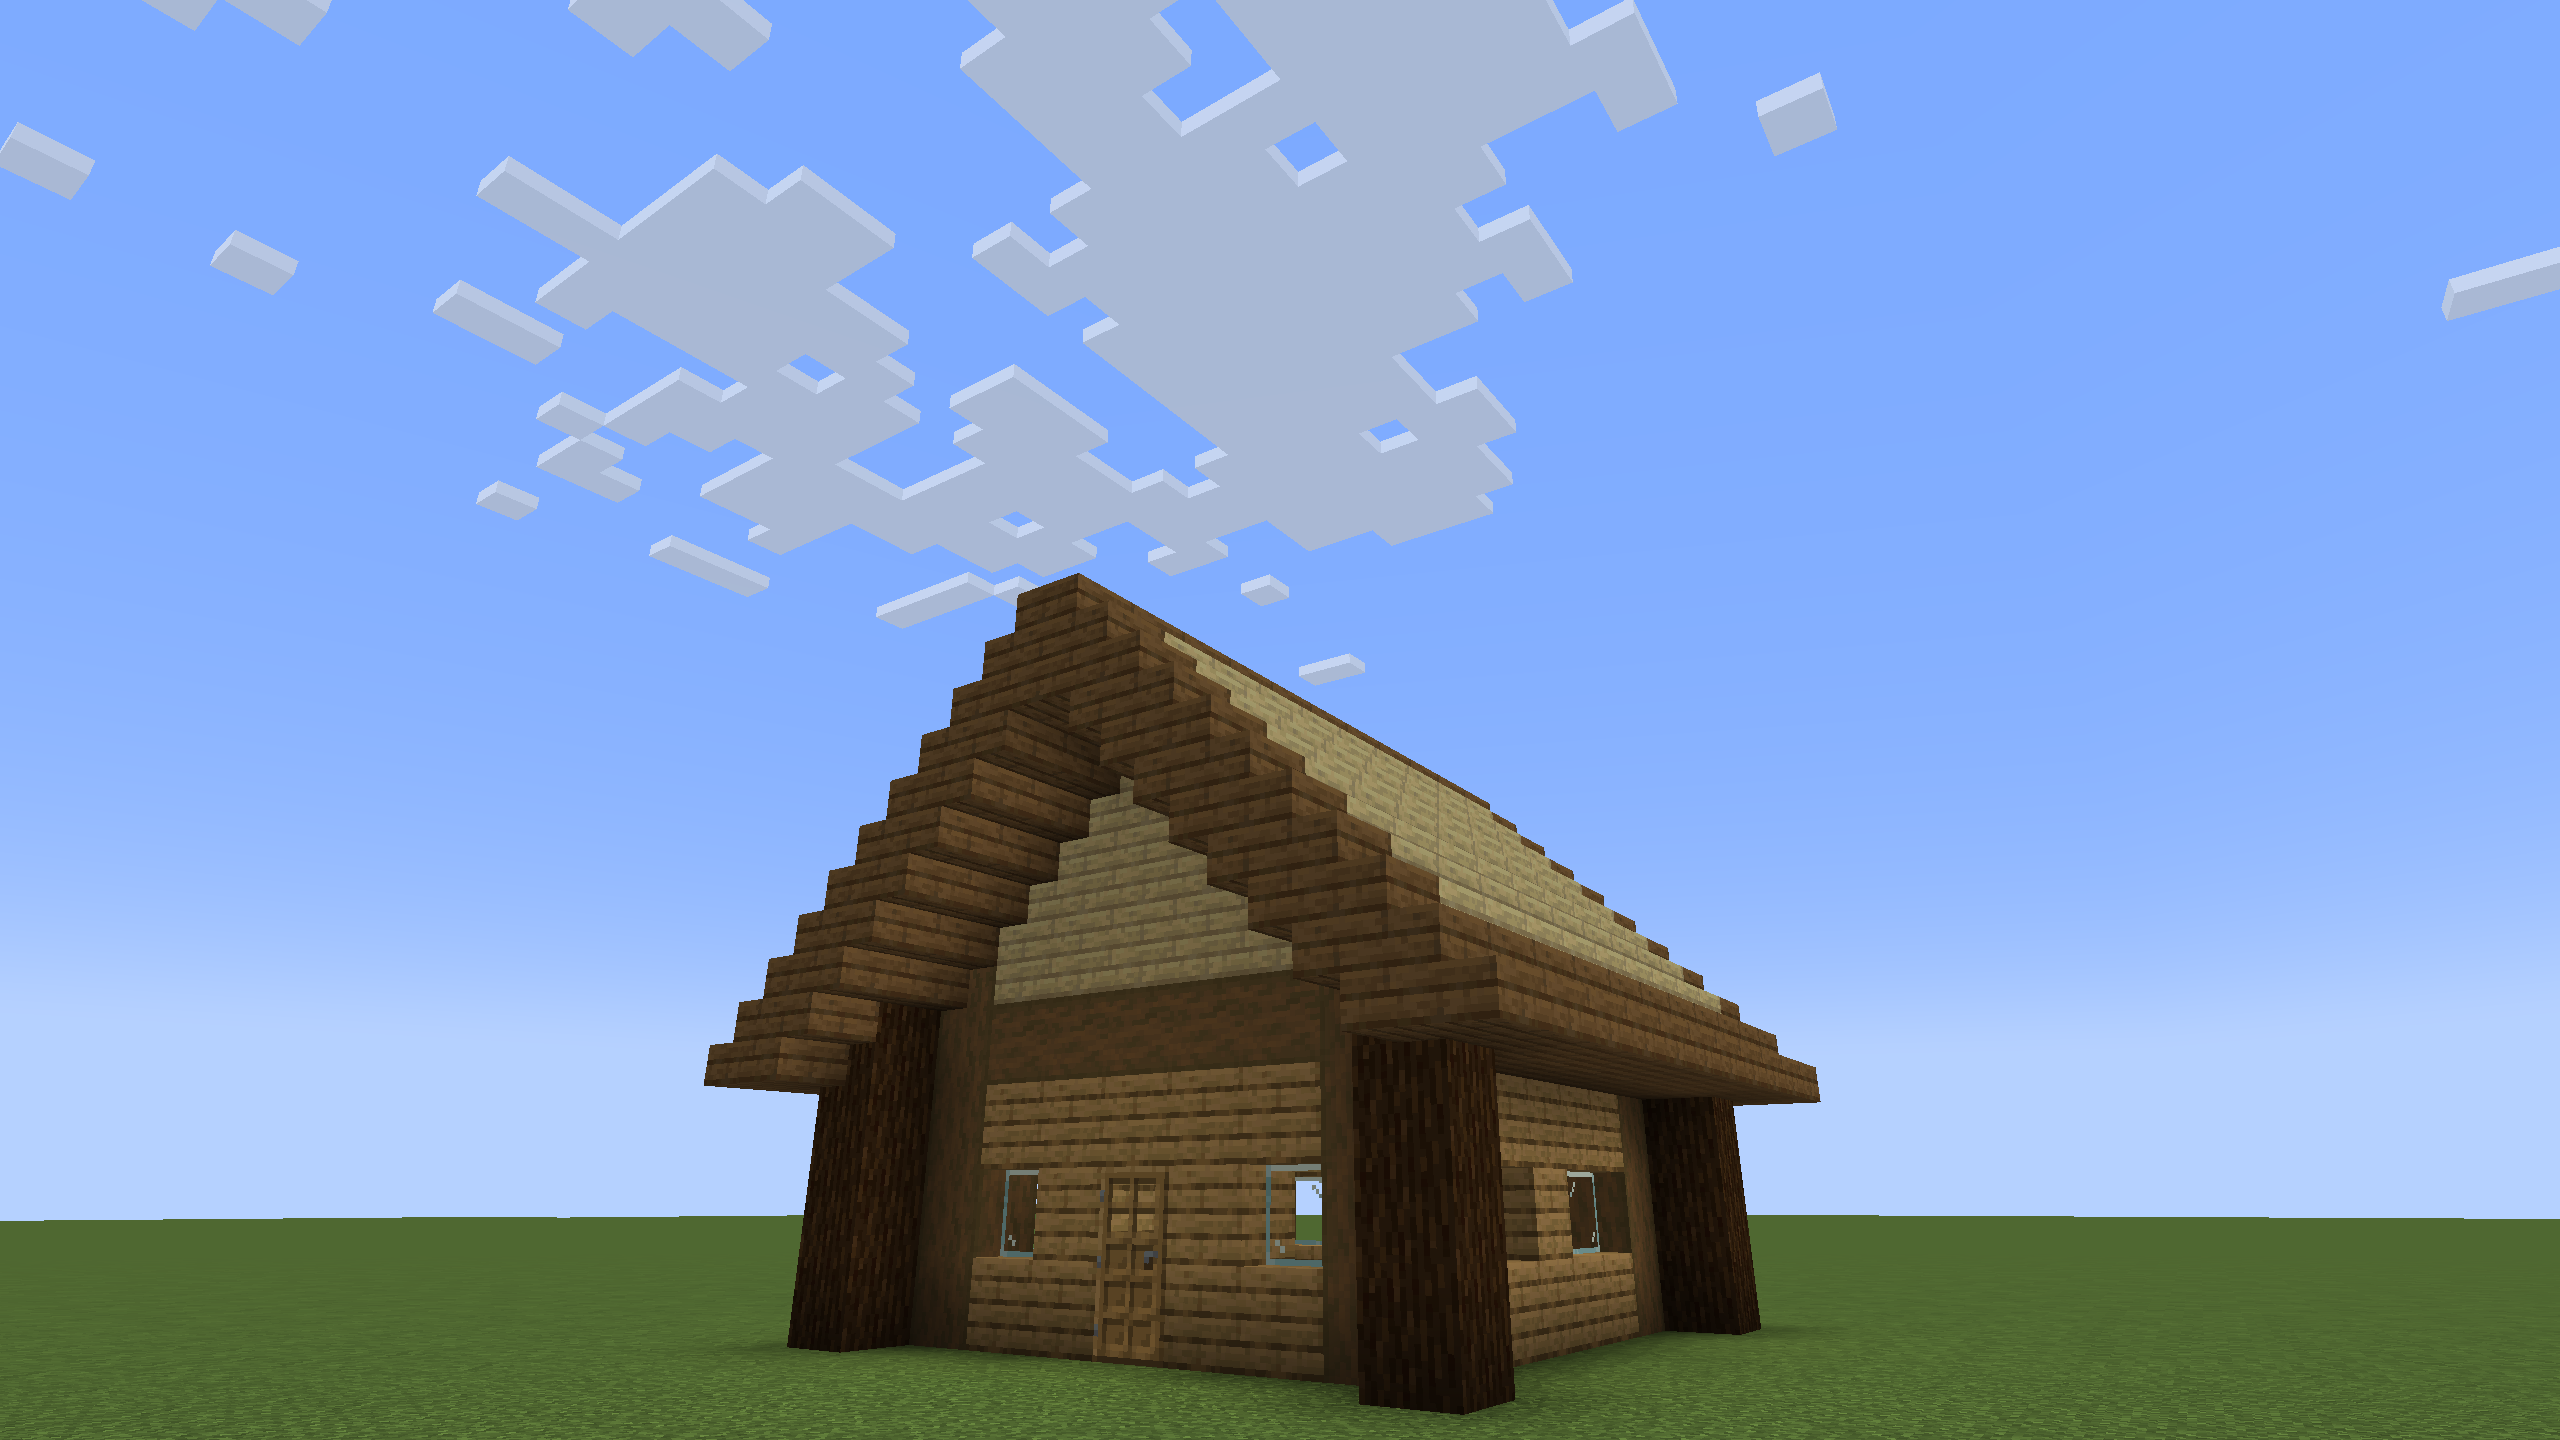
Some basic ways to add depth include: Putting doors on the inside, adding support pillars and fences, swapping glass blocks for panes, and most importantly, adding an overhang to your roof. In builds meant to look ruined or where detailed patterns work, replacing blocks with non-solid counterparts is a good way to add some extra depth. Of course, there are plenty of ways to add depth! These aren't the only ways to create depth in your builds. Depth is so important because it creates a more interesting silhouette, further breaks up monotony, and generally creates visual interest.
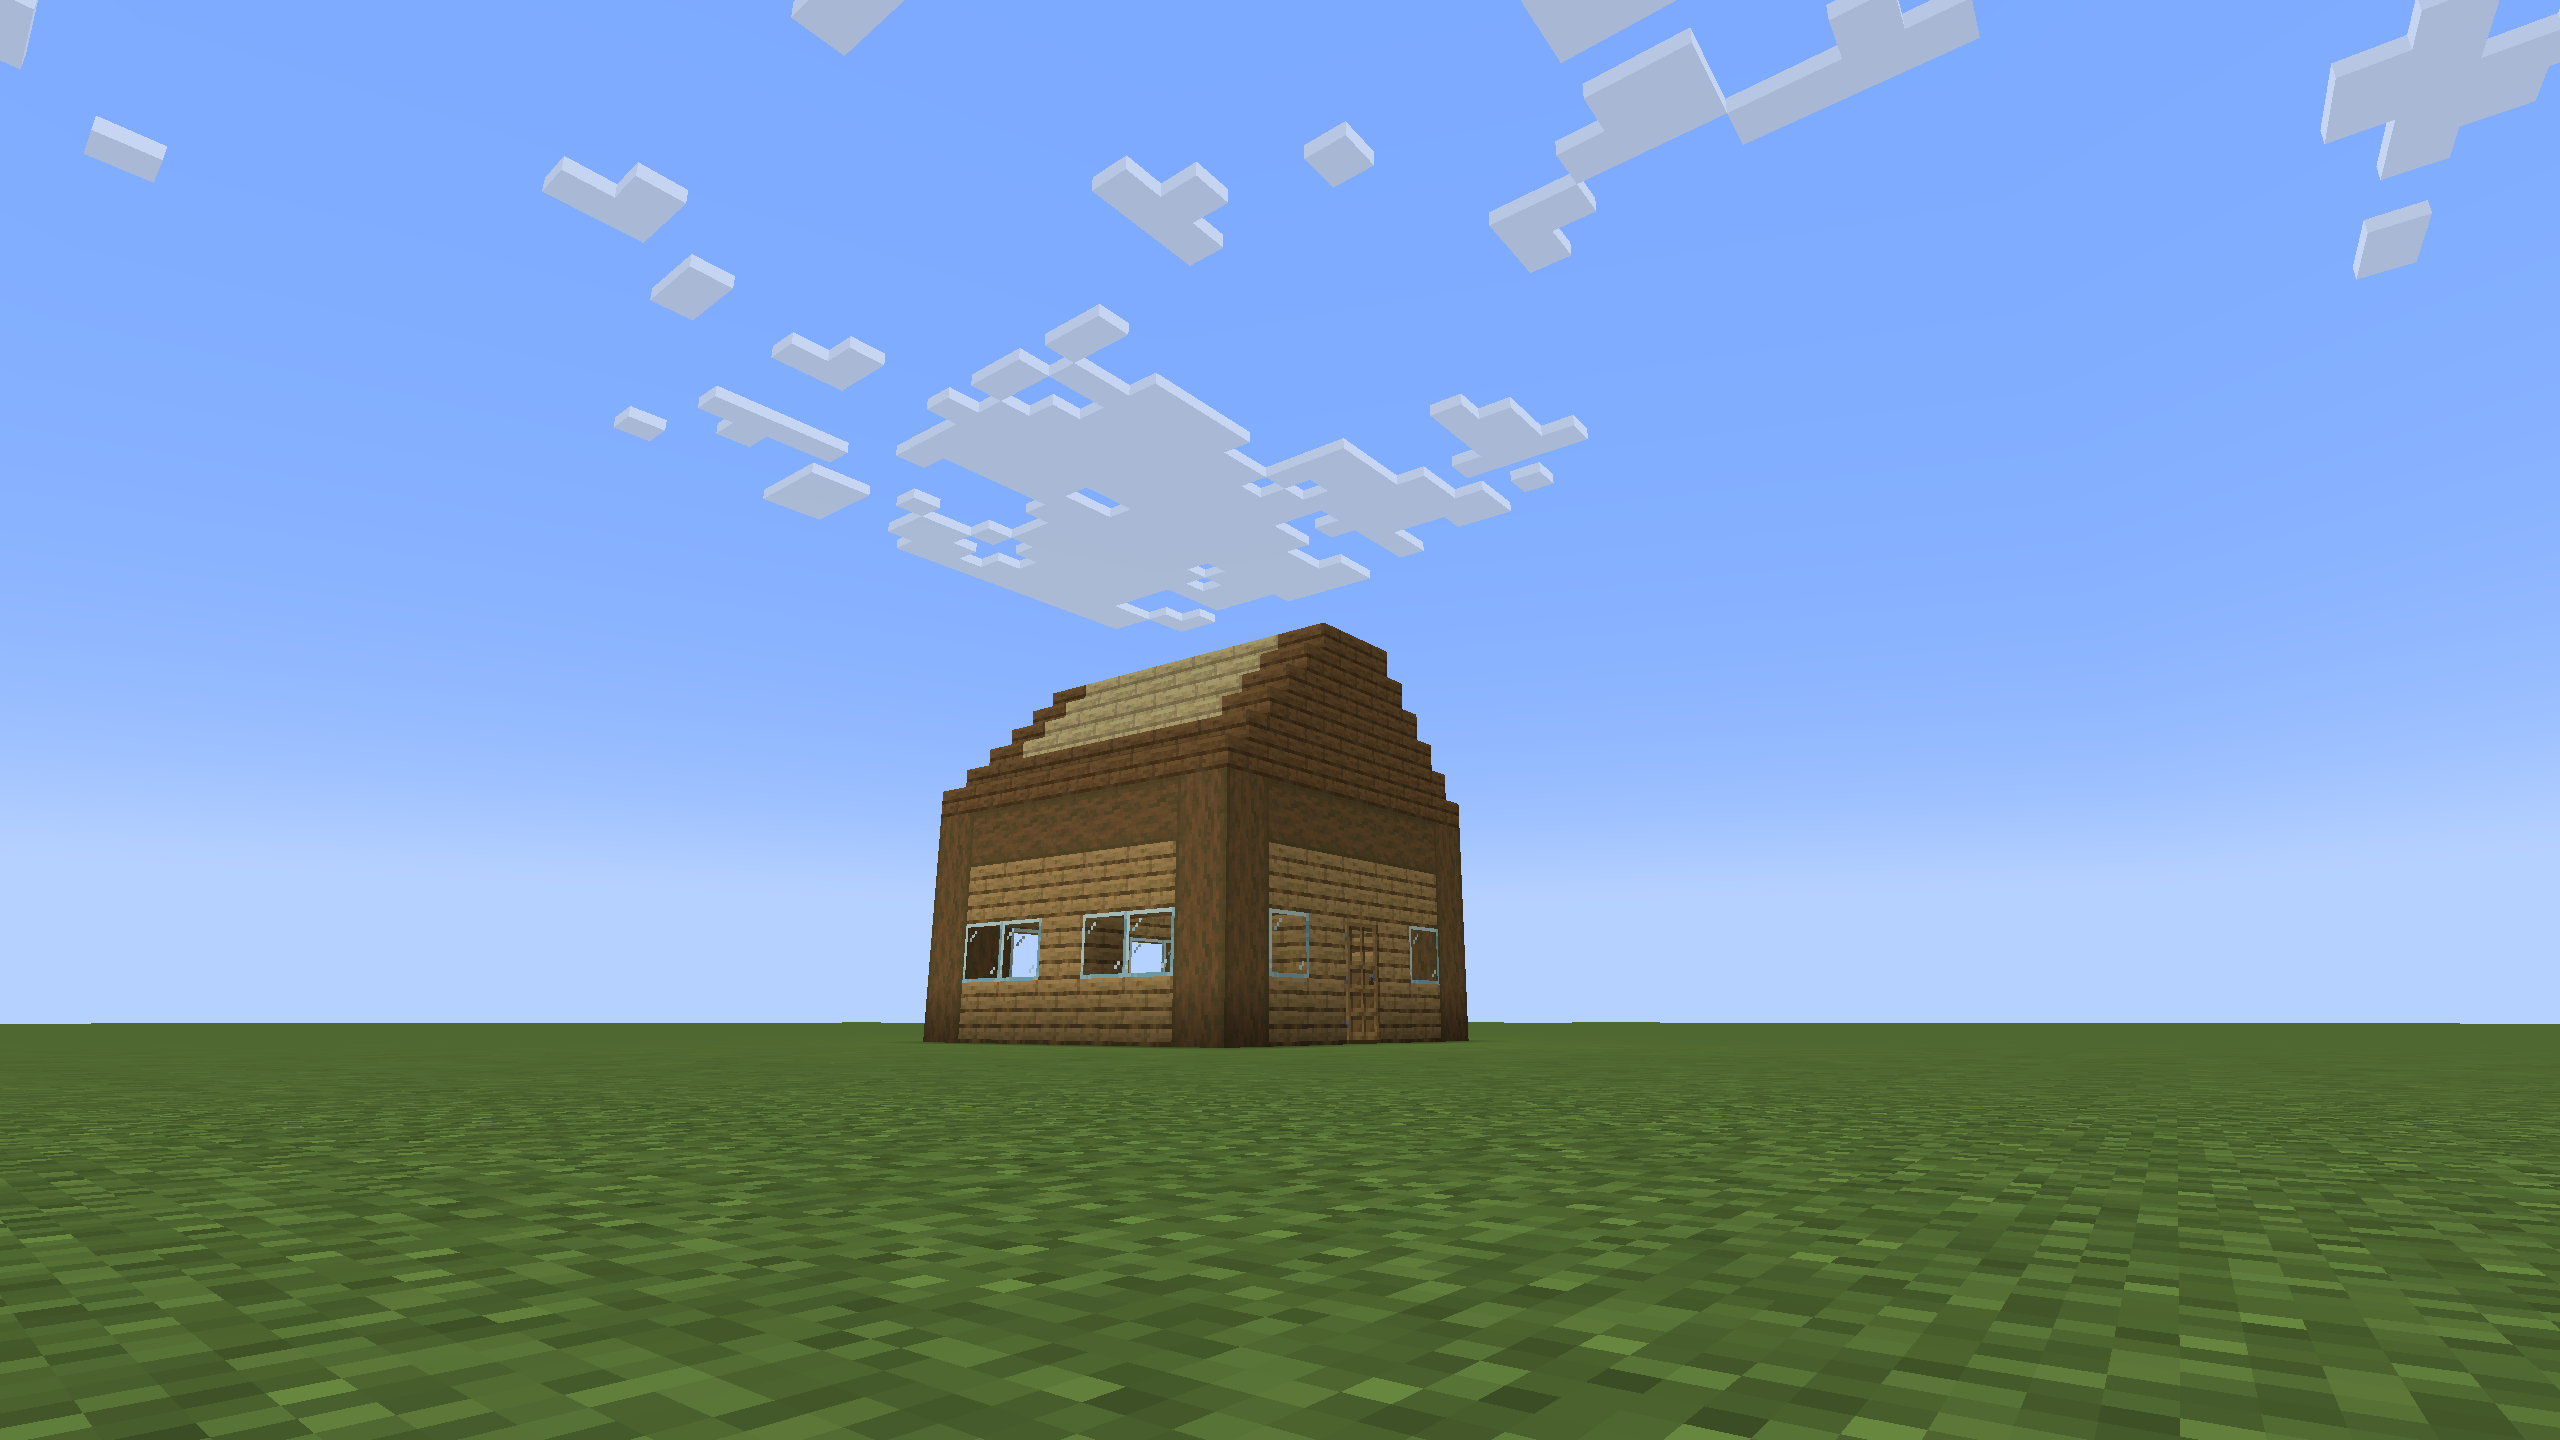
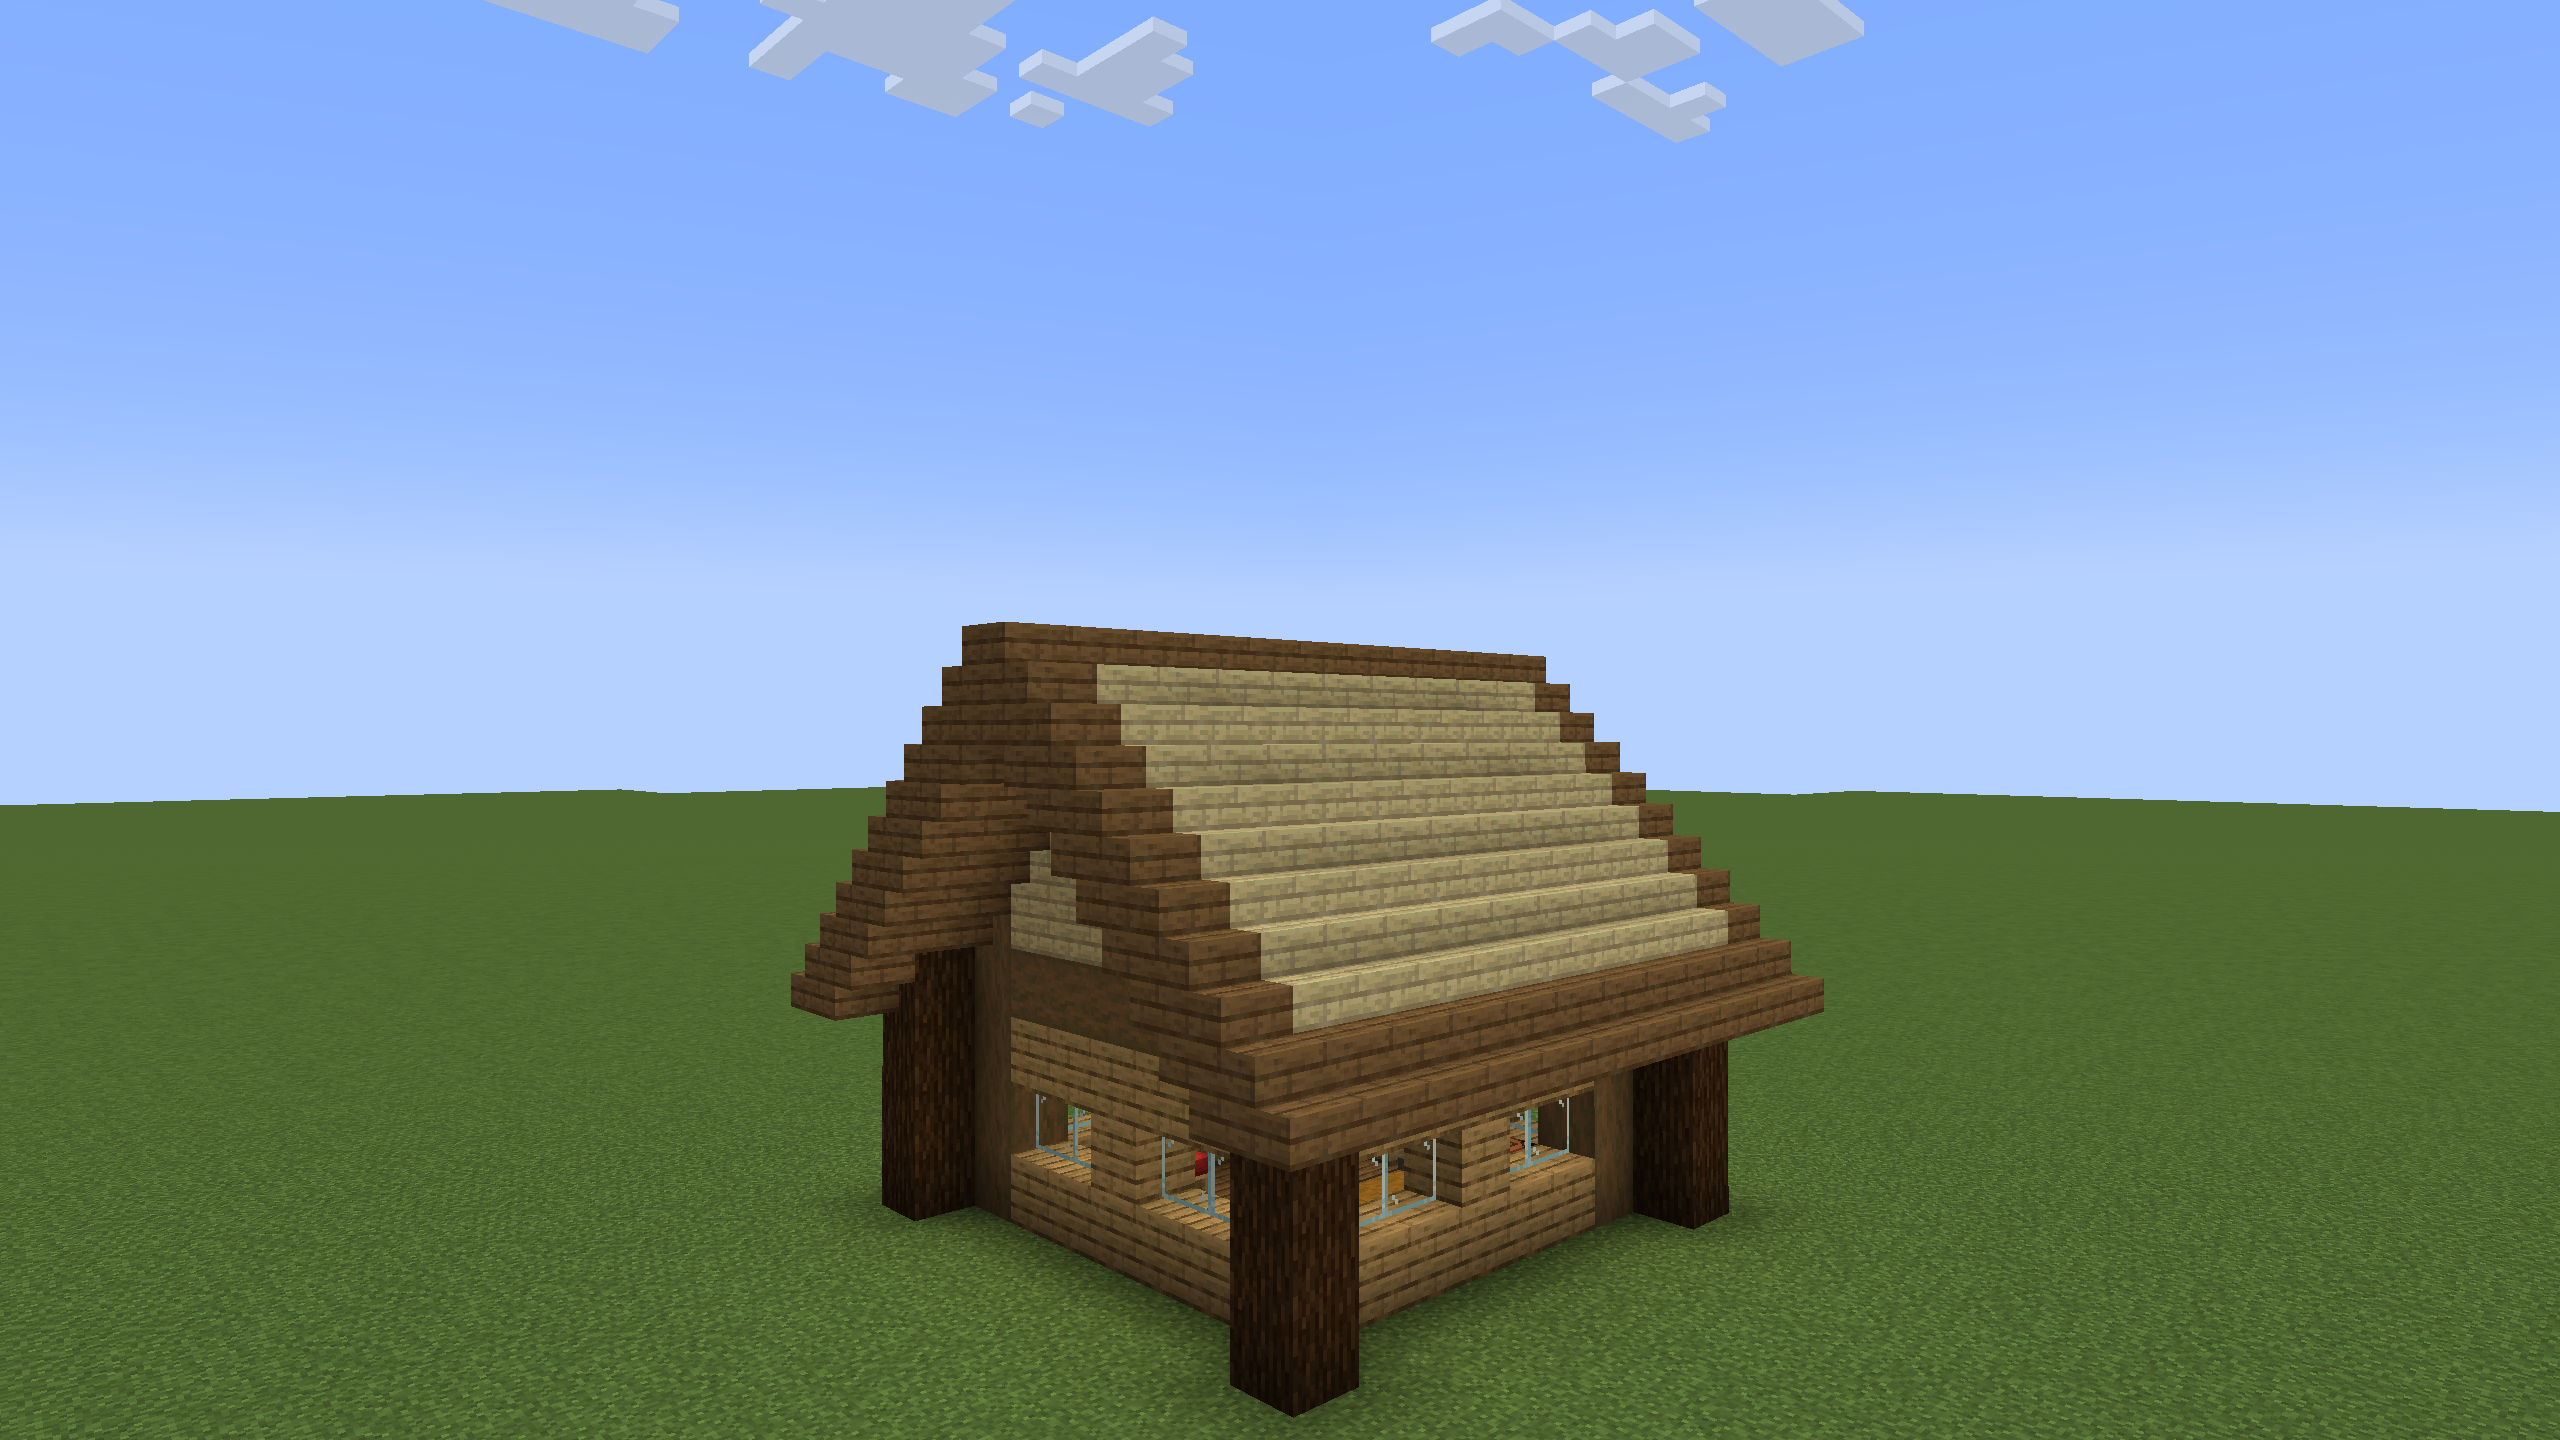
Modifying Shape
That roof is pretty boring, right? Let's change the slope. Of course, you could also just go right to detailing, this is more of a stylistic choice. I find that steep roofs look great in more fantasy-themed builds, while shallow or asymmetrical roofs work well in more modern builds. In larger builds, making the basic outline non-rectangular, like an L or a T shape is great, but rectangles can look great too, especially with smaller builds. Curves are also very underrated in my opinion; adding curved areas to roofs can add an interesting touch to larger builds. In this specific example, I also added some extra depth with the large windows.
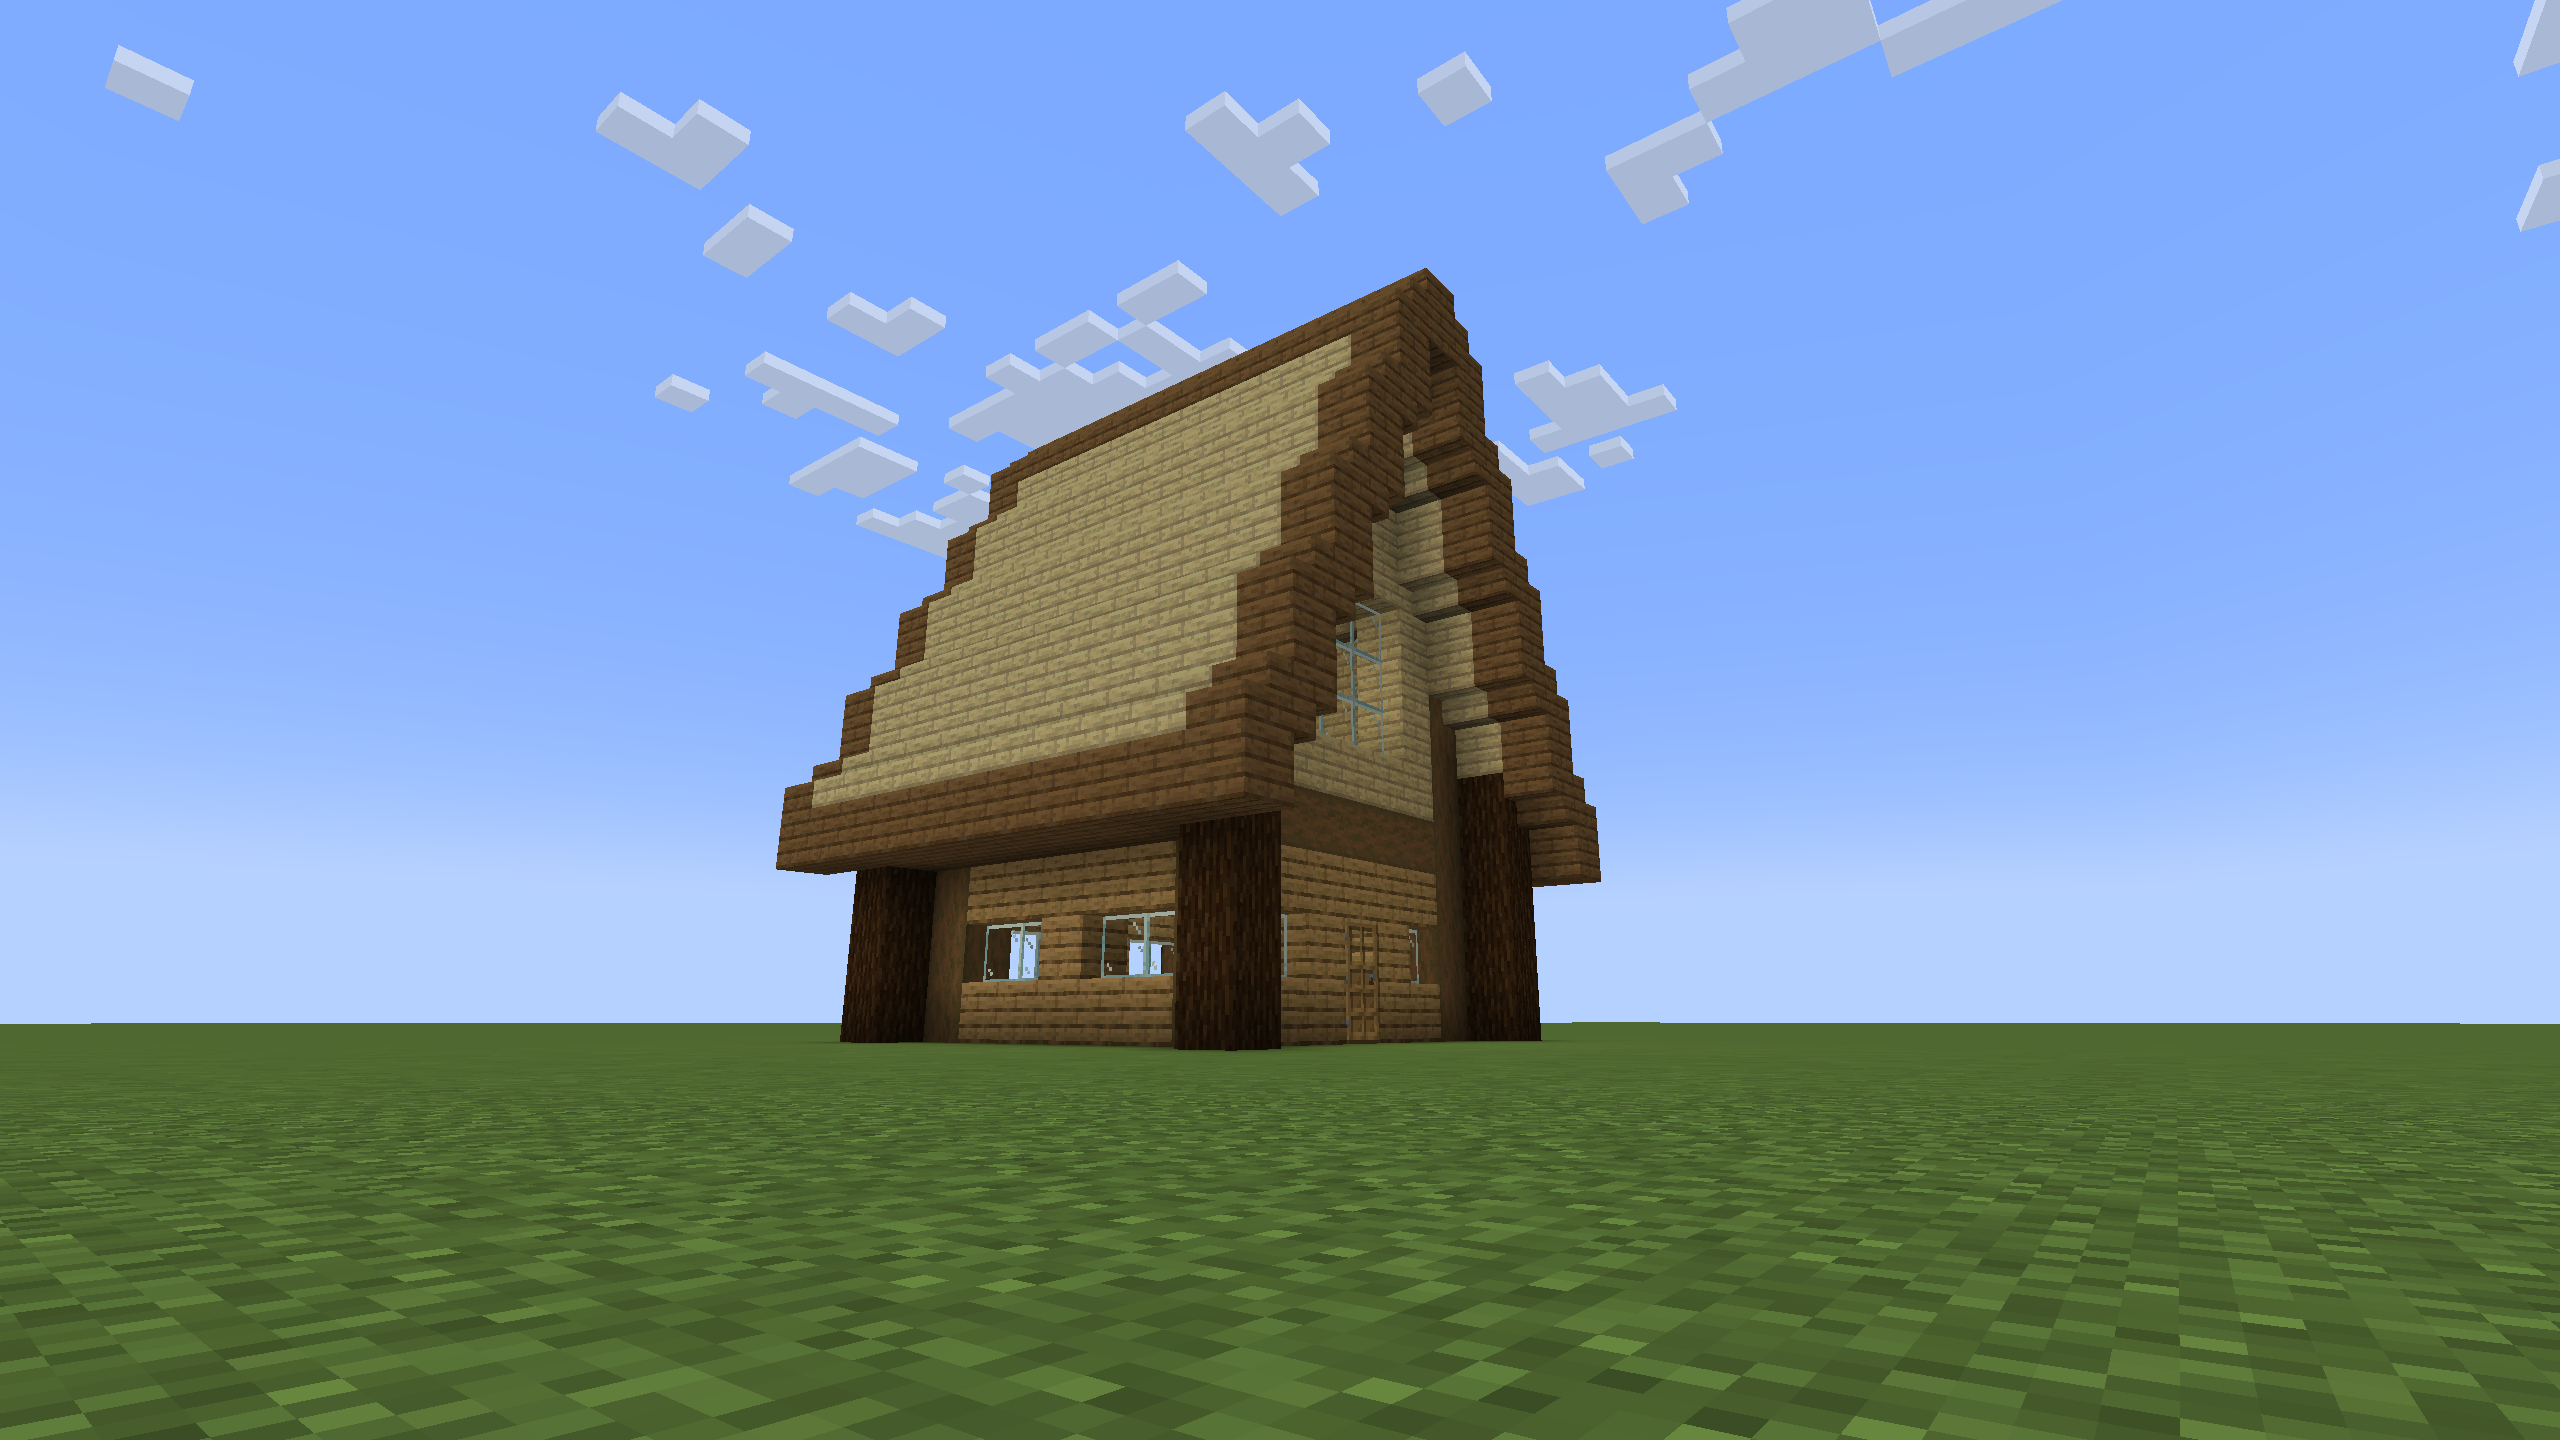
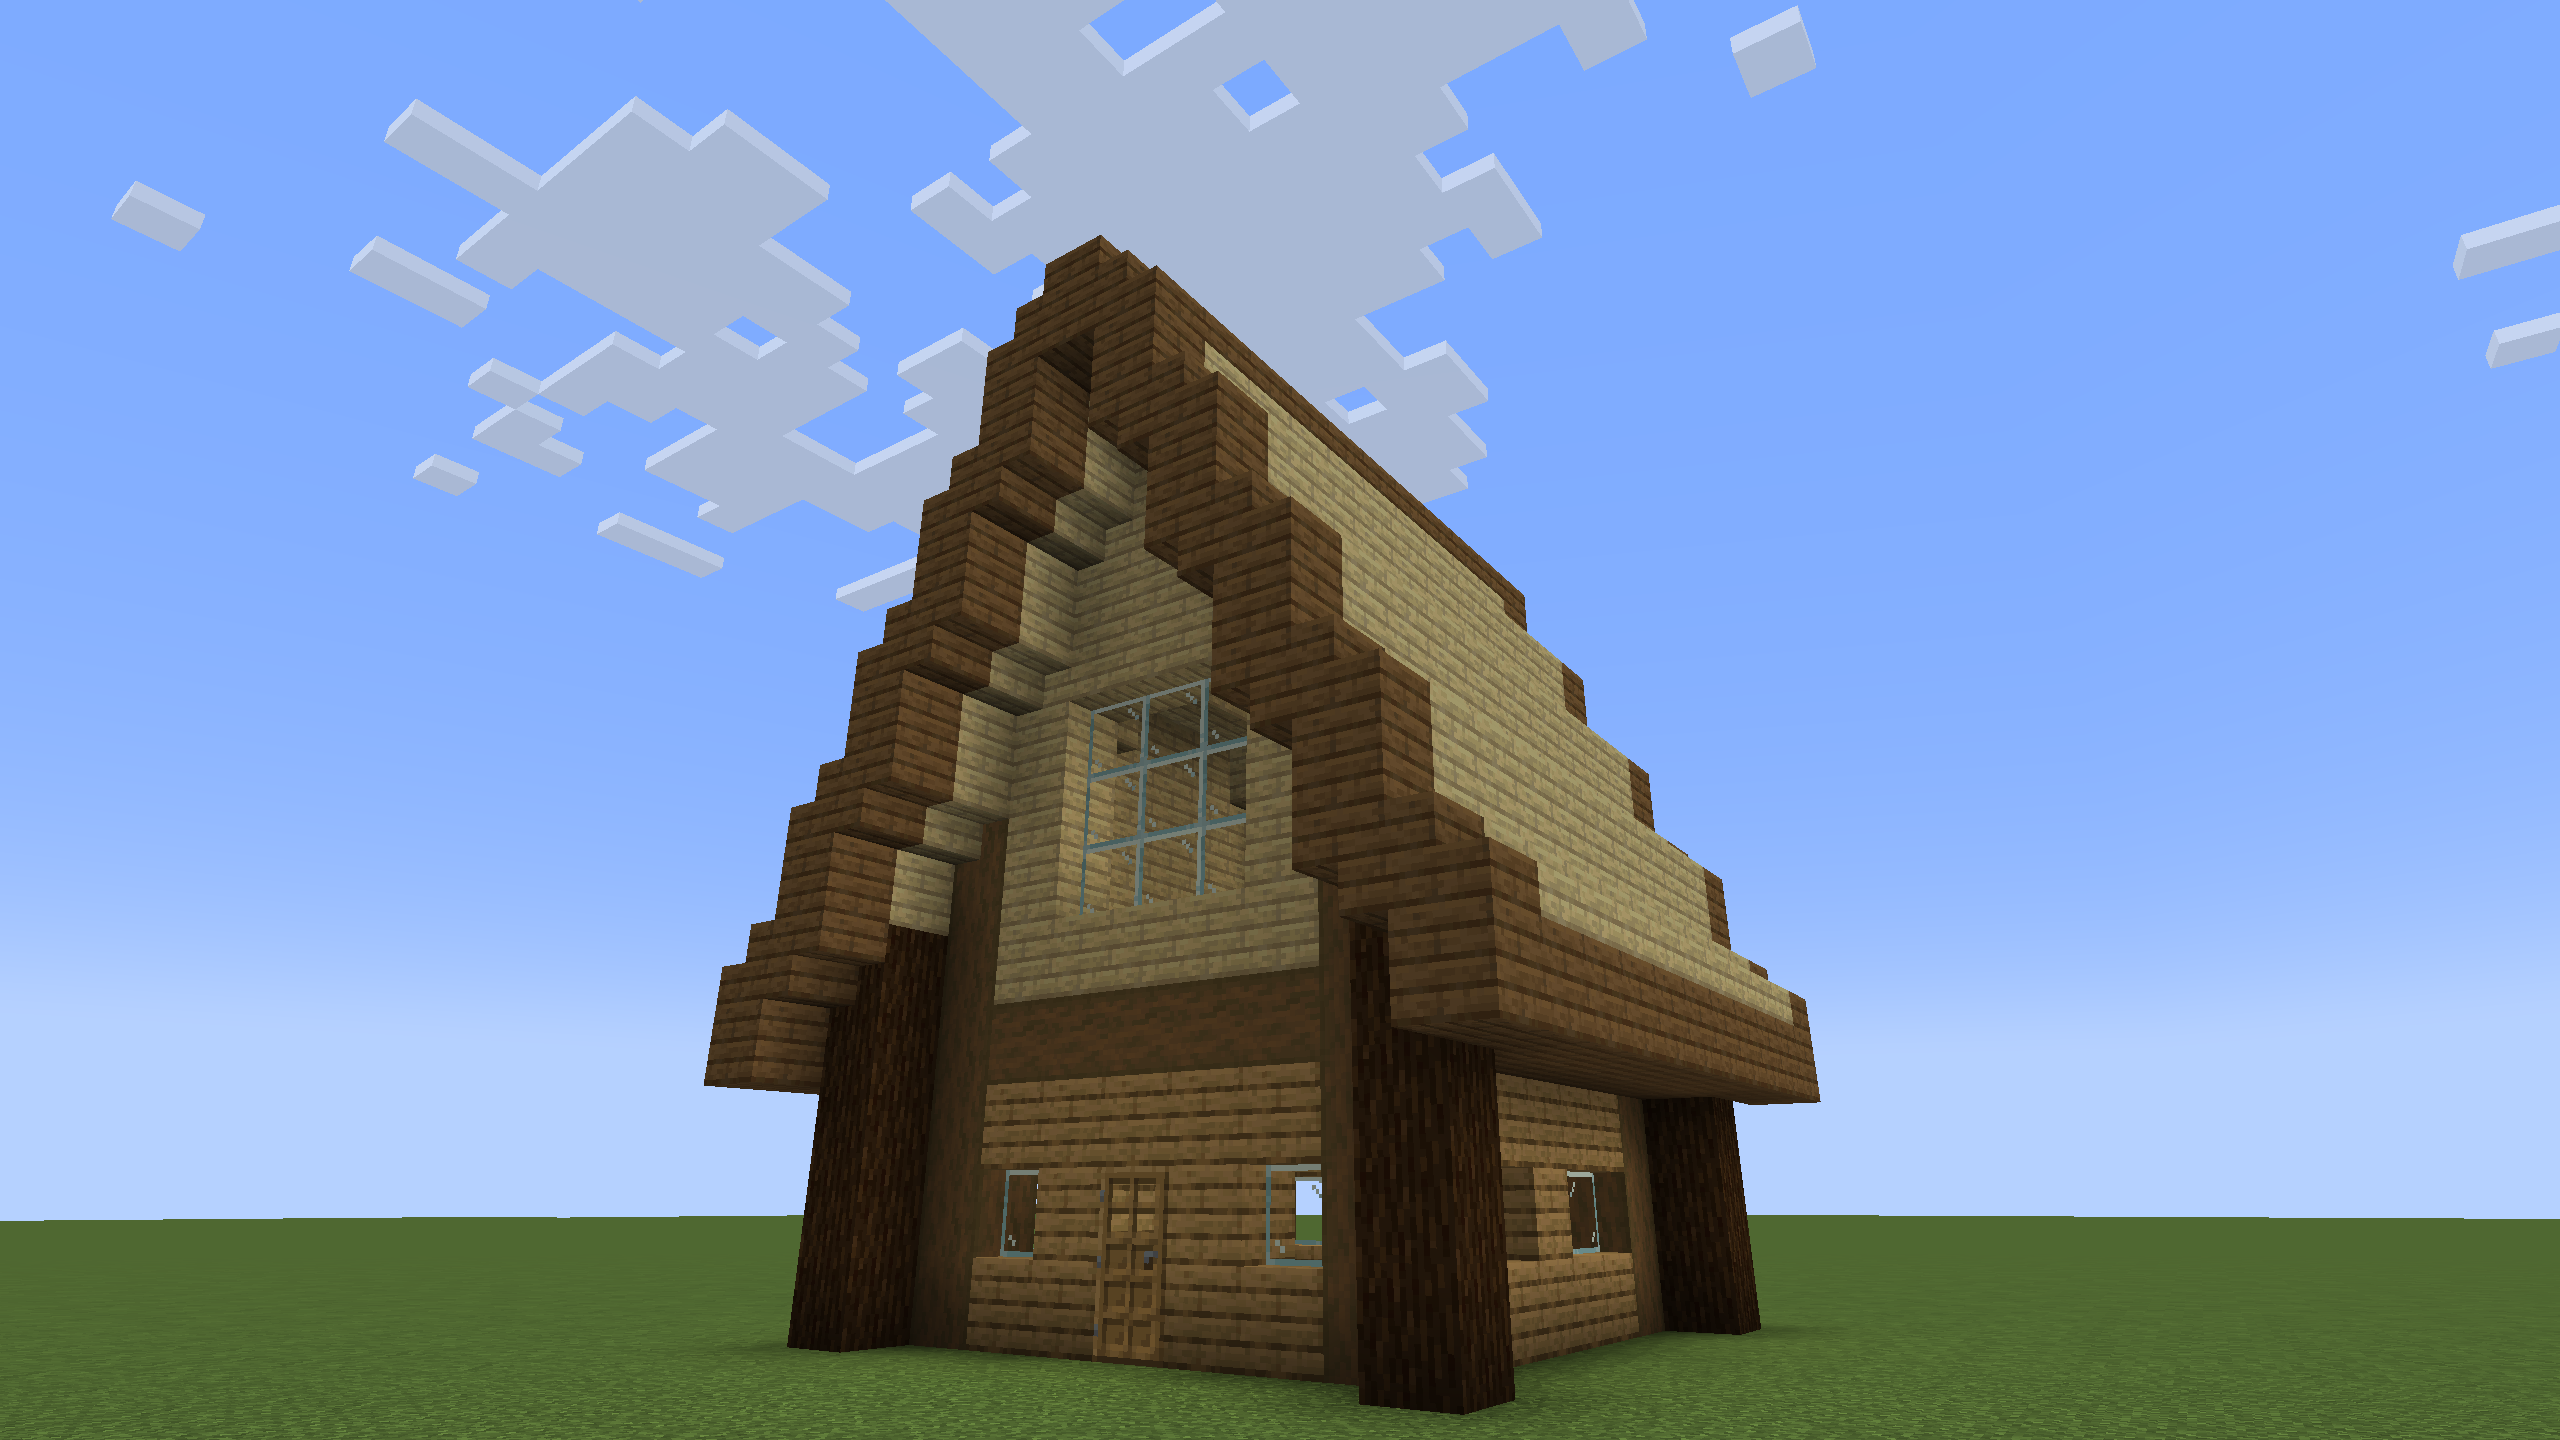
Detail, Detail, Detail
Detail is easily the next most important thing after depth. It can completely transform a build. Some of the details I like using the most include: dormers, flowerboxes, window shutters, balconies, overhangs over windows, and giving the tips of the roof a curve where it juts out a bit.
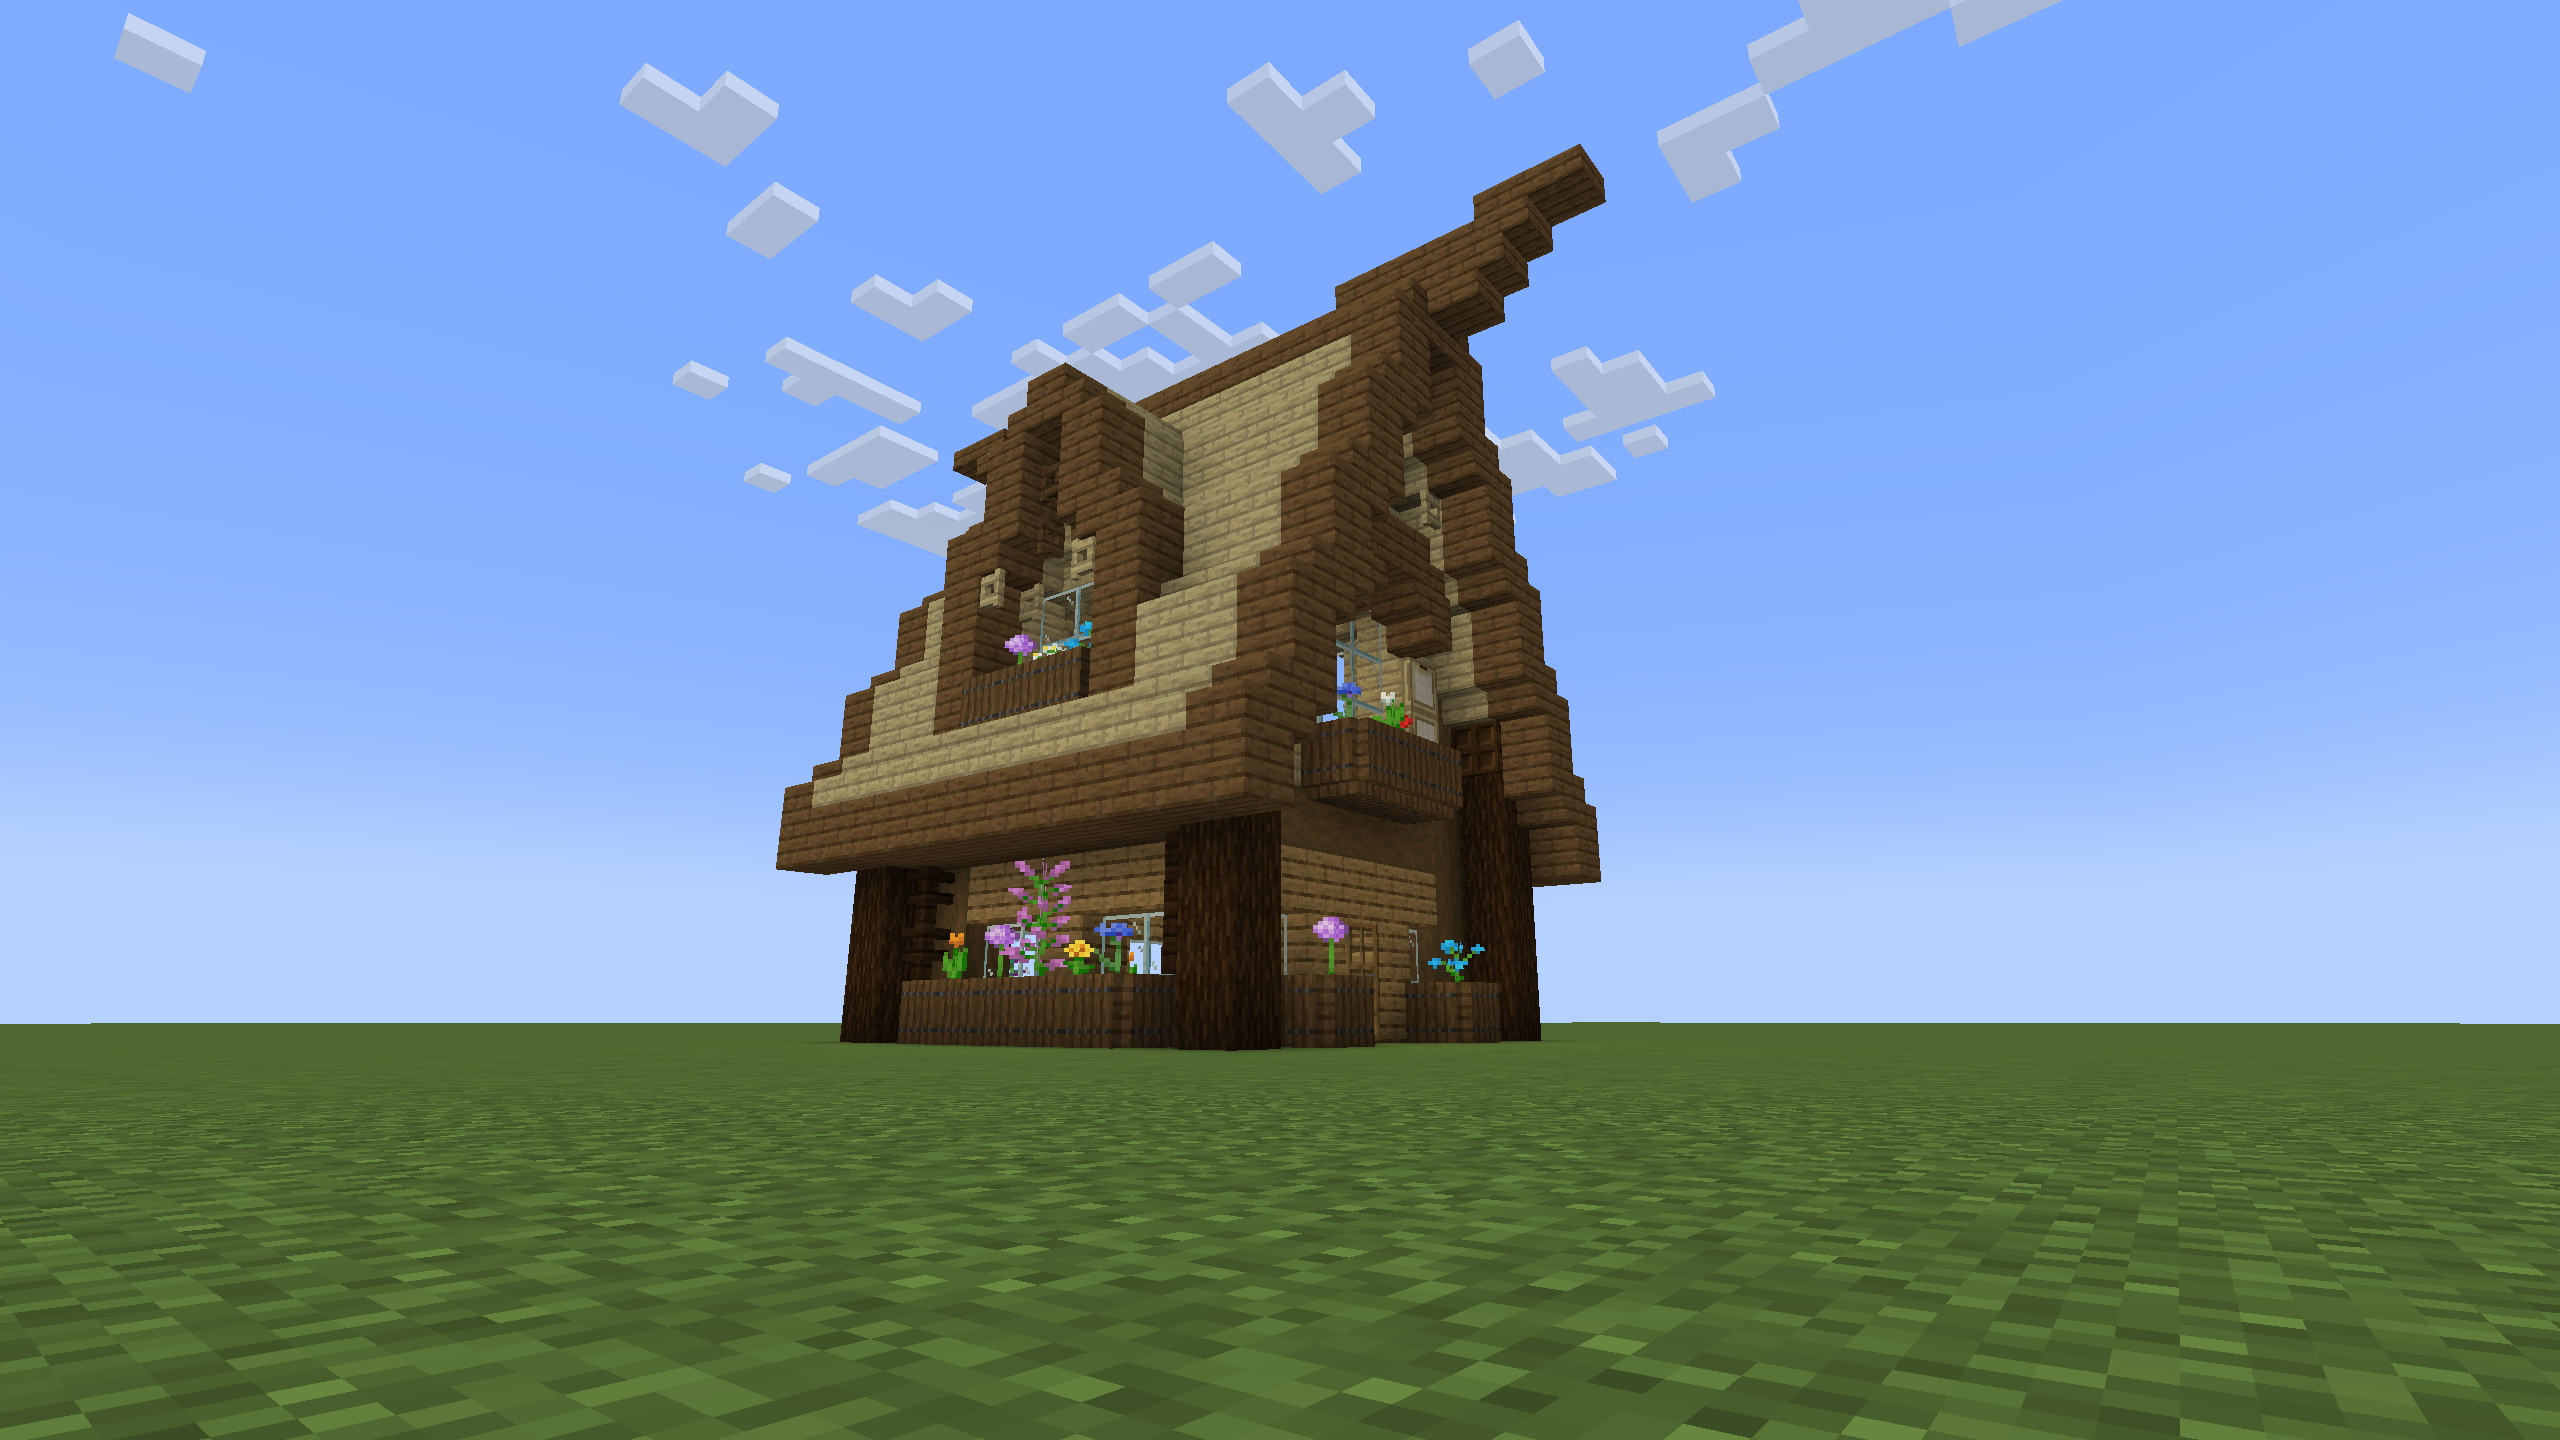
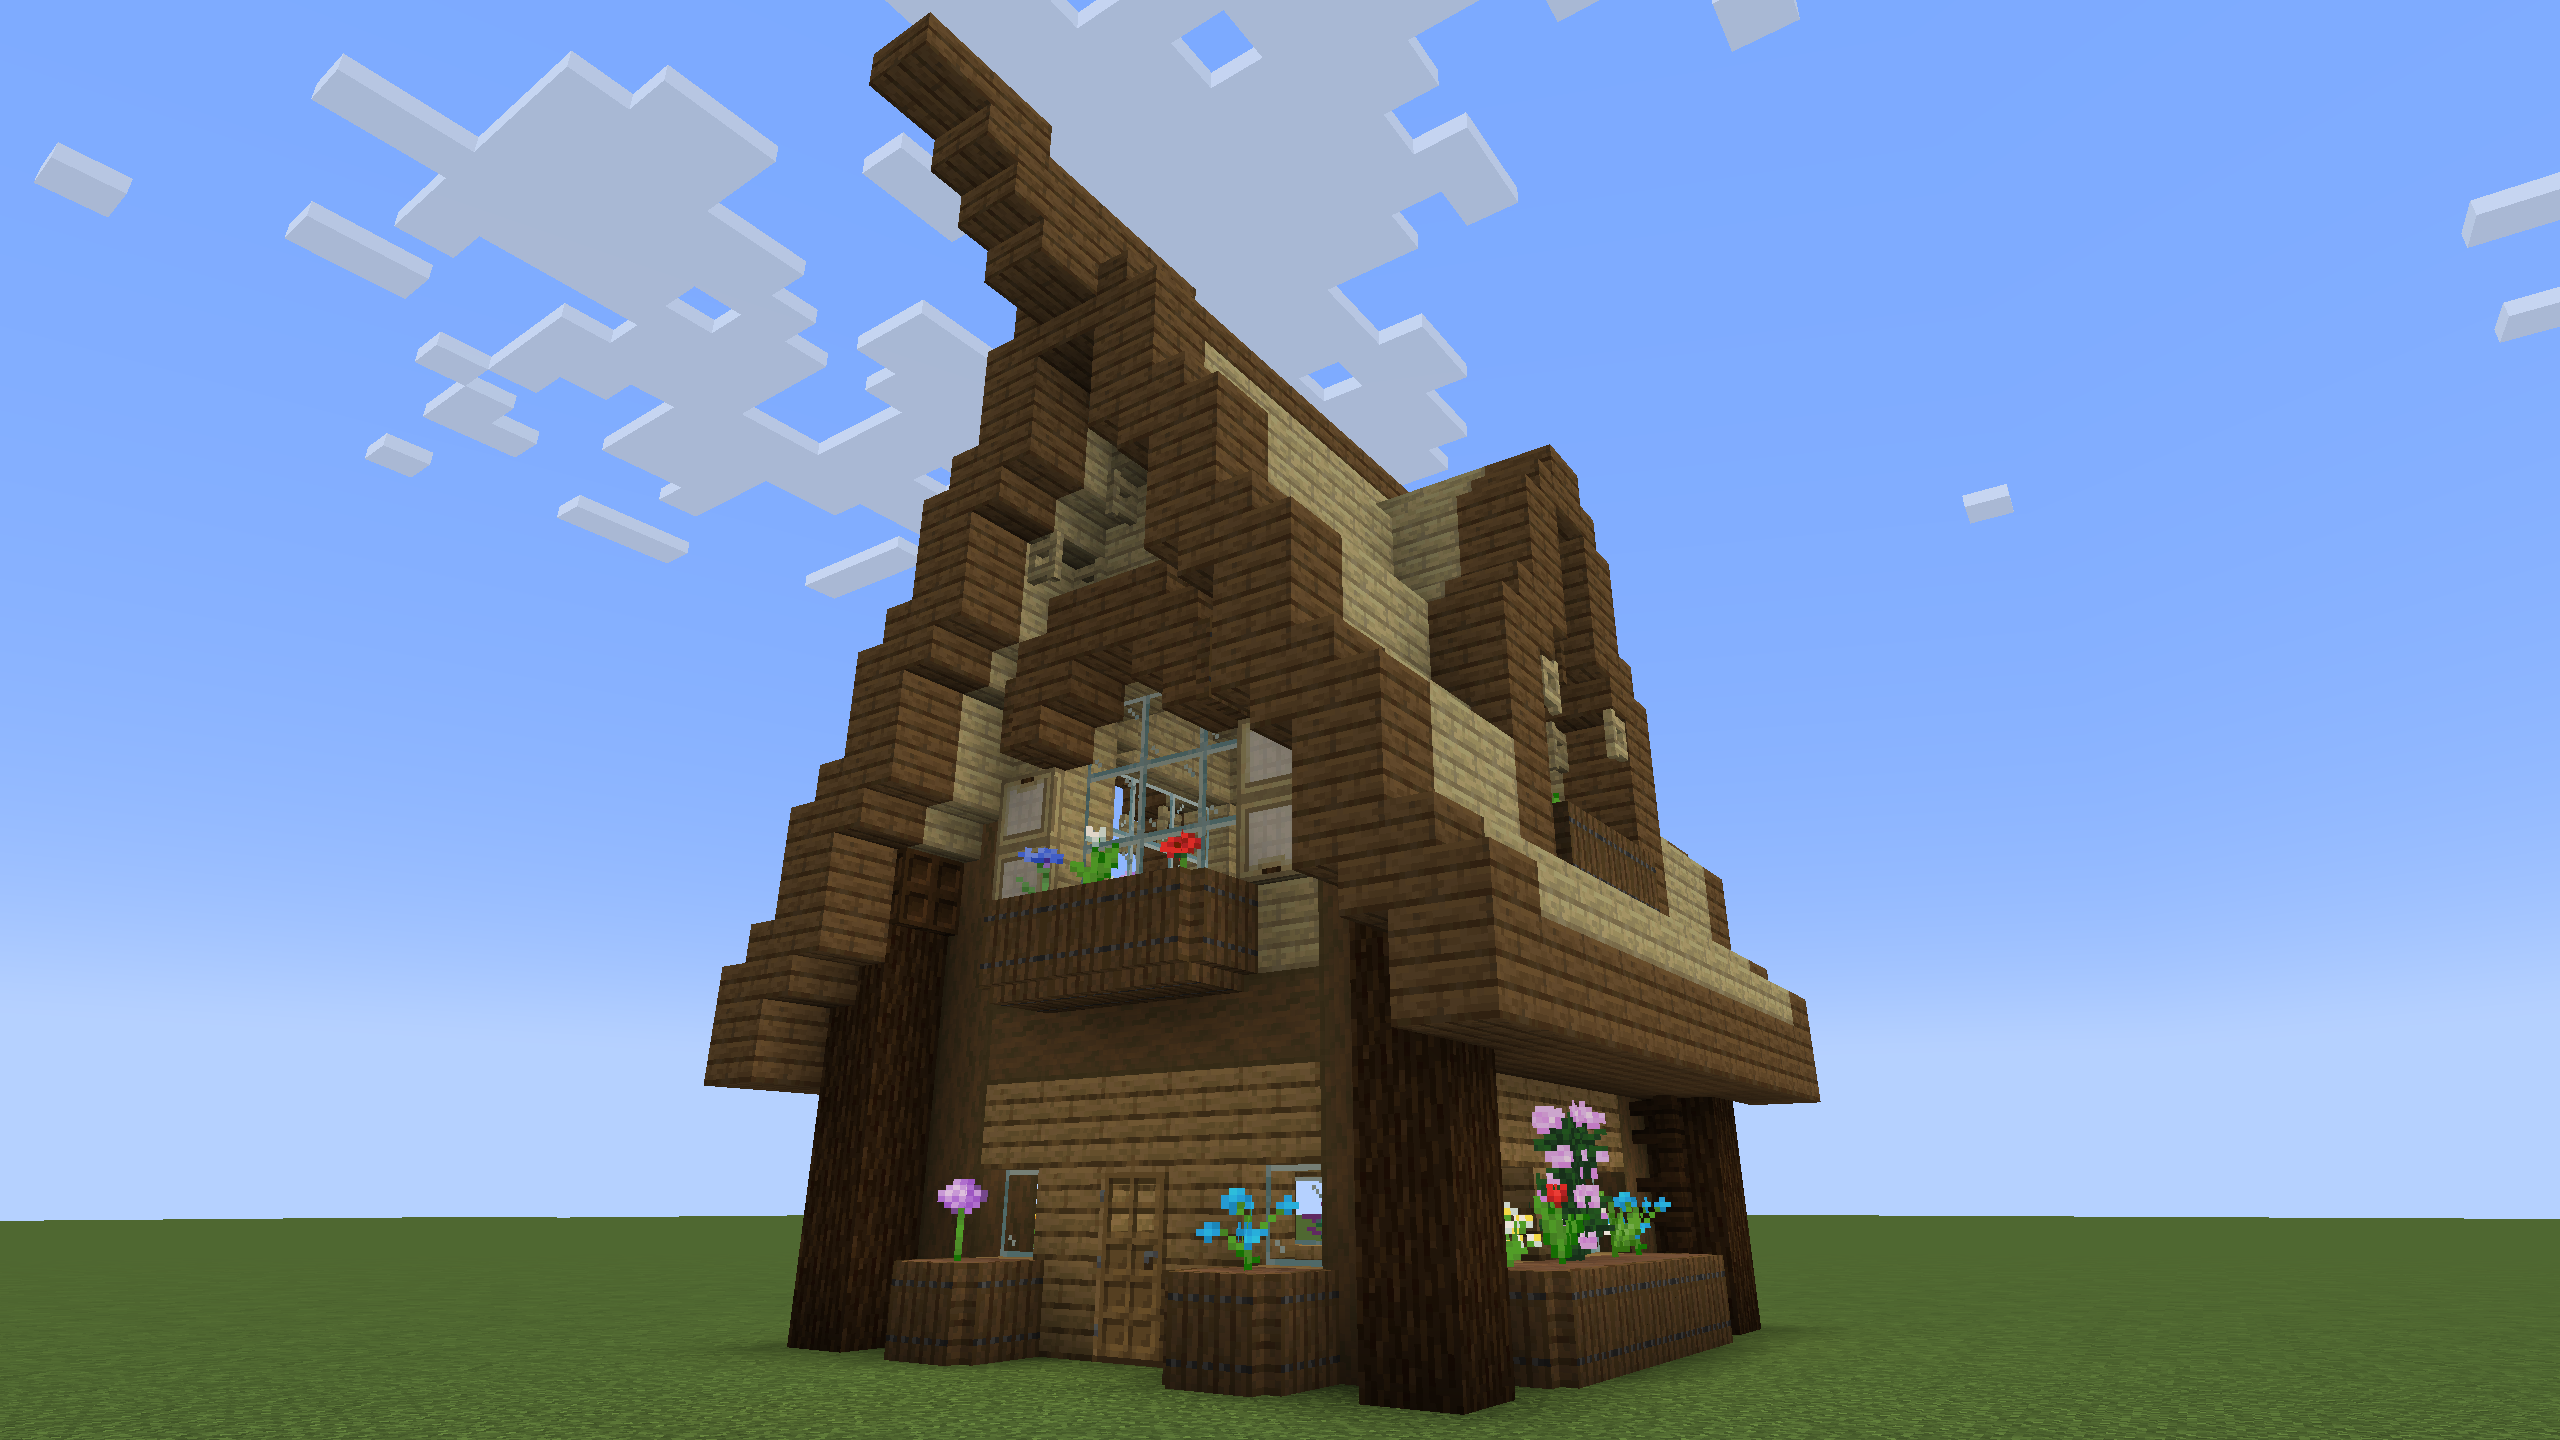
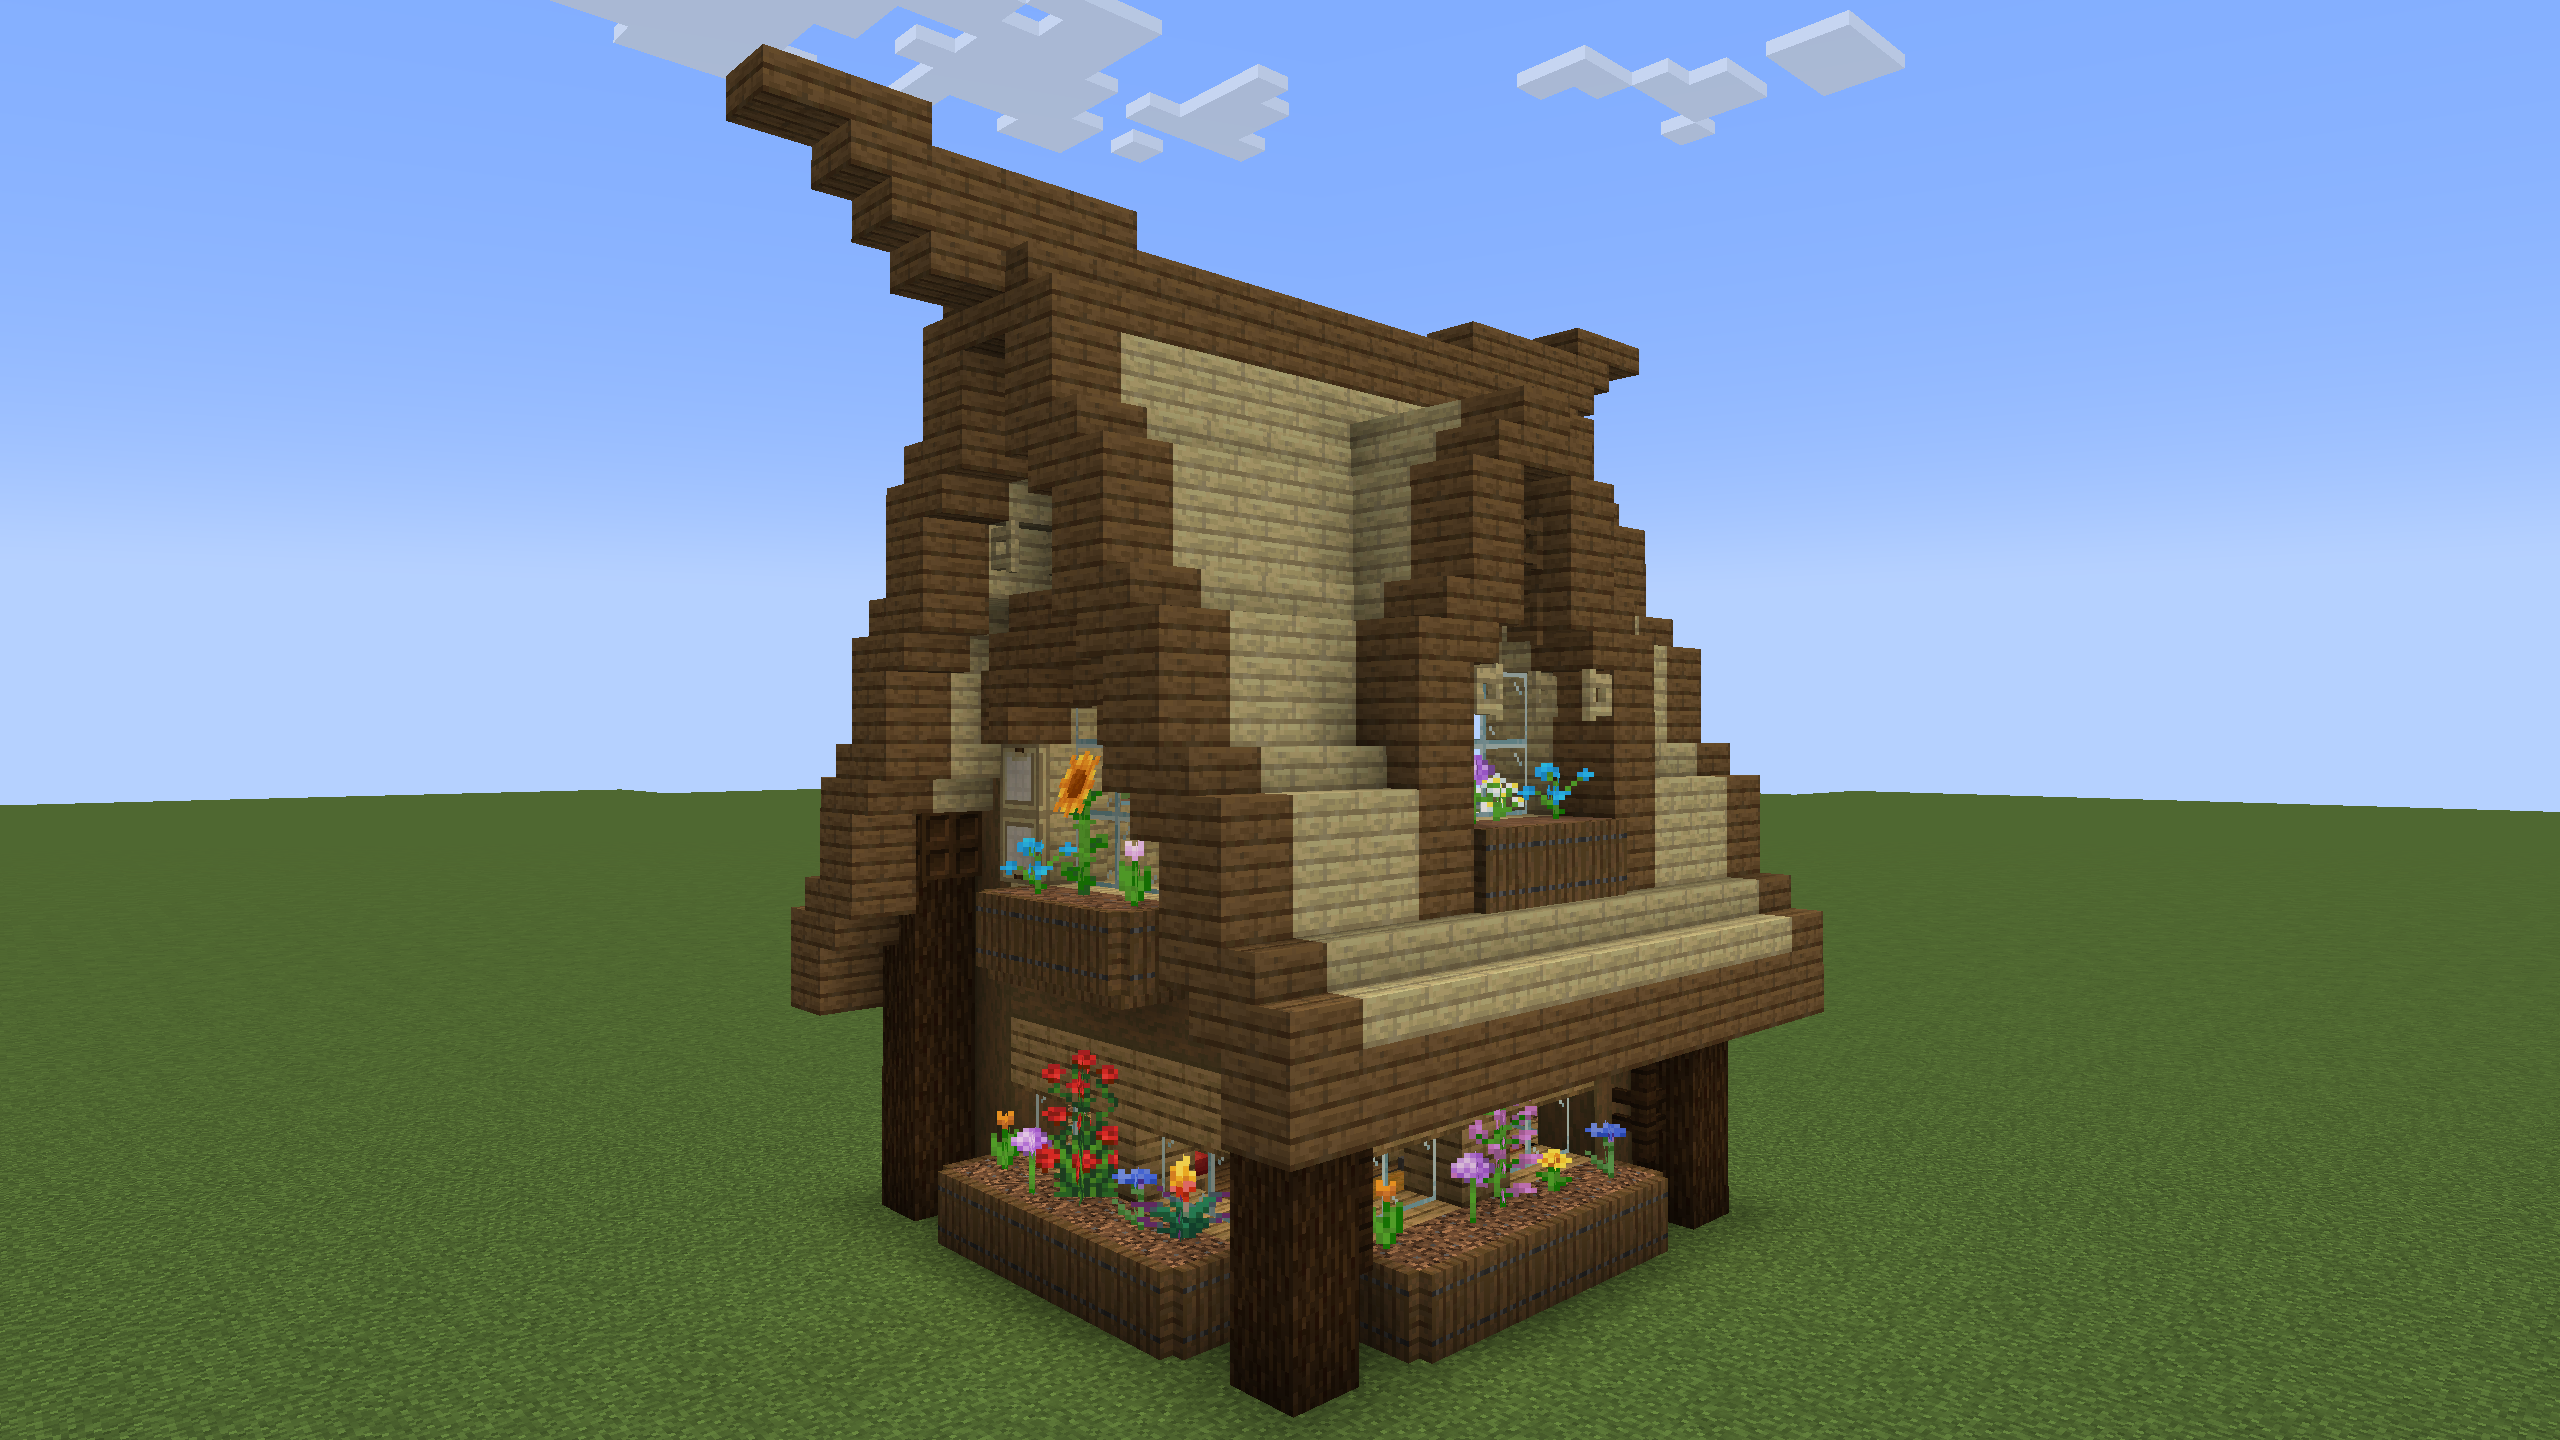
As you can see, a little detail can go a long way. Detail is important since it ties everything together. Using details can give your build more cohesion, and tie together a palette.
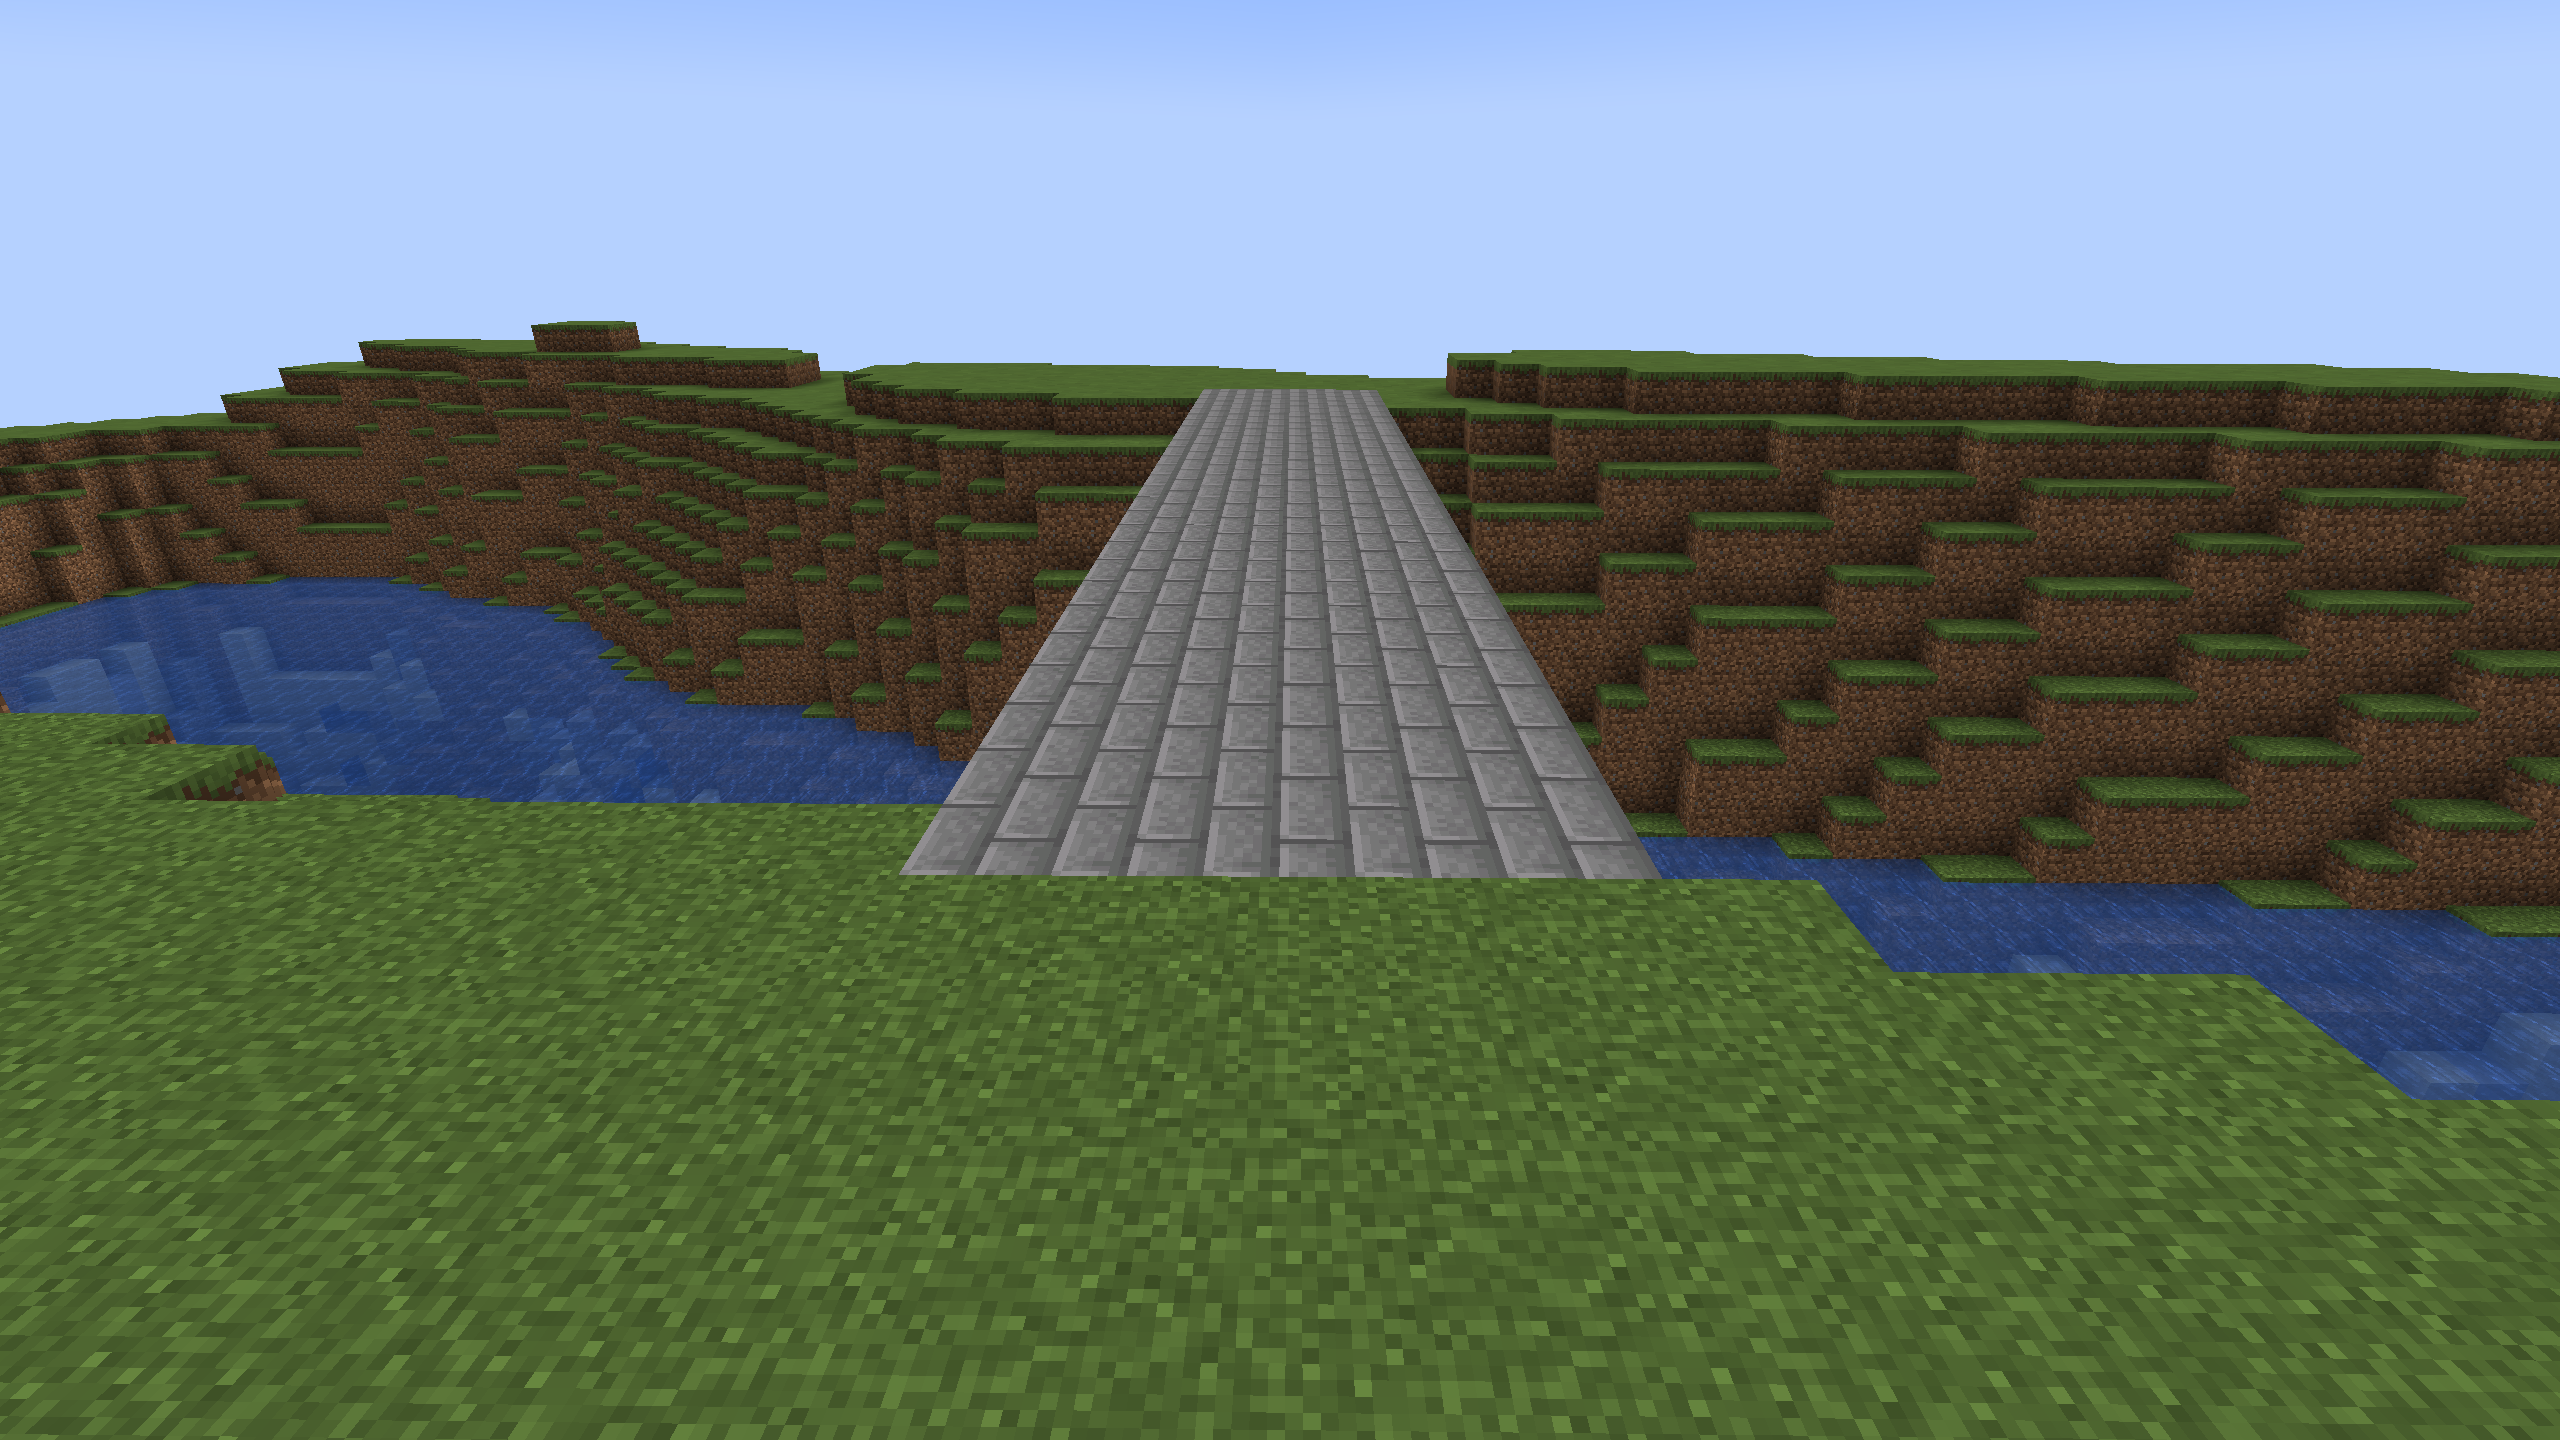
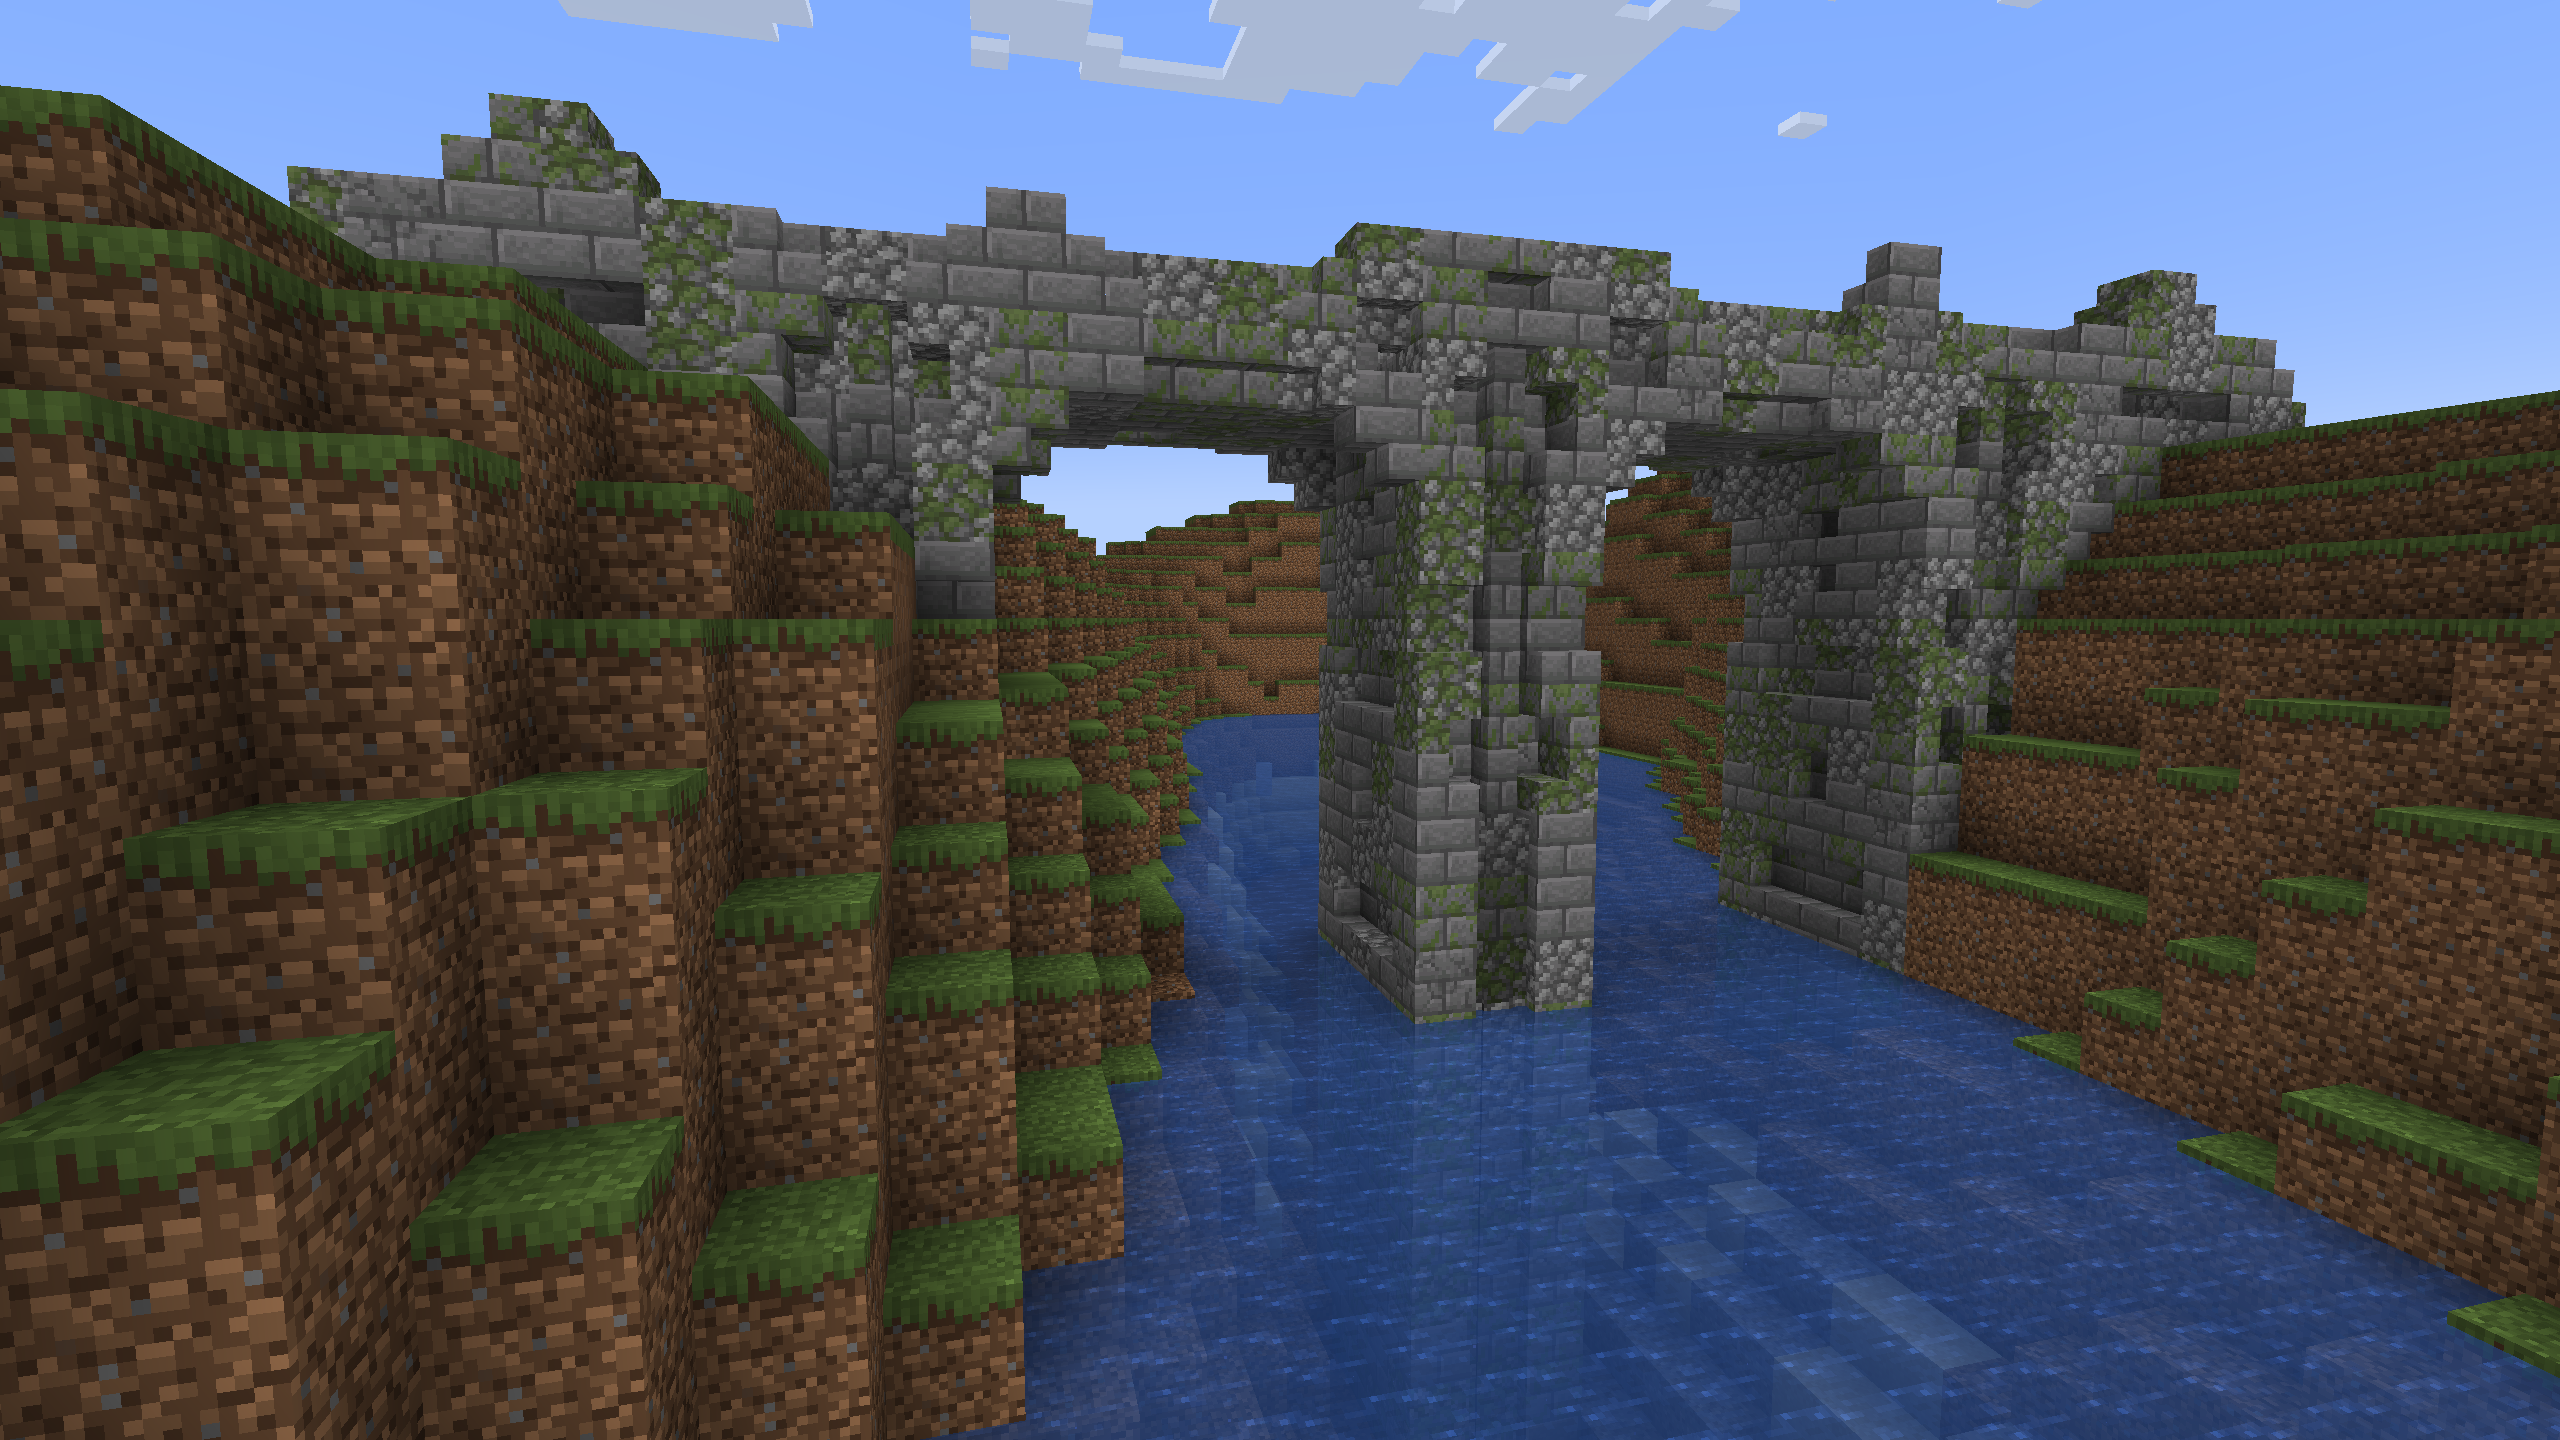
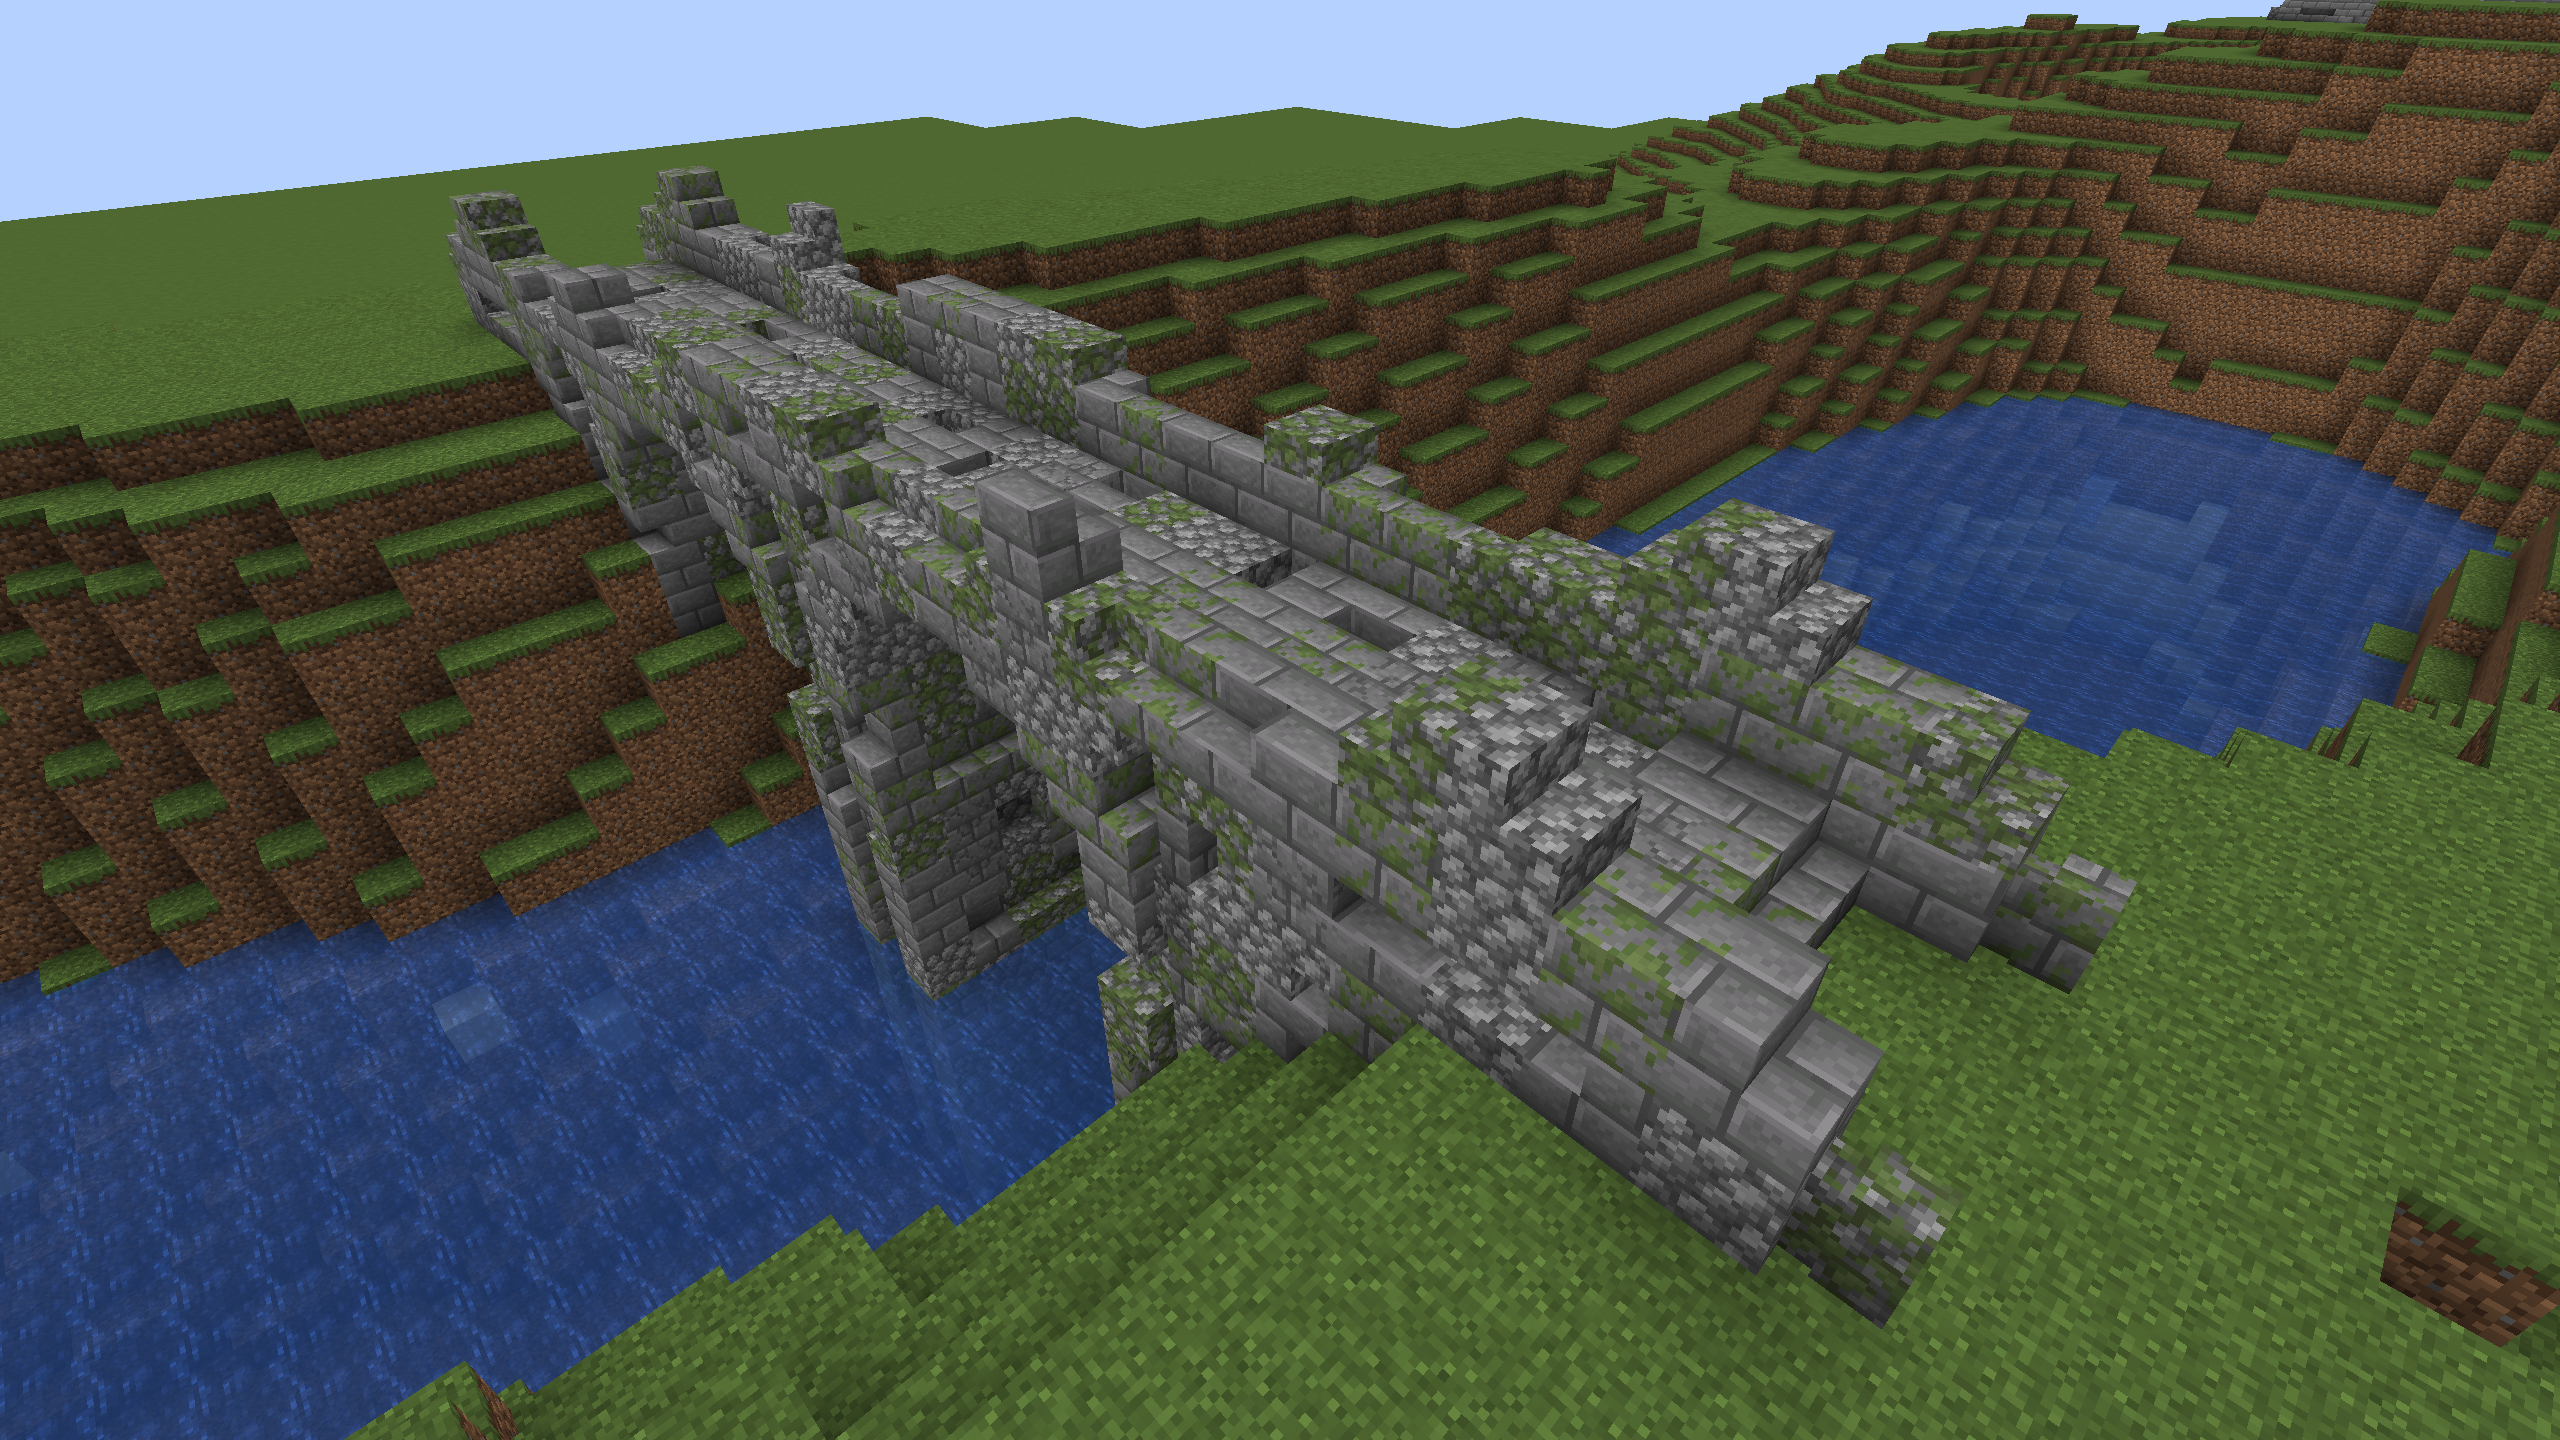
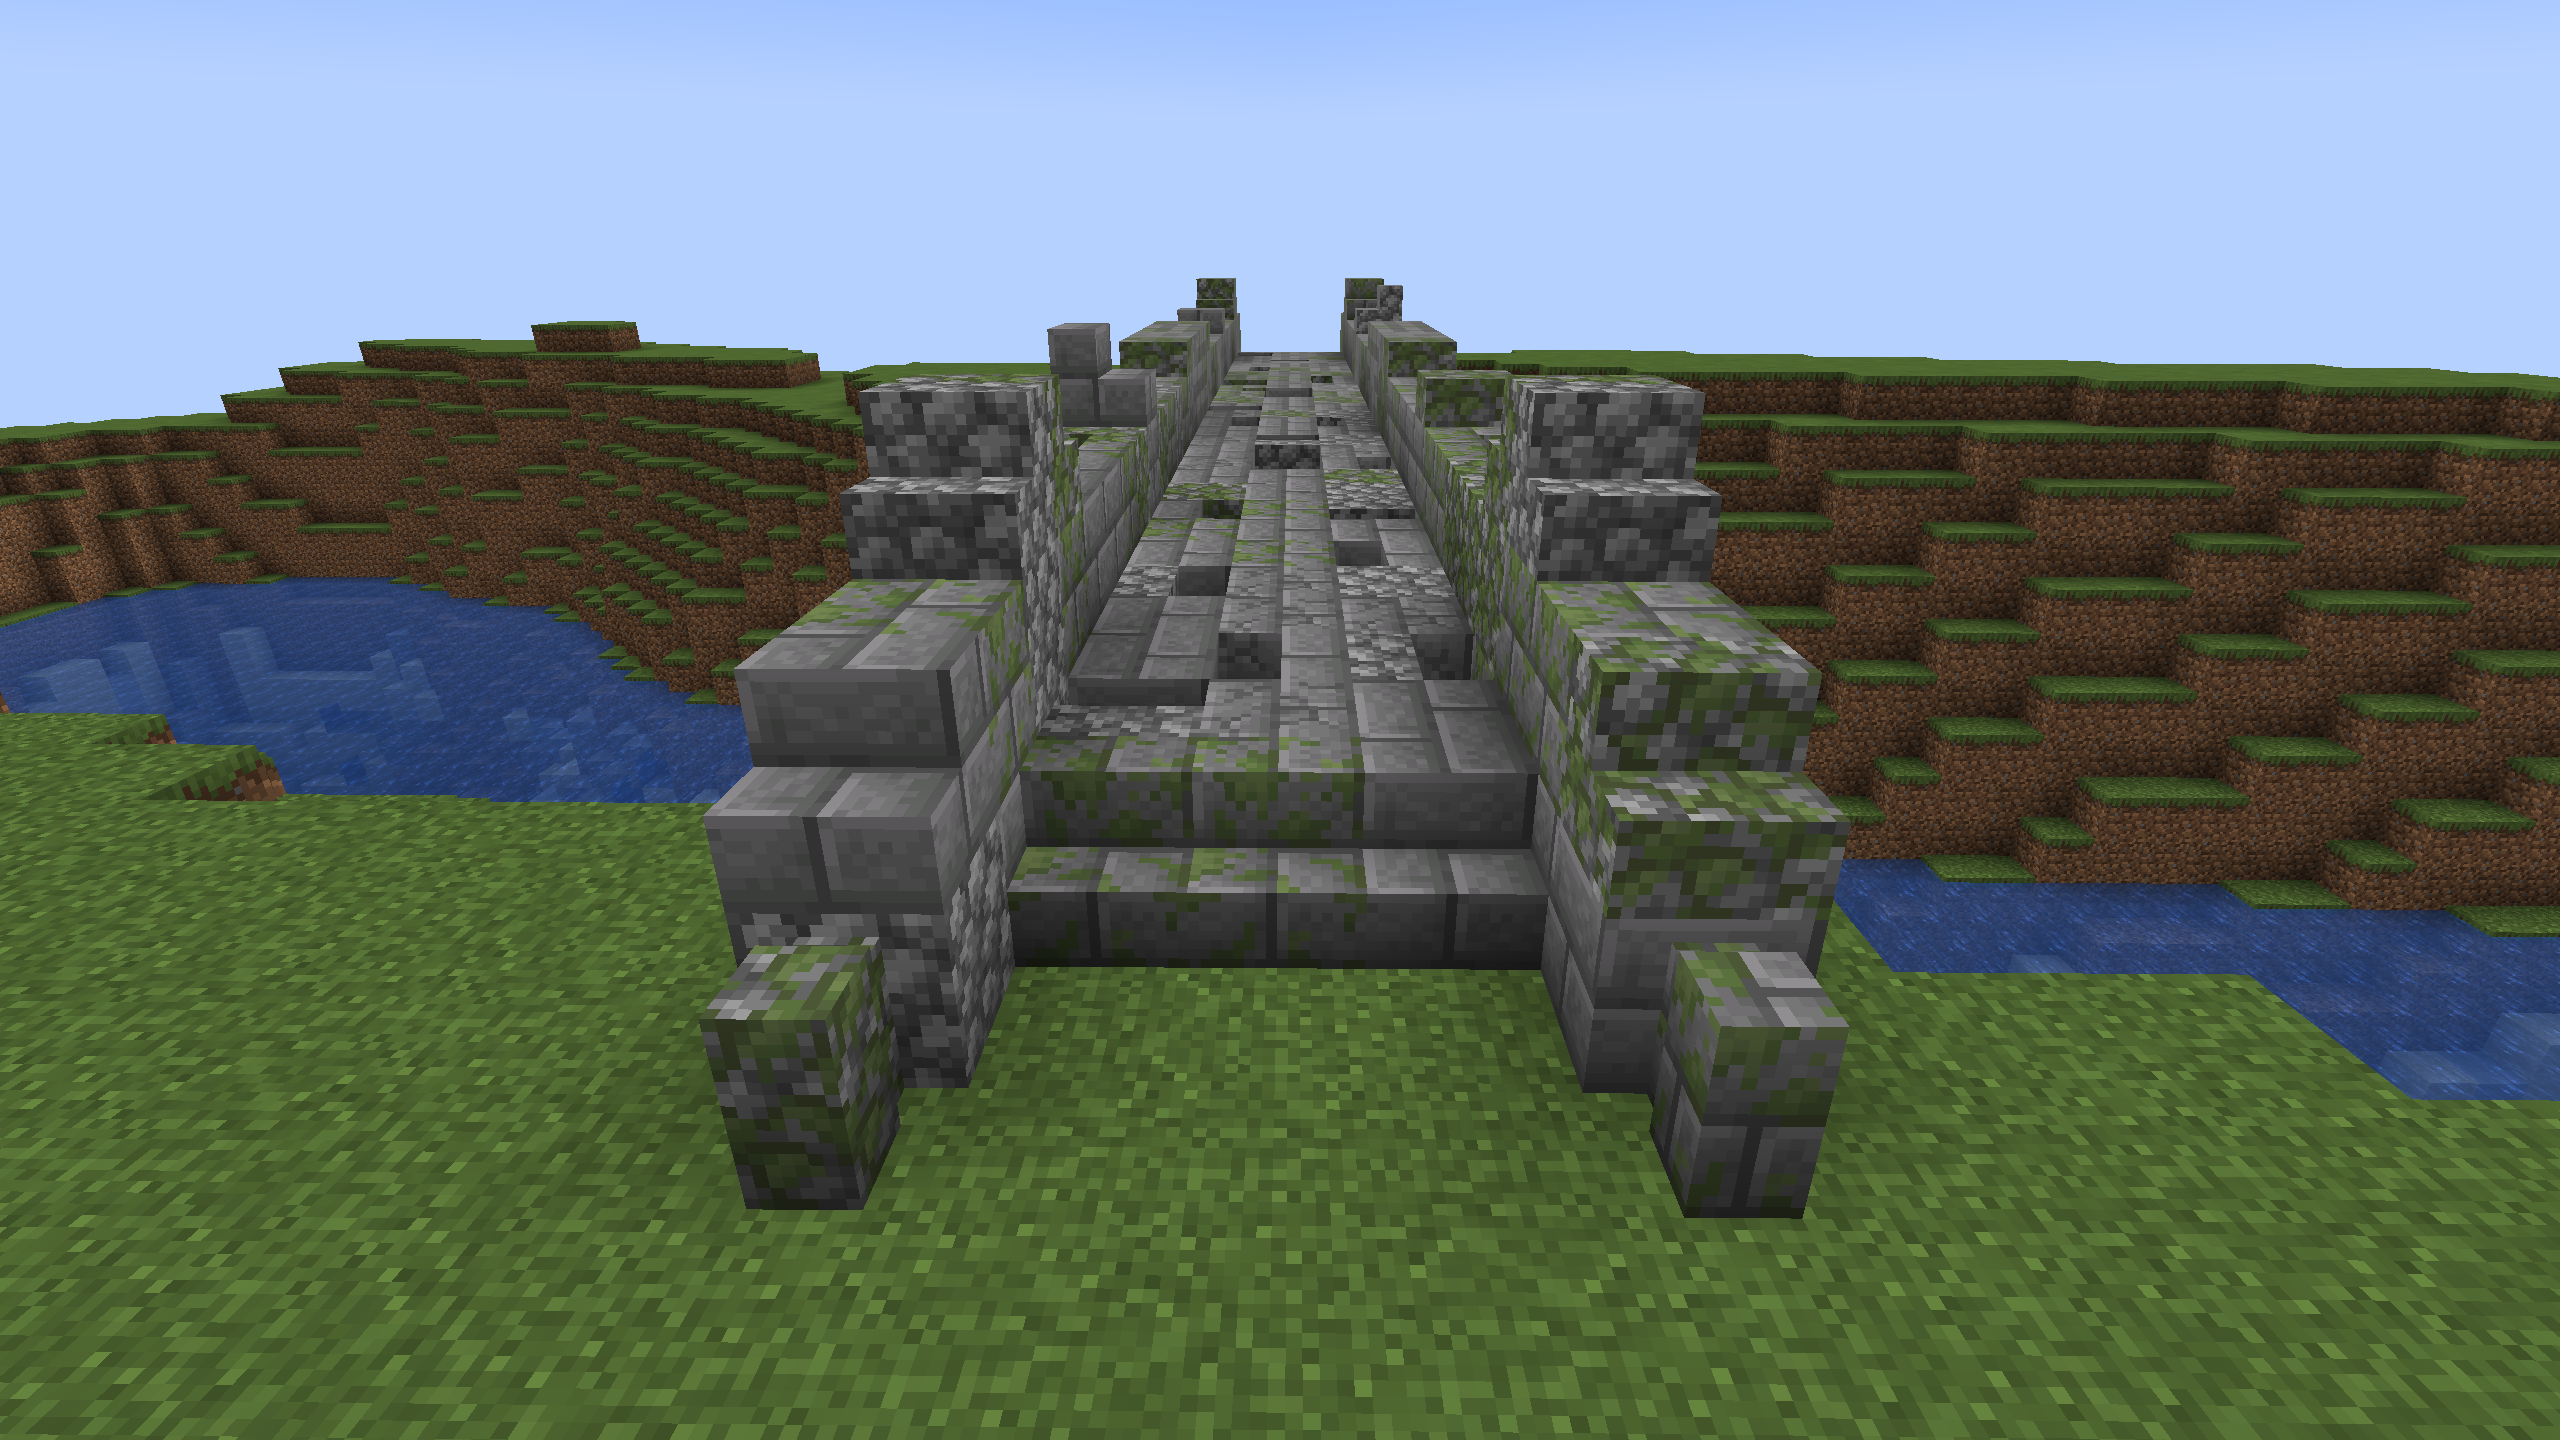
Bonus: Bridge
Here's a basic bridge. It's perfectly serviceable, of course, but we can improve it by a lot! It's almost completely devoid of depth and detail.
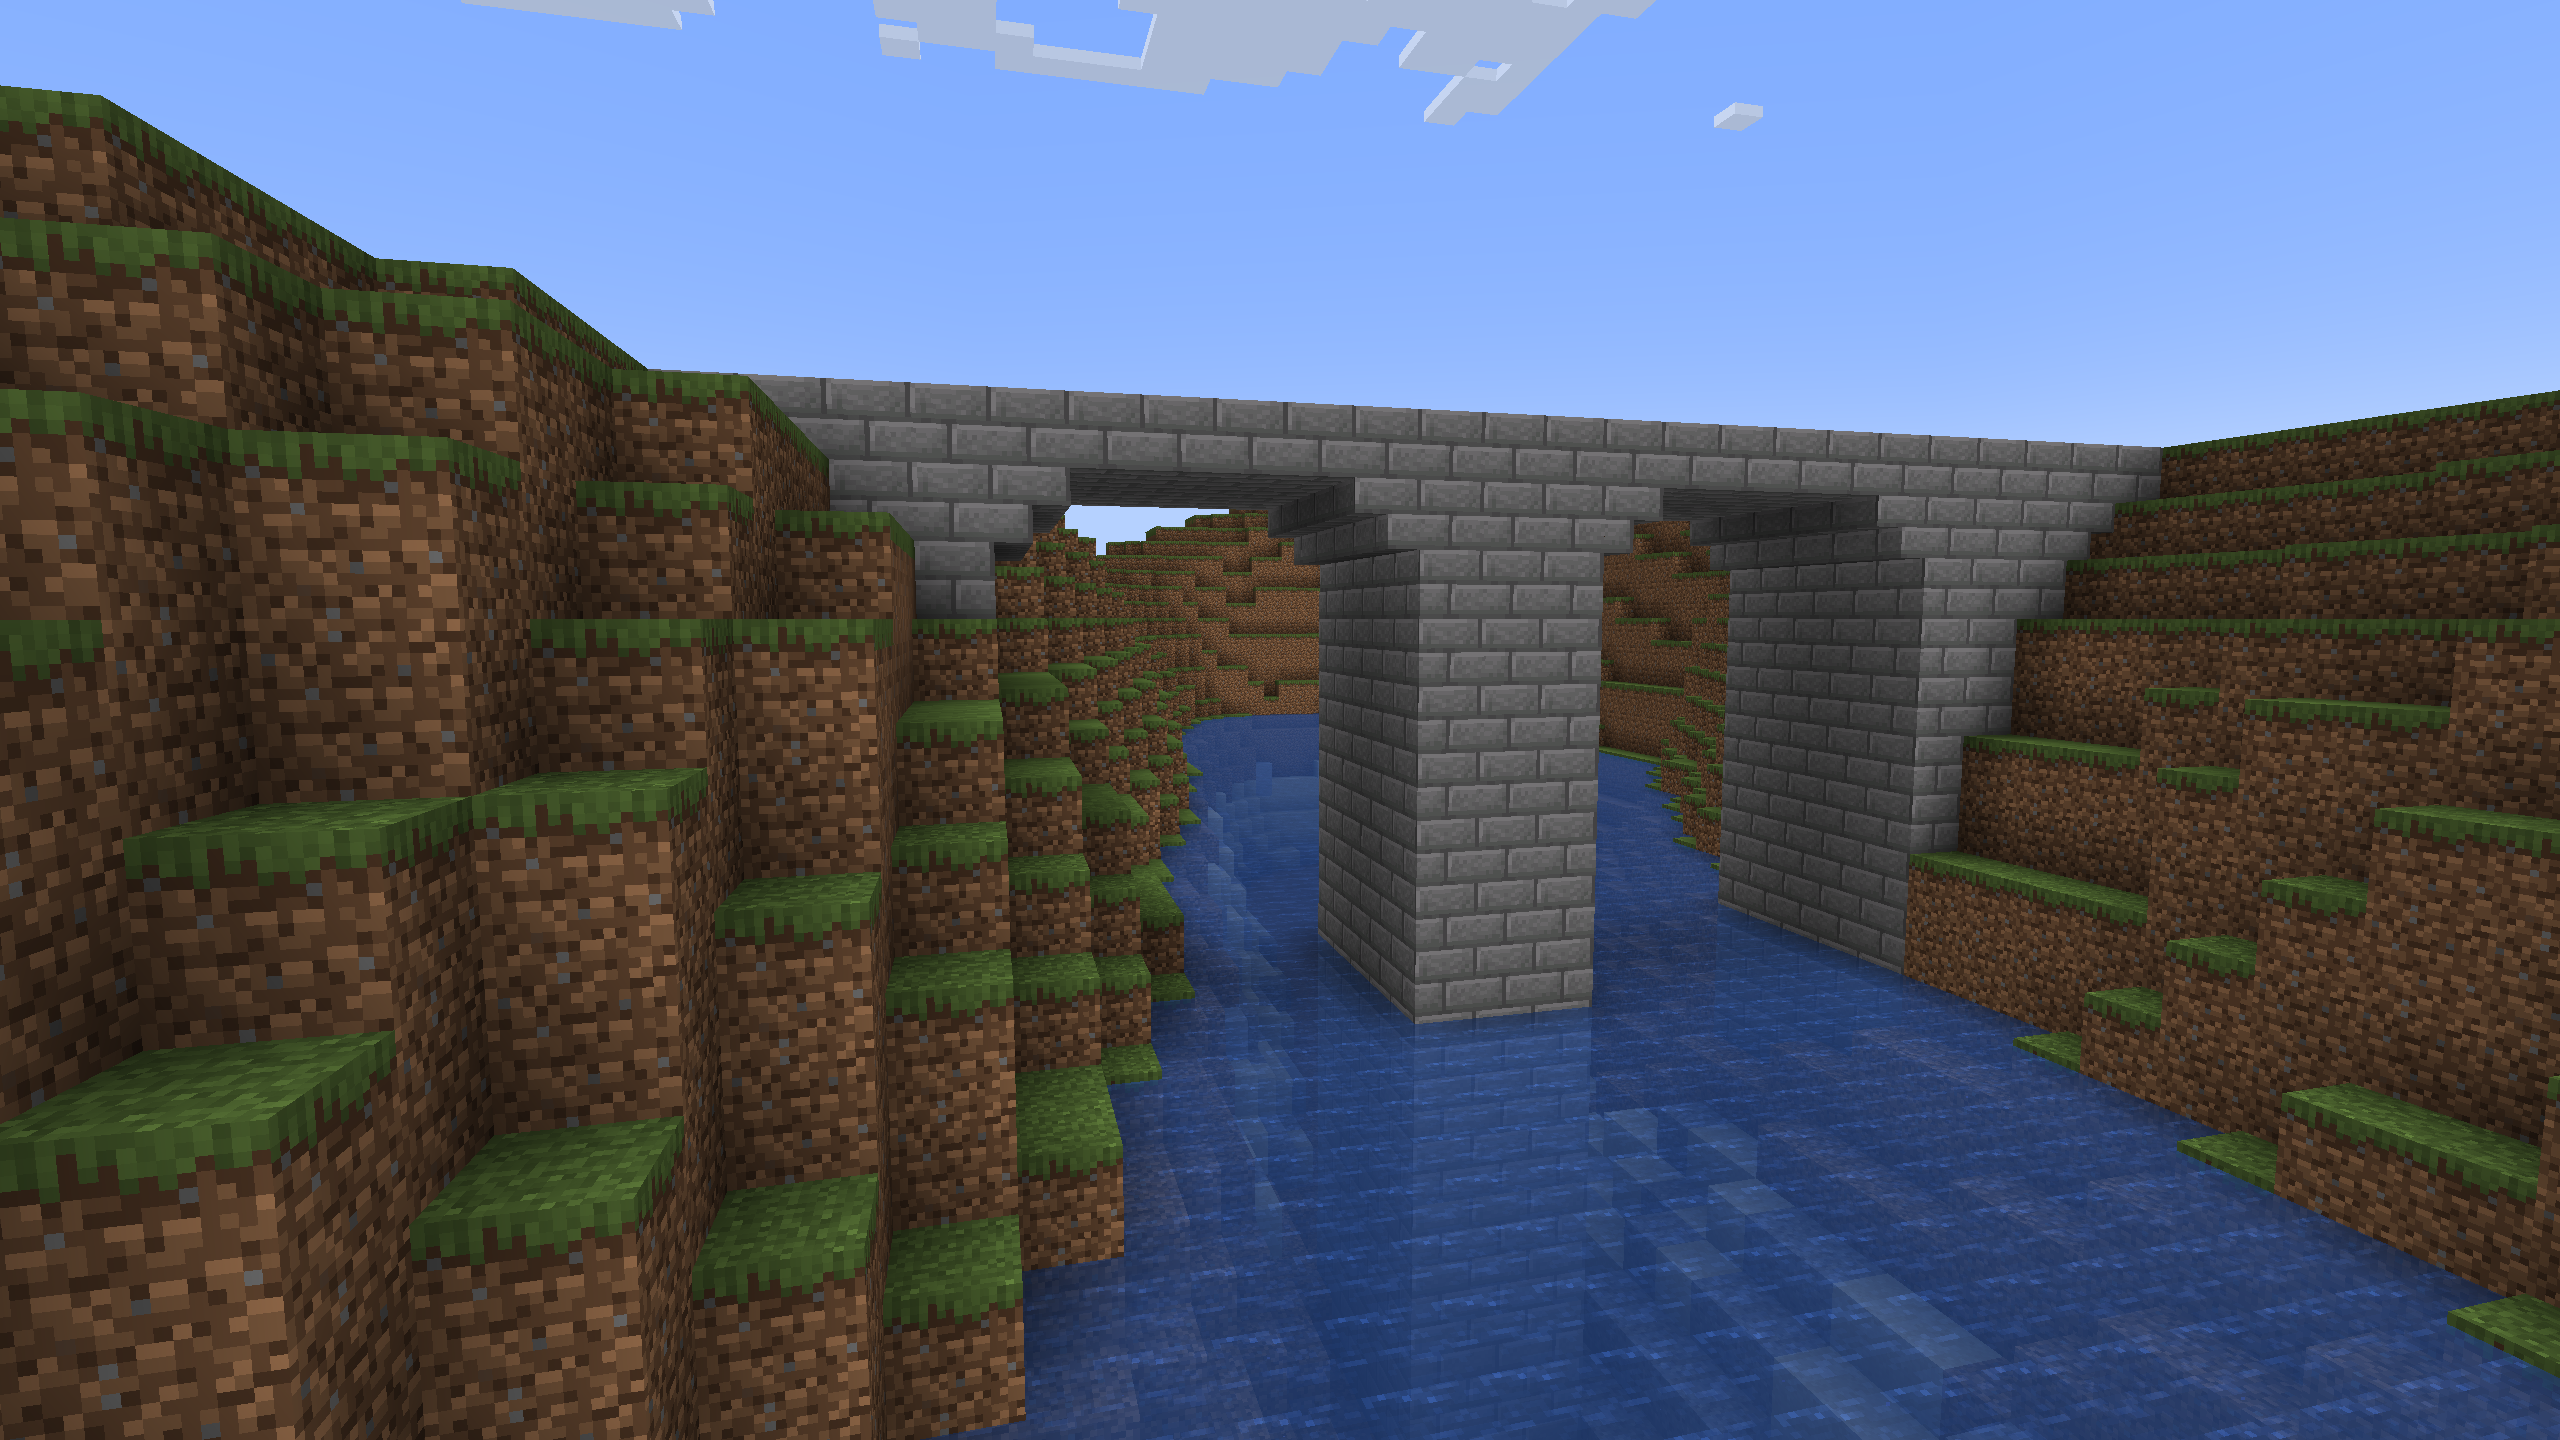
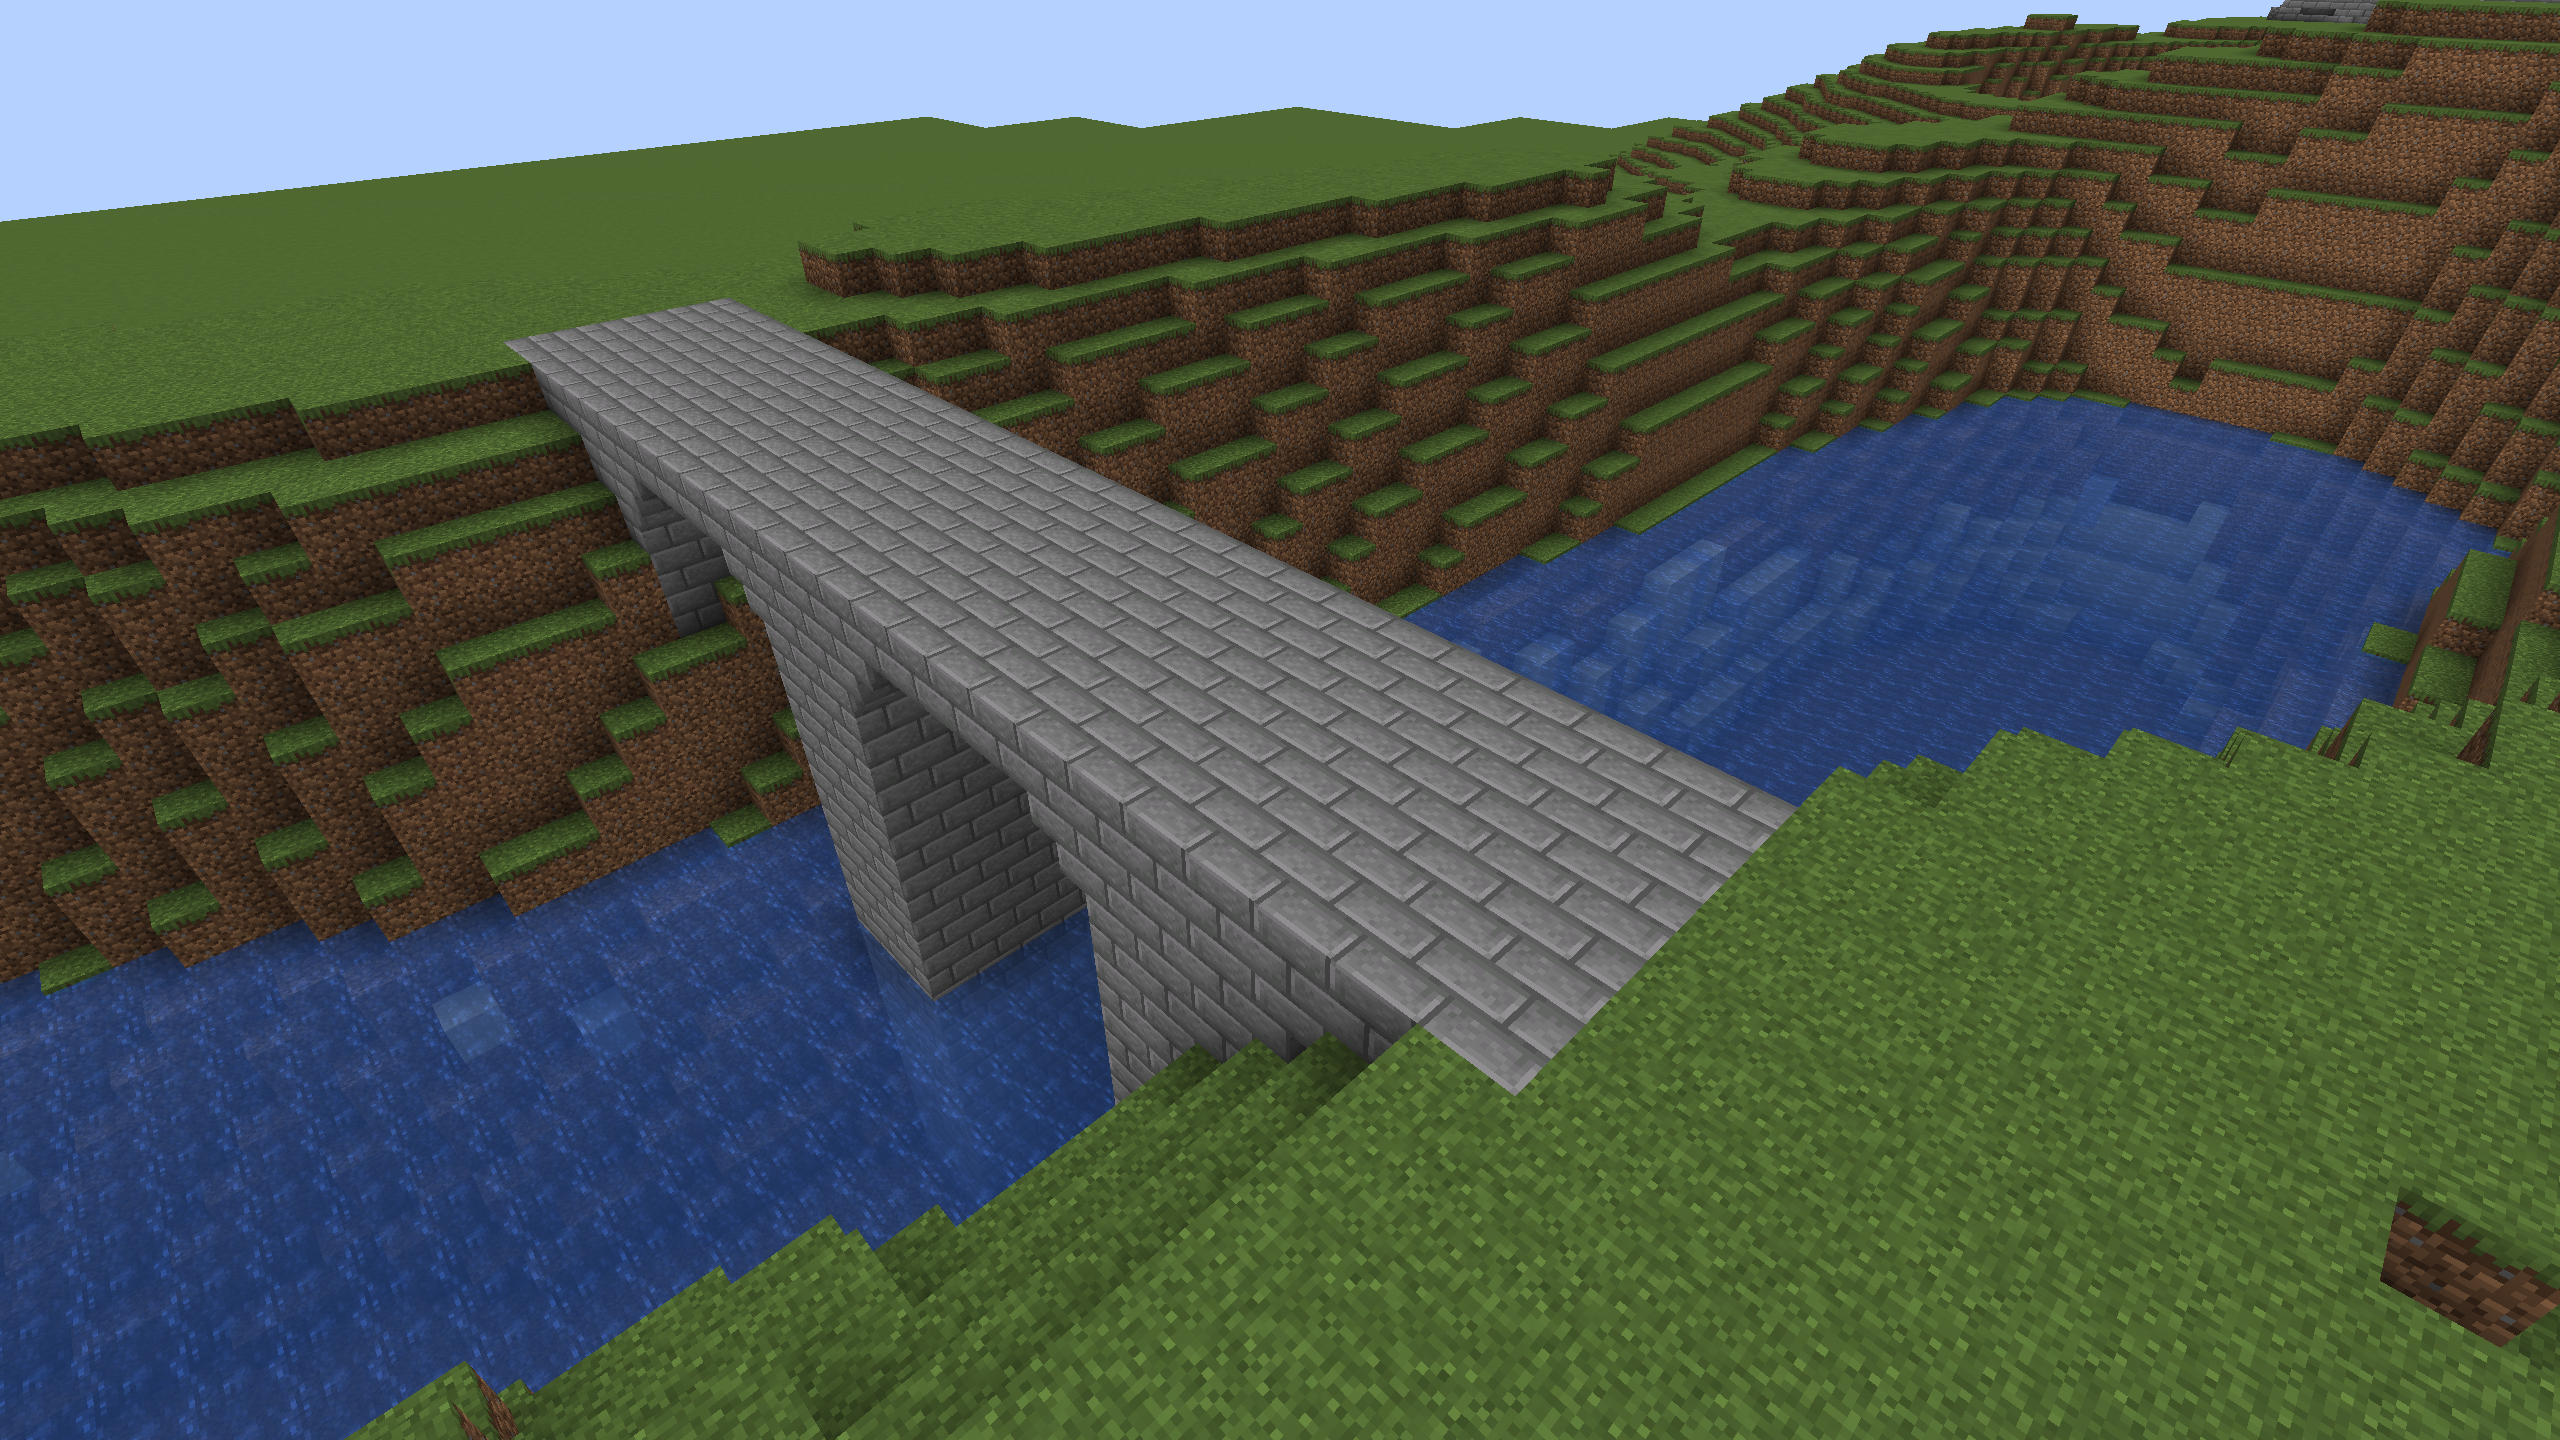
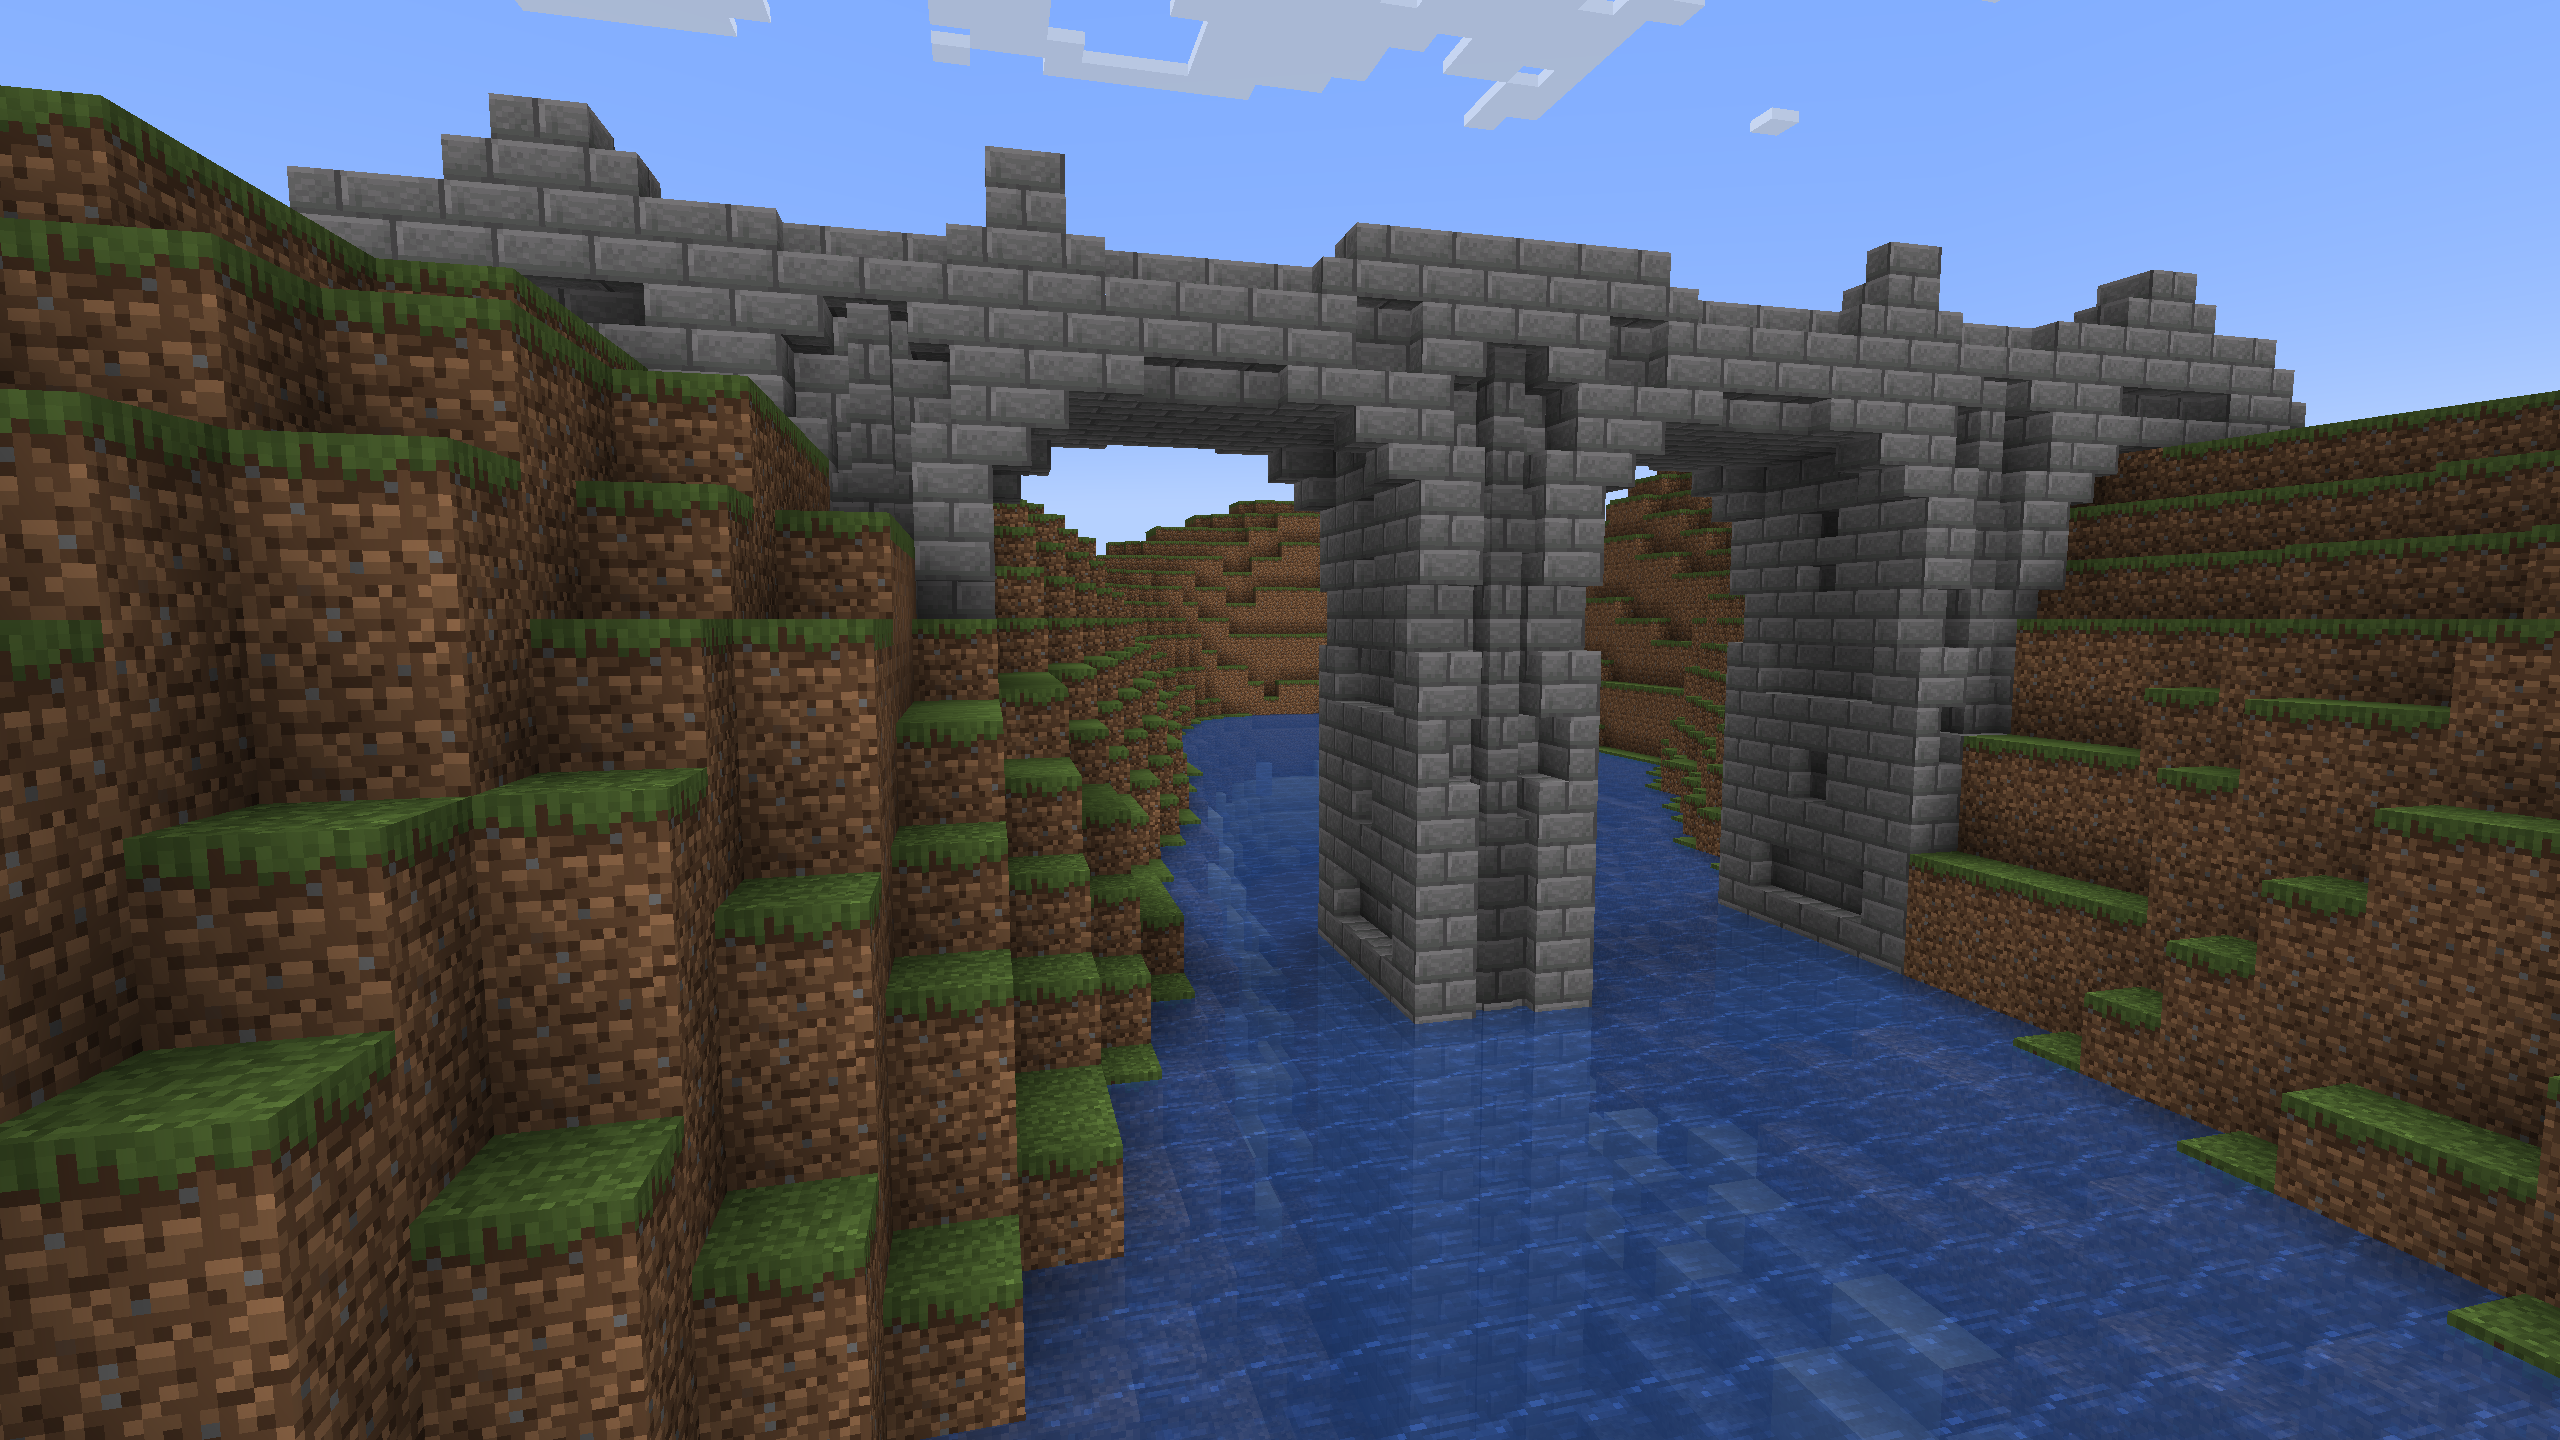
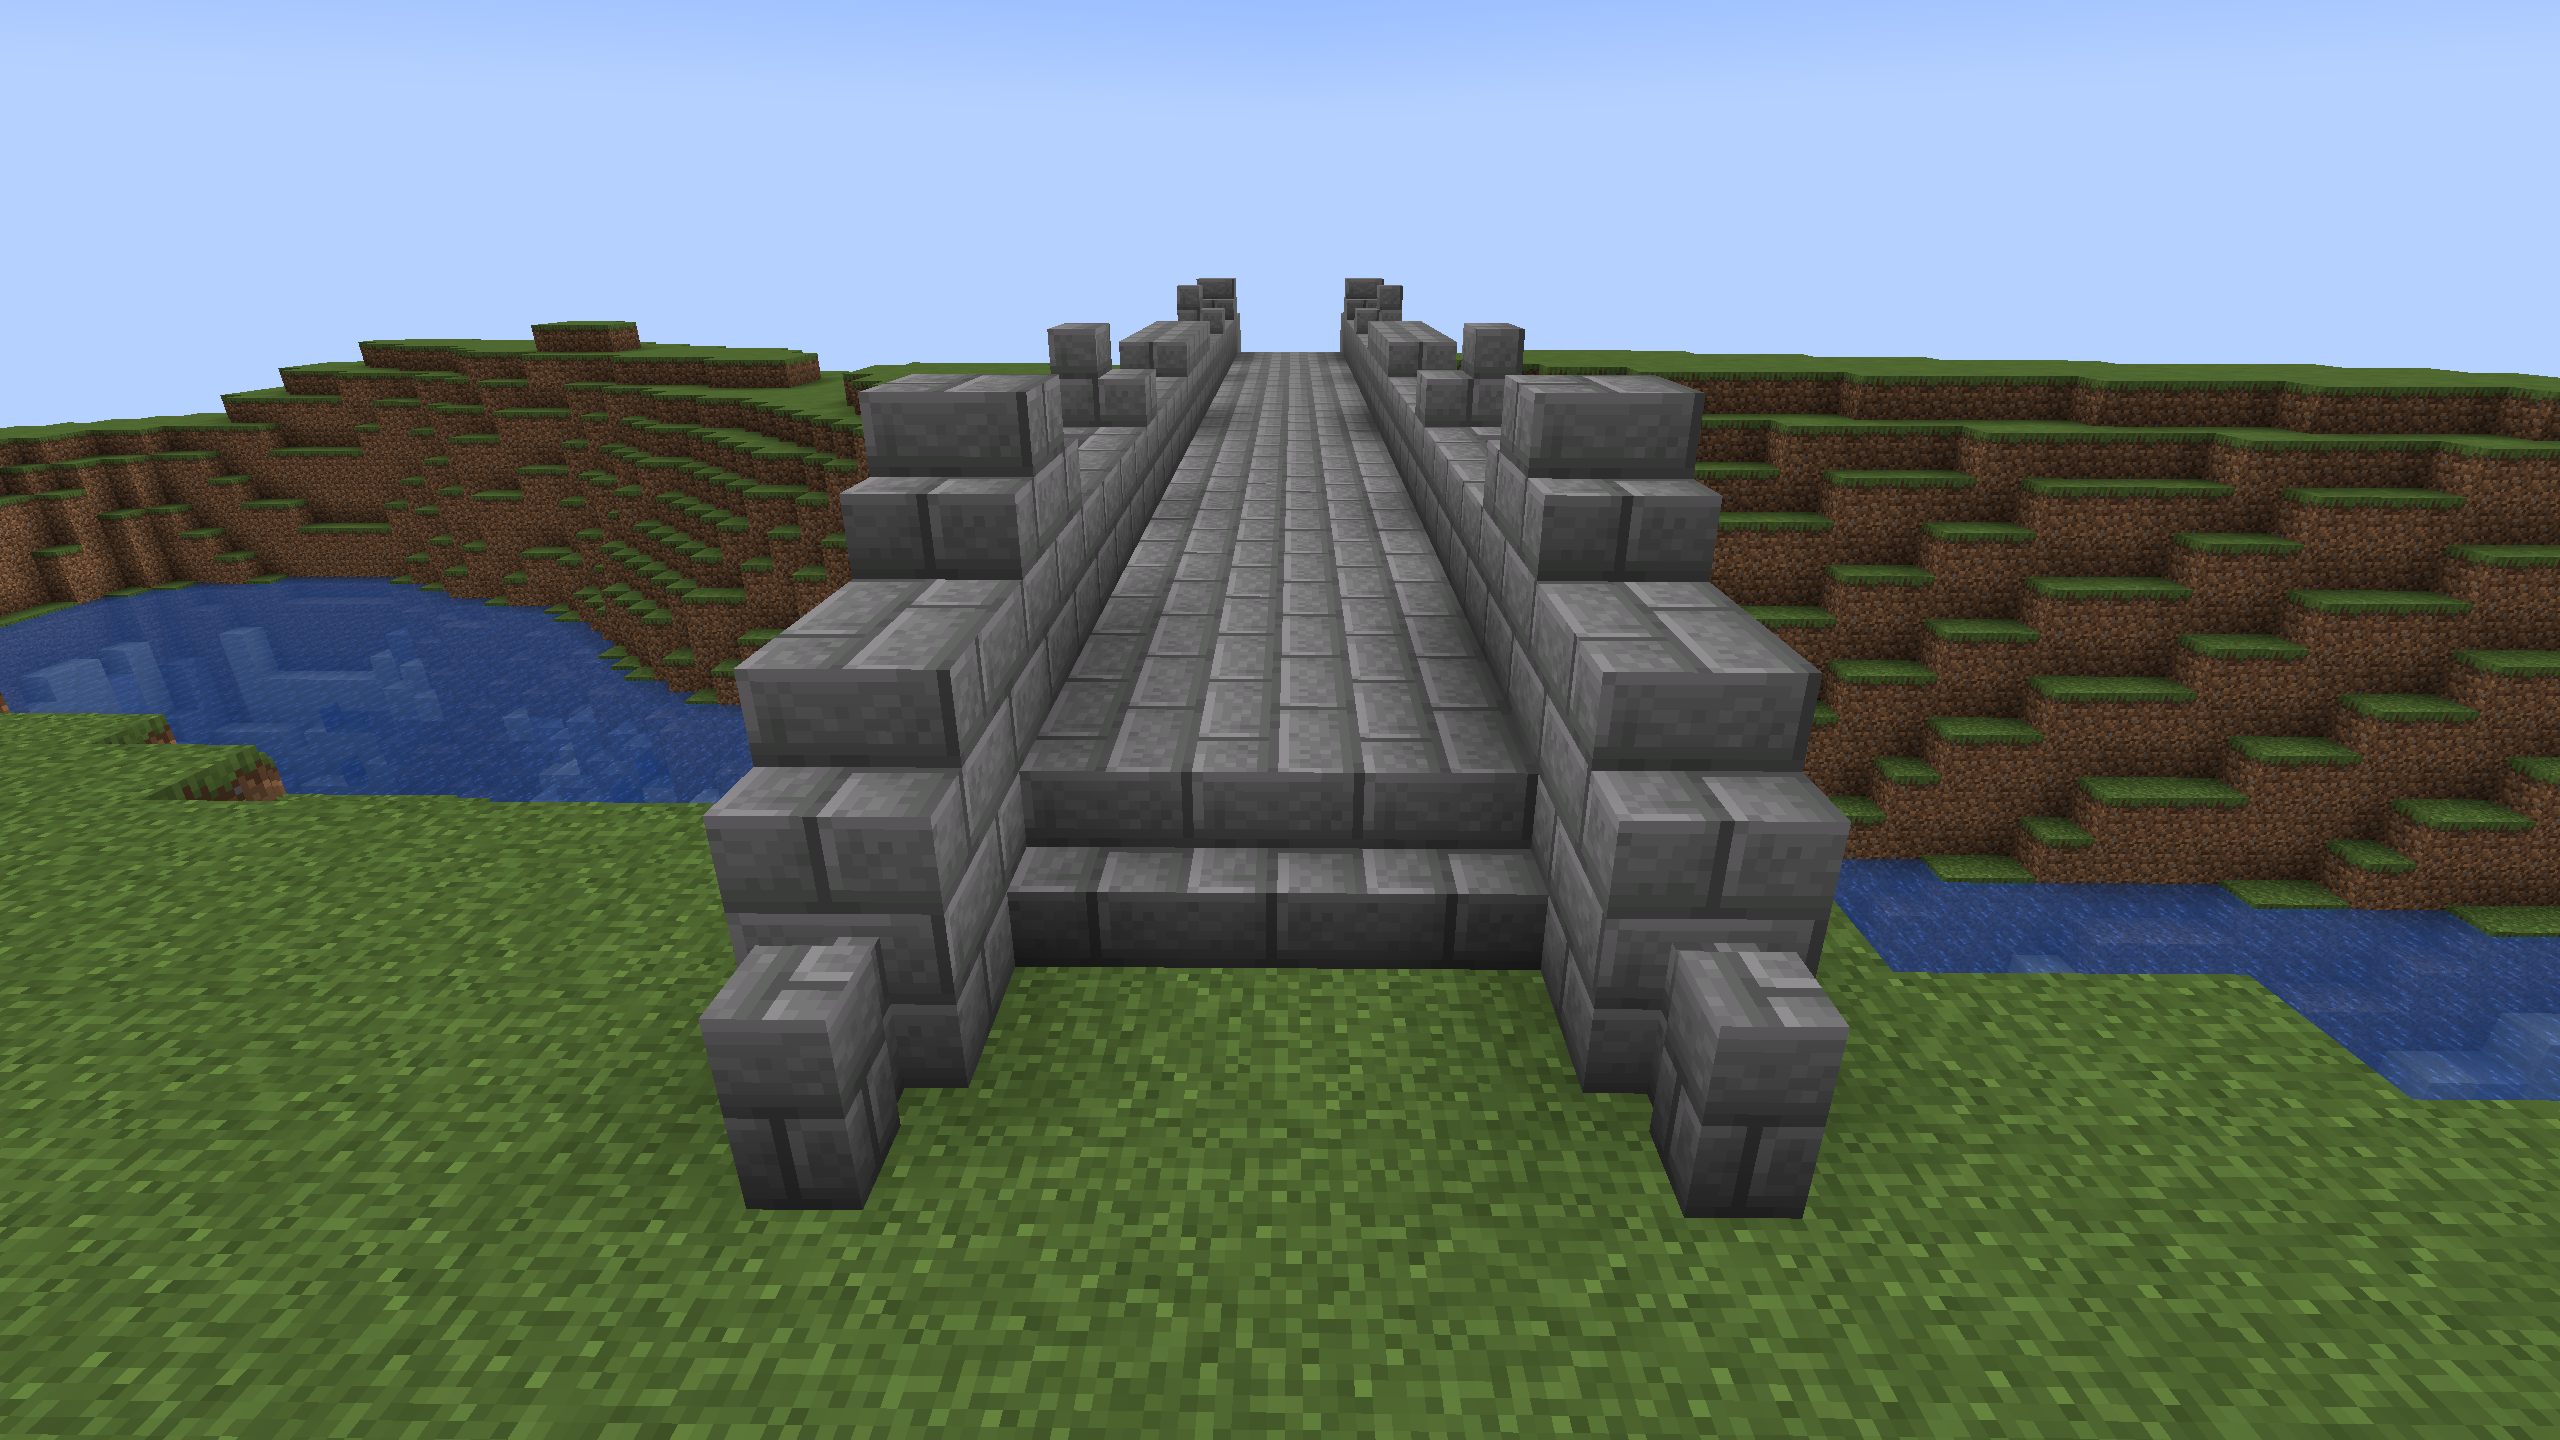
Depth & Detail!
Even using only one block and its variants, you can still do a lot. Here, I used mainly walls and stairs to add an inset pattern on each of the pillars, took it up a block such that it's raised above the ground, and added guardrails with some more patterning. You can get a lot of detail by just randomly placing non-solid blocks in patterns. Mess around with it!

Destruction!
Weathering isn't strictly an improvement to a build, but it works great for some builds. I usually only do it on stone builds, as stone has a lot of block options with similar coloration to add texture with. However, you can still weather wooden builds. Removing blocks or replacing them with non-solid counterparts, switching blocks for similar but darker blocks (for a wet or decaying appearance), and replacing blocks with similarly colored blocks with rougher textures (or cracked or mossy variants) are all great ways to give a build a more weathered appearance. In this specific build, I used cobblestone and mossy and cracked stone bricks randomly to give it a decaying appearance, and replaced some blocks randomly with stairs and slabs to create divots and missing bricks in the path.
Summary and More Tips
- Use block palettes with contrast, whether that contrast is in brightness, hue, or both!
- Create a sense of depth with things like roof overhangs and outer pillars!
- Utilize interesting shapes like steep triangles, curves, and L or T shapes!
- Add lots of detail!
- You can weather builds with rougher blocks, non-solid variants, and blocks like vines or mossy variants!
- Natural terrain can be a great asset to a build, try building under cliffs, over ravines, and into hills!
- When building circles and curves, using a basic paint program like MS Paint or KolourPaint can give you an outline. There are also many mods that can help with building curved shapes.
Mods I Use
Of course, you don't have to use mods to be a good builder! They just provide a lot of useful quality of life improvements that can help you build faster. To install mods, I highly recommend using PrismLauncher, as it has a much better UI for managing mods than the official launcher. These aren't all the mods that I use, just the ones that are useful for building and the tangentially building related ones.
building-specific mods
- MiniHUD (Fabric)
BoccHUD (Forge) - Adds various shape overlays that can be used to build circles and spheres and such, as well as an overlay that can show current FPS, facing angles, coordinates, speed, and much more.
- Litematica (Fabric)
Forgematica (Forge) - Allows saving schematic files that can be shown in any world and pasted (in creative / if you're a server admin) or built from a ghost image. So you could build something in creative mode in singleplayer and then show the schematic on a survival server and build it from that. It even shows you a list of the resources you need to build the schematic!
- Effortless Building
(Forge)
Effortless Structure
(Fabric/Forge) - Adds a radial menu that lets you almost instantly build rectangles, circles, and other basic shapes, as well as quickly fill in walls and floors. It's server-side, so if you want to use it on a server, the server needs it too.
- Axiom (Fabric)
- A creative-only mod that adds a fully featured 3D editor to the game, as well as many extremely useful features for standard creative mode like a symmetry tool, moving parts of a build around, copying parts of a build, noclip flying, faster placing and breaking, and more. It's quite possibly my favorite mod on this list.
other mods
- Iris (Fabric)
Oculus (Forge) - Lets you install shader packs to have pretty lighting for taking screenshots.
- Shoulder Surfing
(Forge/Fabric) - Adds a fancier third person camera, useful for taking pretty screenshots including your player player model.
- Carpet (Fabric)
- Adds various commands like
/tick freezeand other tools useful for technical Minecraft players. However, some of these are also generally useful. For example,/tick freezecan be used to completely freeze the game, so you can keep things like crops and vines from growing or mobs from moving while you're taking screenshots. - Xaero's Minimap
(Fabric/Forge)
Xaero's Worldmap
(Fabric/Forge) - Add a minimap and worldmap respectively and allow you to set waypoints that show up in the world that can be teleported to (in creative / if you're a server admin).